• Skip to primary navigation
  • Skip to main content
  • Skip to primary sidebar

A Lifestyle Blog

  • About
    • Work With Me
      • Delightful Life Media
    • Privacy Policy & Disclosures
  • Taste
    • Breakfast
    • Lunch
      • Salads
      • Sandwiches
    • Dinner
      • Grilled
      • Sides
      • Pasta
      • Rice
    • Appetizers
    • Desserts
    • Drinks
      • Cocktails
      • Non-Alcoholic
    • Snacks
  • Travel
    • United States
      • Kansas
      • Missouri
      • Nevada
      • Nebraska
      • New York
      • Oklahoma
      • Texas
      • Wisconsin
    • Mexico
  • DIY
    • Projects
  • Contact
  • Lifestyle
  • 100 Things to Do in Wichita Before You Die

cheddar

Lone Star Turkey Chili with Sour Cream and Chives

June 11, 2017 by Vanessa Leave a Comment

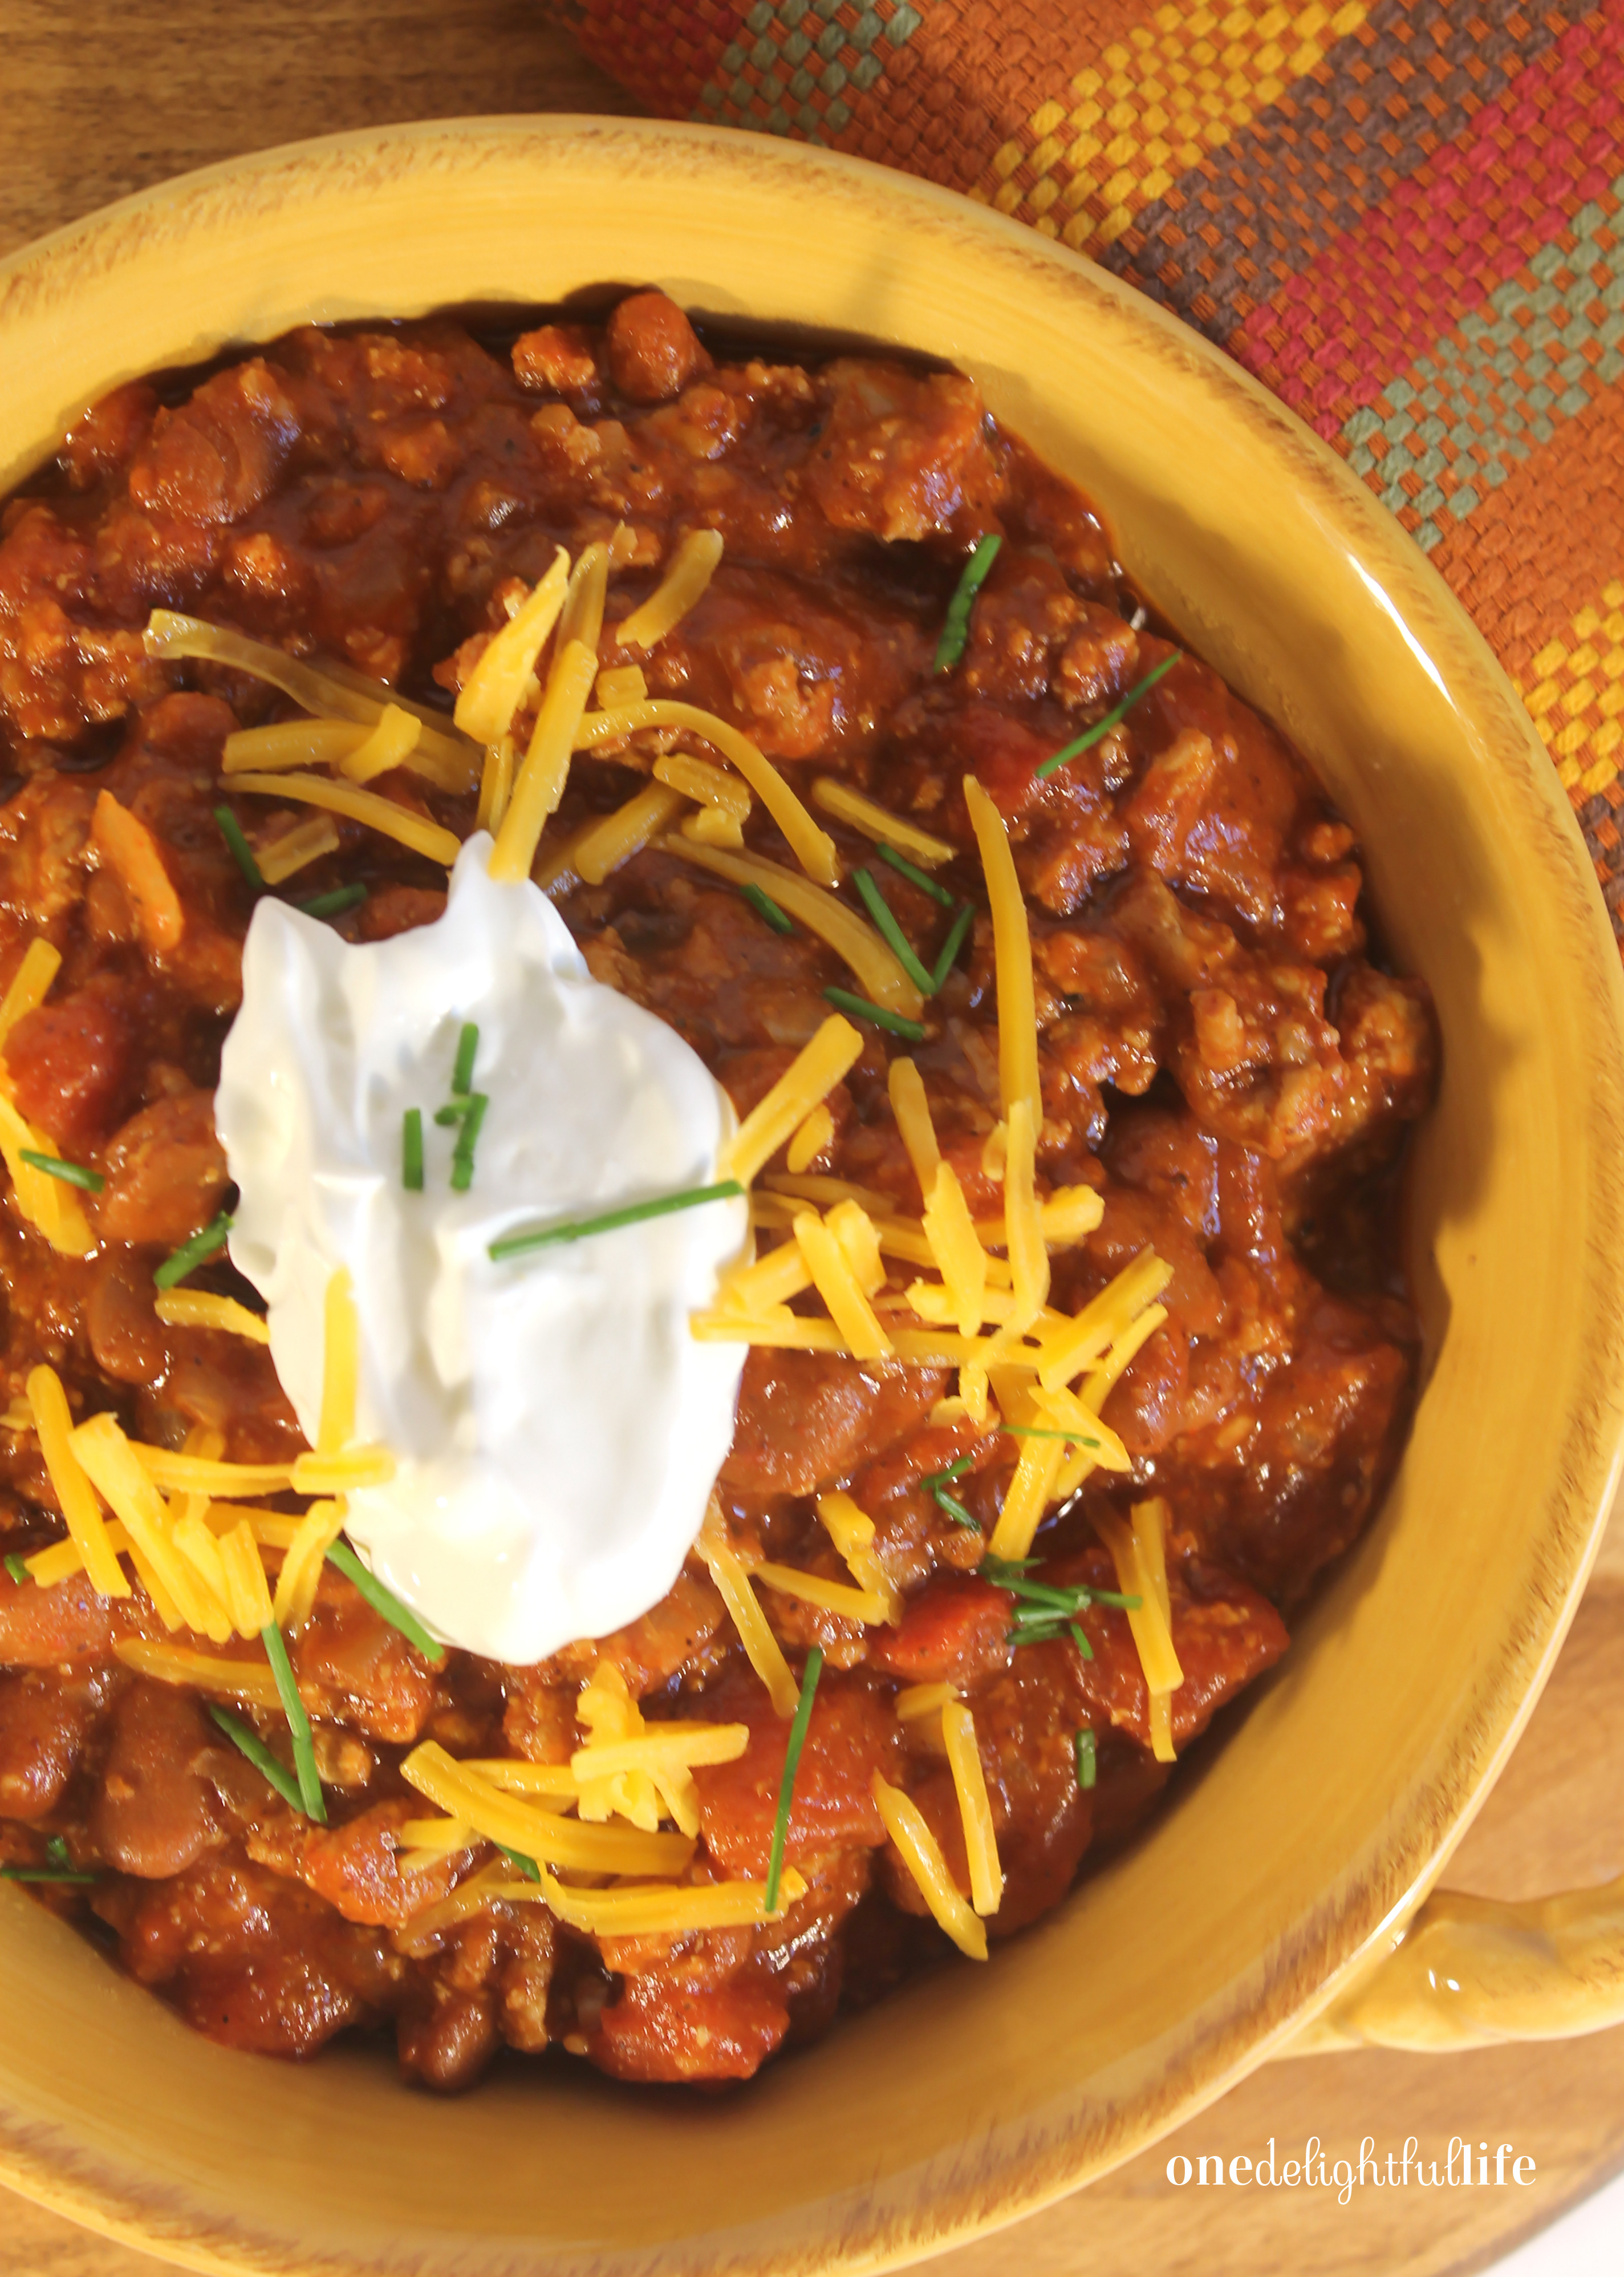
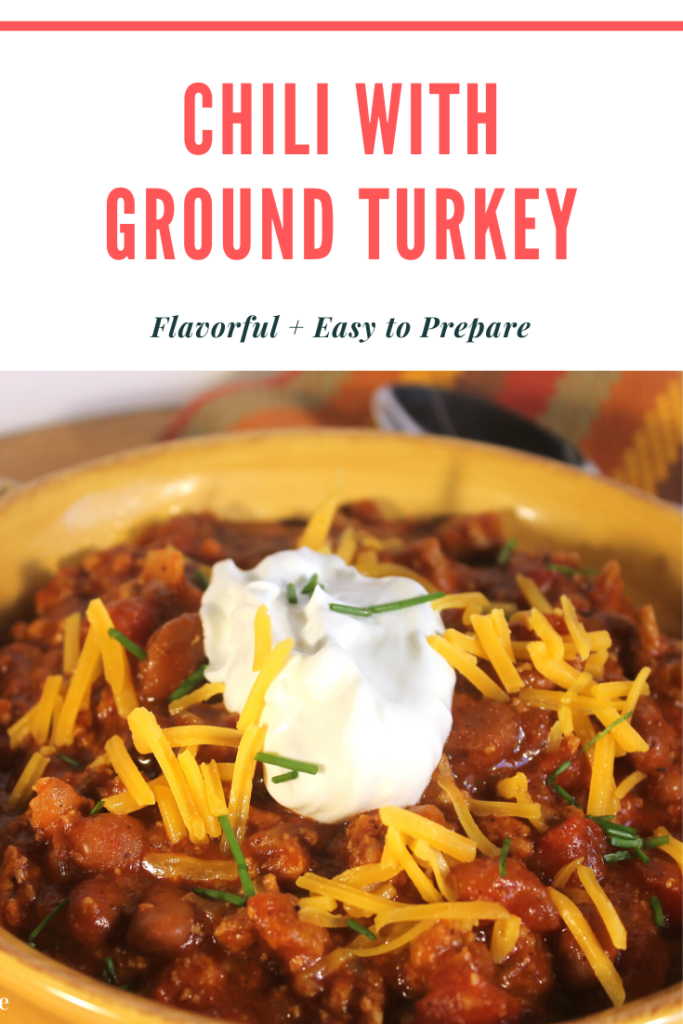
Looks yummy, doesn’t it?

When you’d rather get dinner on the table so you enjoy time with the family outside, this is your new go-to meal. Chili is not just a winter meal. It’s a versatile dish with many options for eating it: layered on top of a grilled hotdog, poured over bowtie pasta, inside an empanada or as the base of Frito pie.

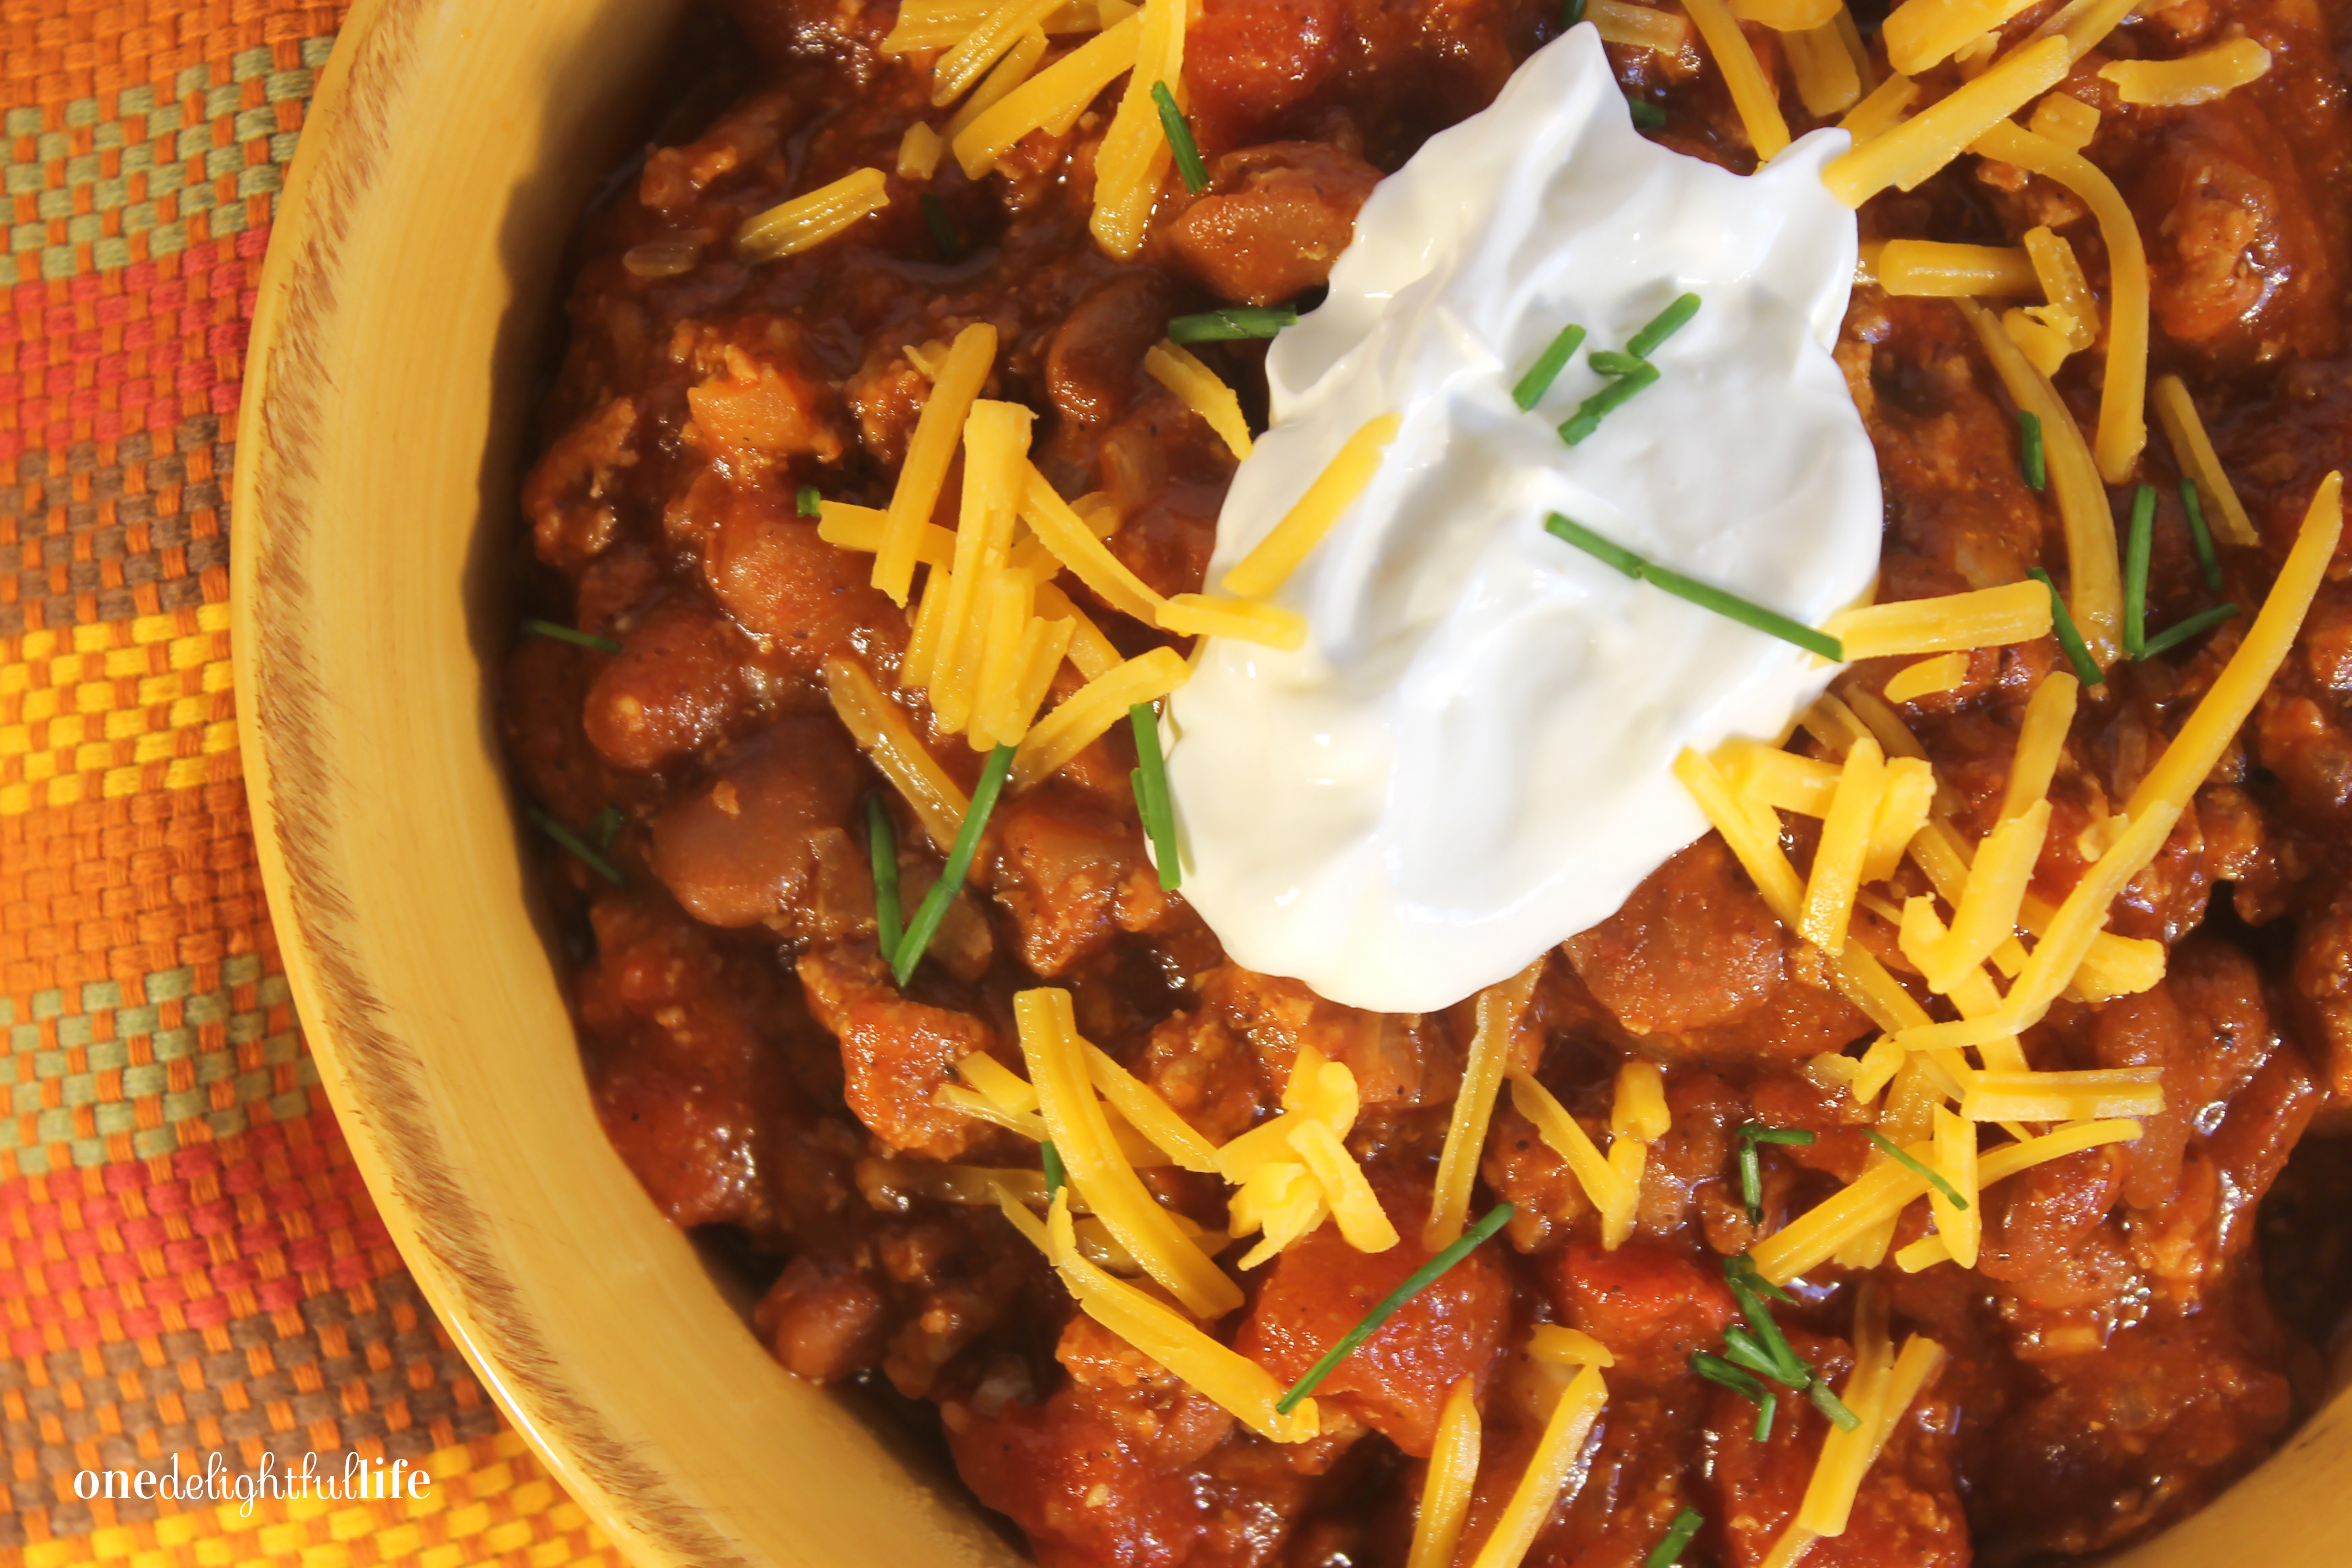
I prefer a thick tomato based chili served as the base for a multitude of toppings. Lone Star Turkey Chili with Sour Cream and Chives is not a overly spiced chili, but if you want more heat you can add a couple smoked ancho peppers (that will crank up the heat!) to the pot or top a bowl of chili with fresh sliced jalapenos. Because people like their chili with different levels of heat, I keep it simple and provide options for toppings, like a “buffet o’ heat” ranging from bottled sriracha to sliced peppers. The sour cream cools of the heat and balances the acidic tomato flavor.

My recipe gets its name from using Texas Jet Lone Star Chili Seasoning, a packet of spices brought home by my boyfriend after a trip to Houston. However, you can make your own chili seasoning with this Taste of Home recipe, if you need it.

Saute the garlic and onions in a tablespoon of melted butter until soft before adding a pound of ground turkey. Over medium heat to medium-high heat, stir the meat with the garlic and onions continuously until it is cooked thoroughly, Because there is no grease to drain (healthier!), you can then add the canned ingredients, mix well, cover and allow to cook on a medium-low simmer until the chili reaches the consistency you prefer for serving (typically about 30 minutes).

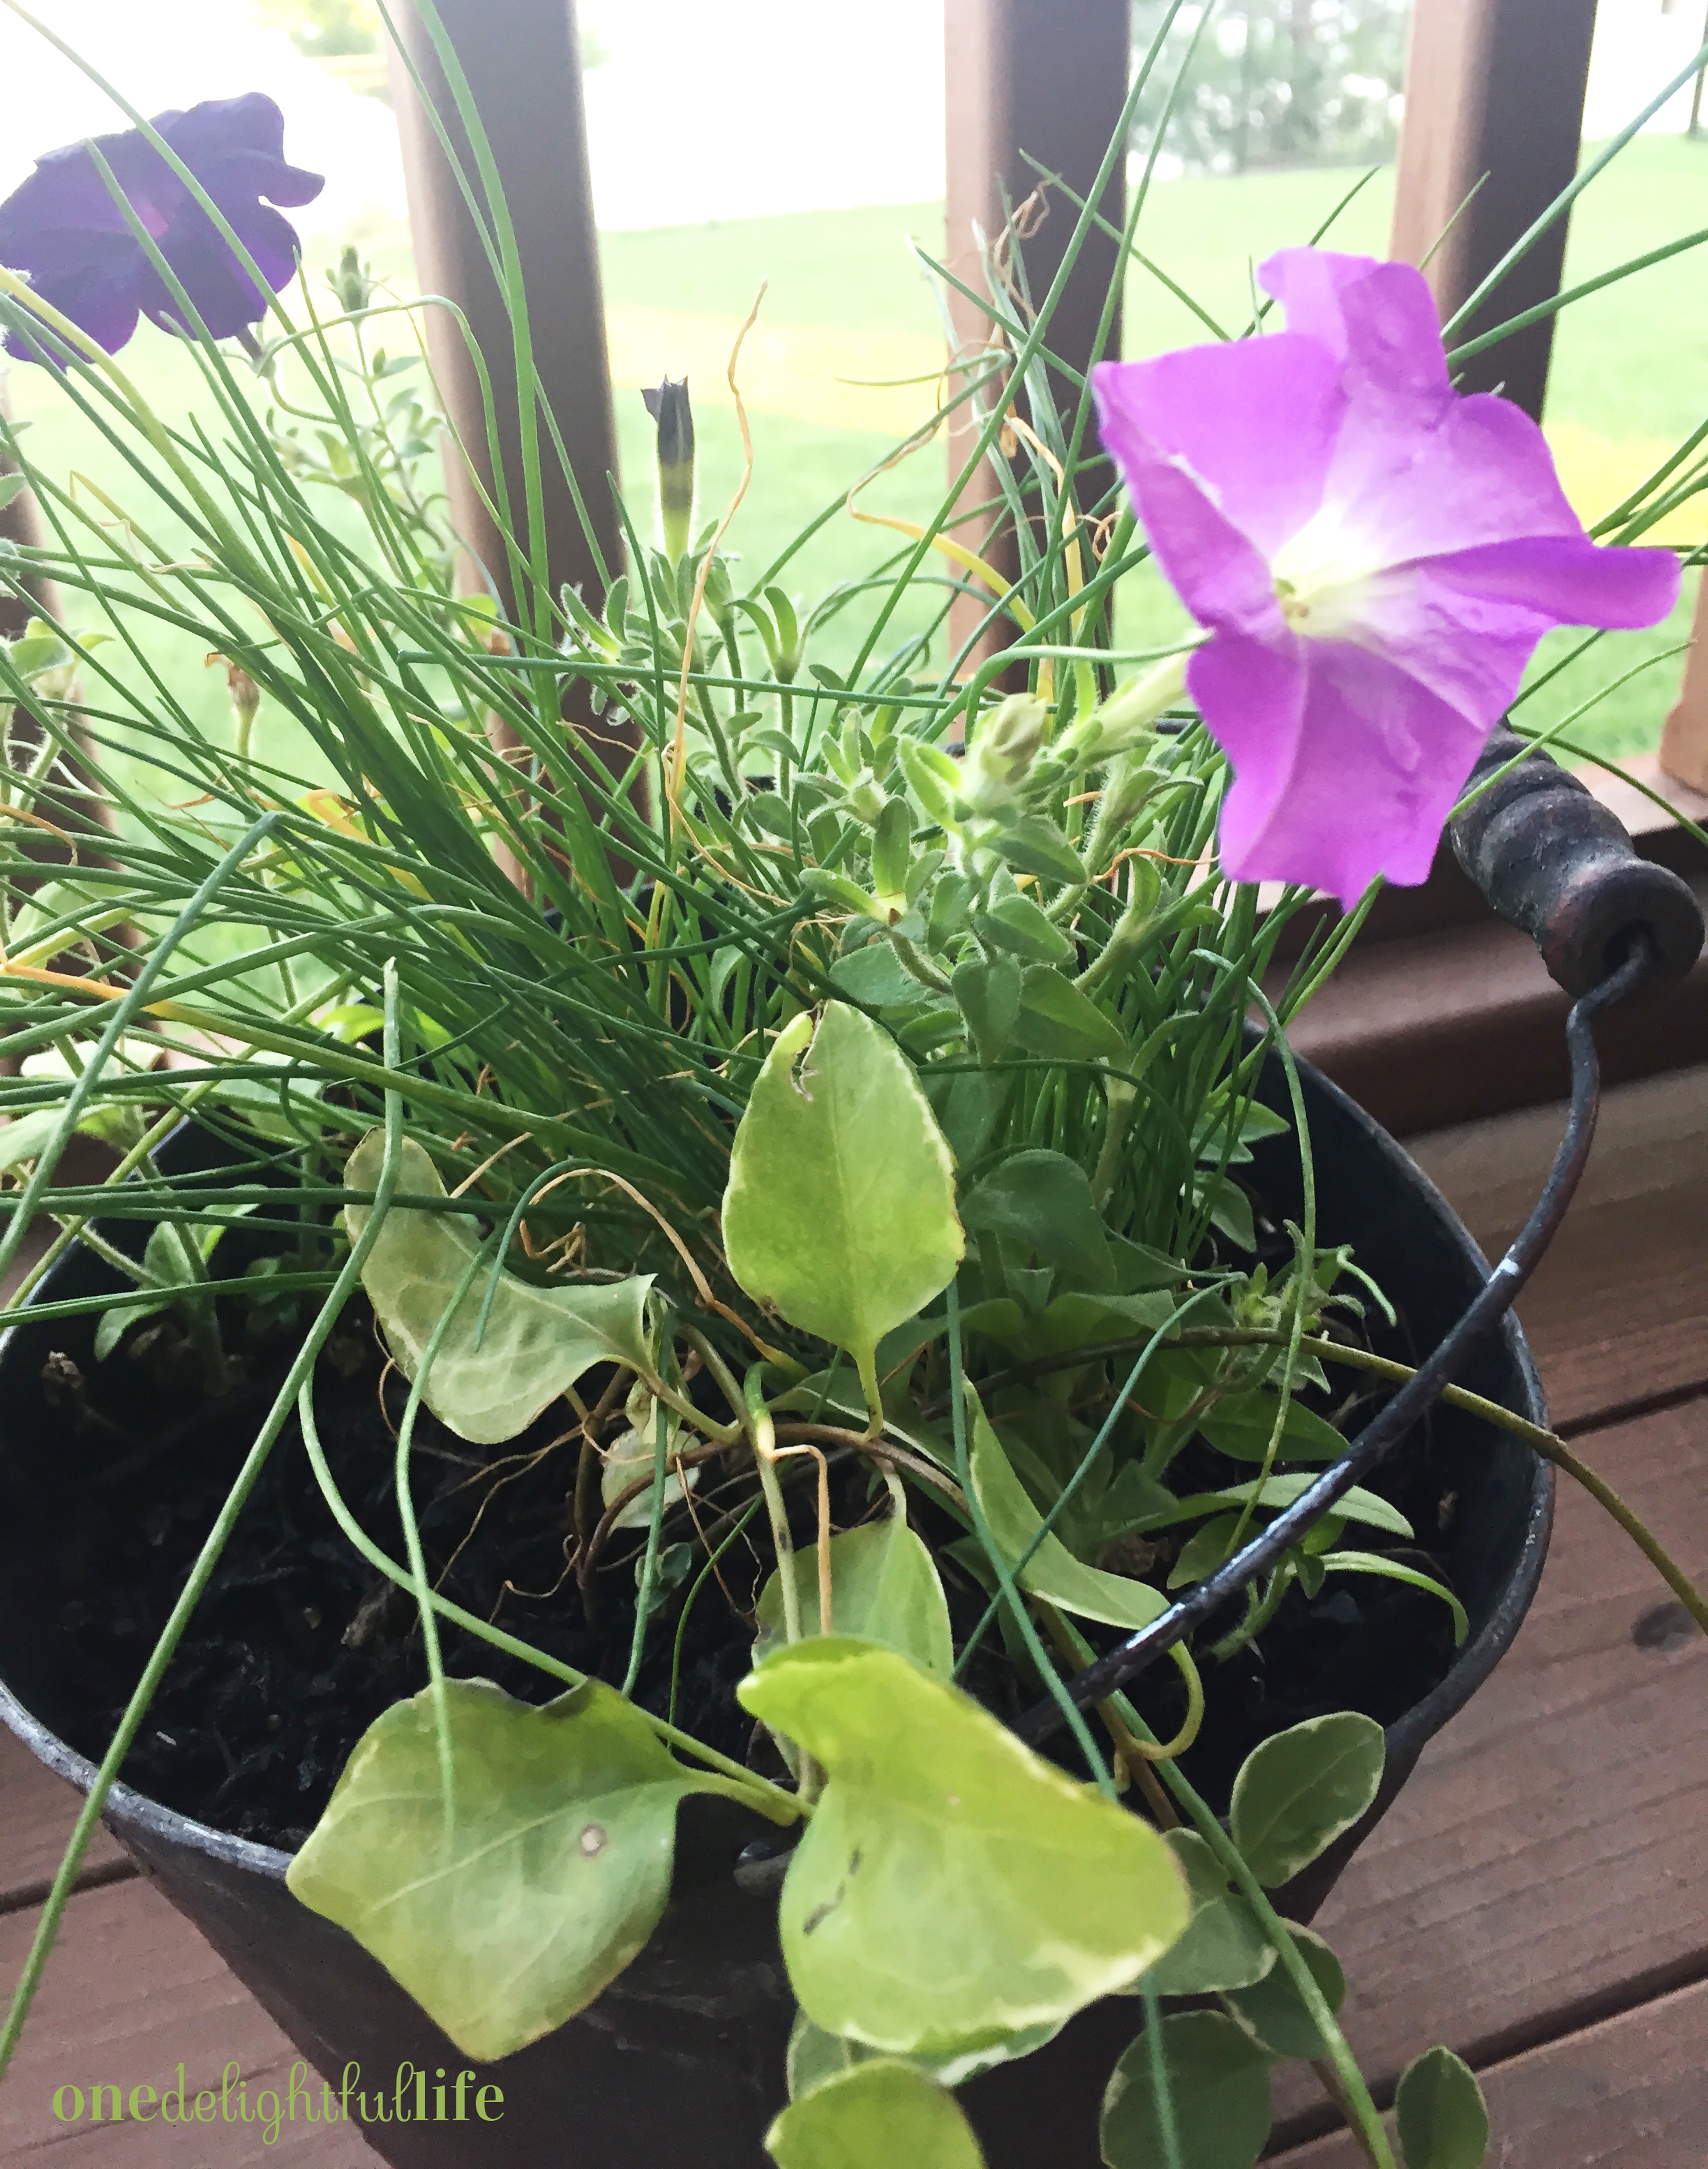
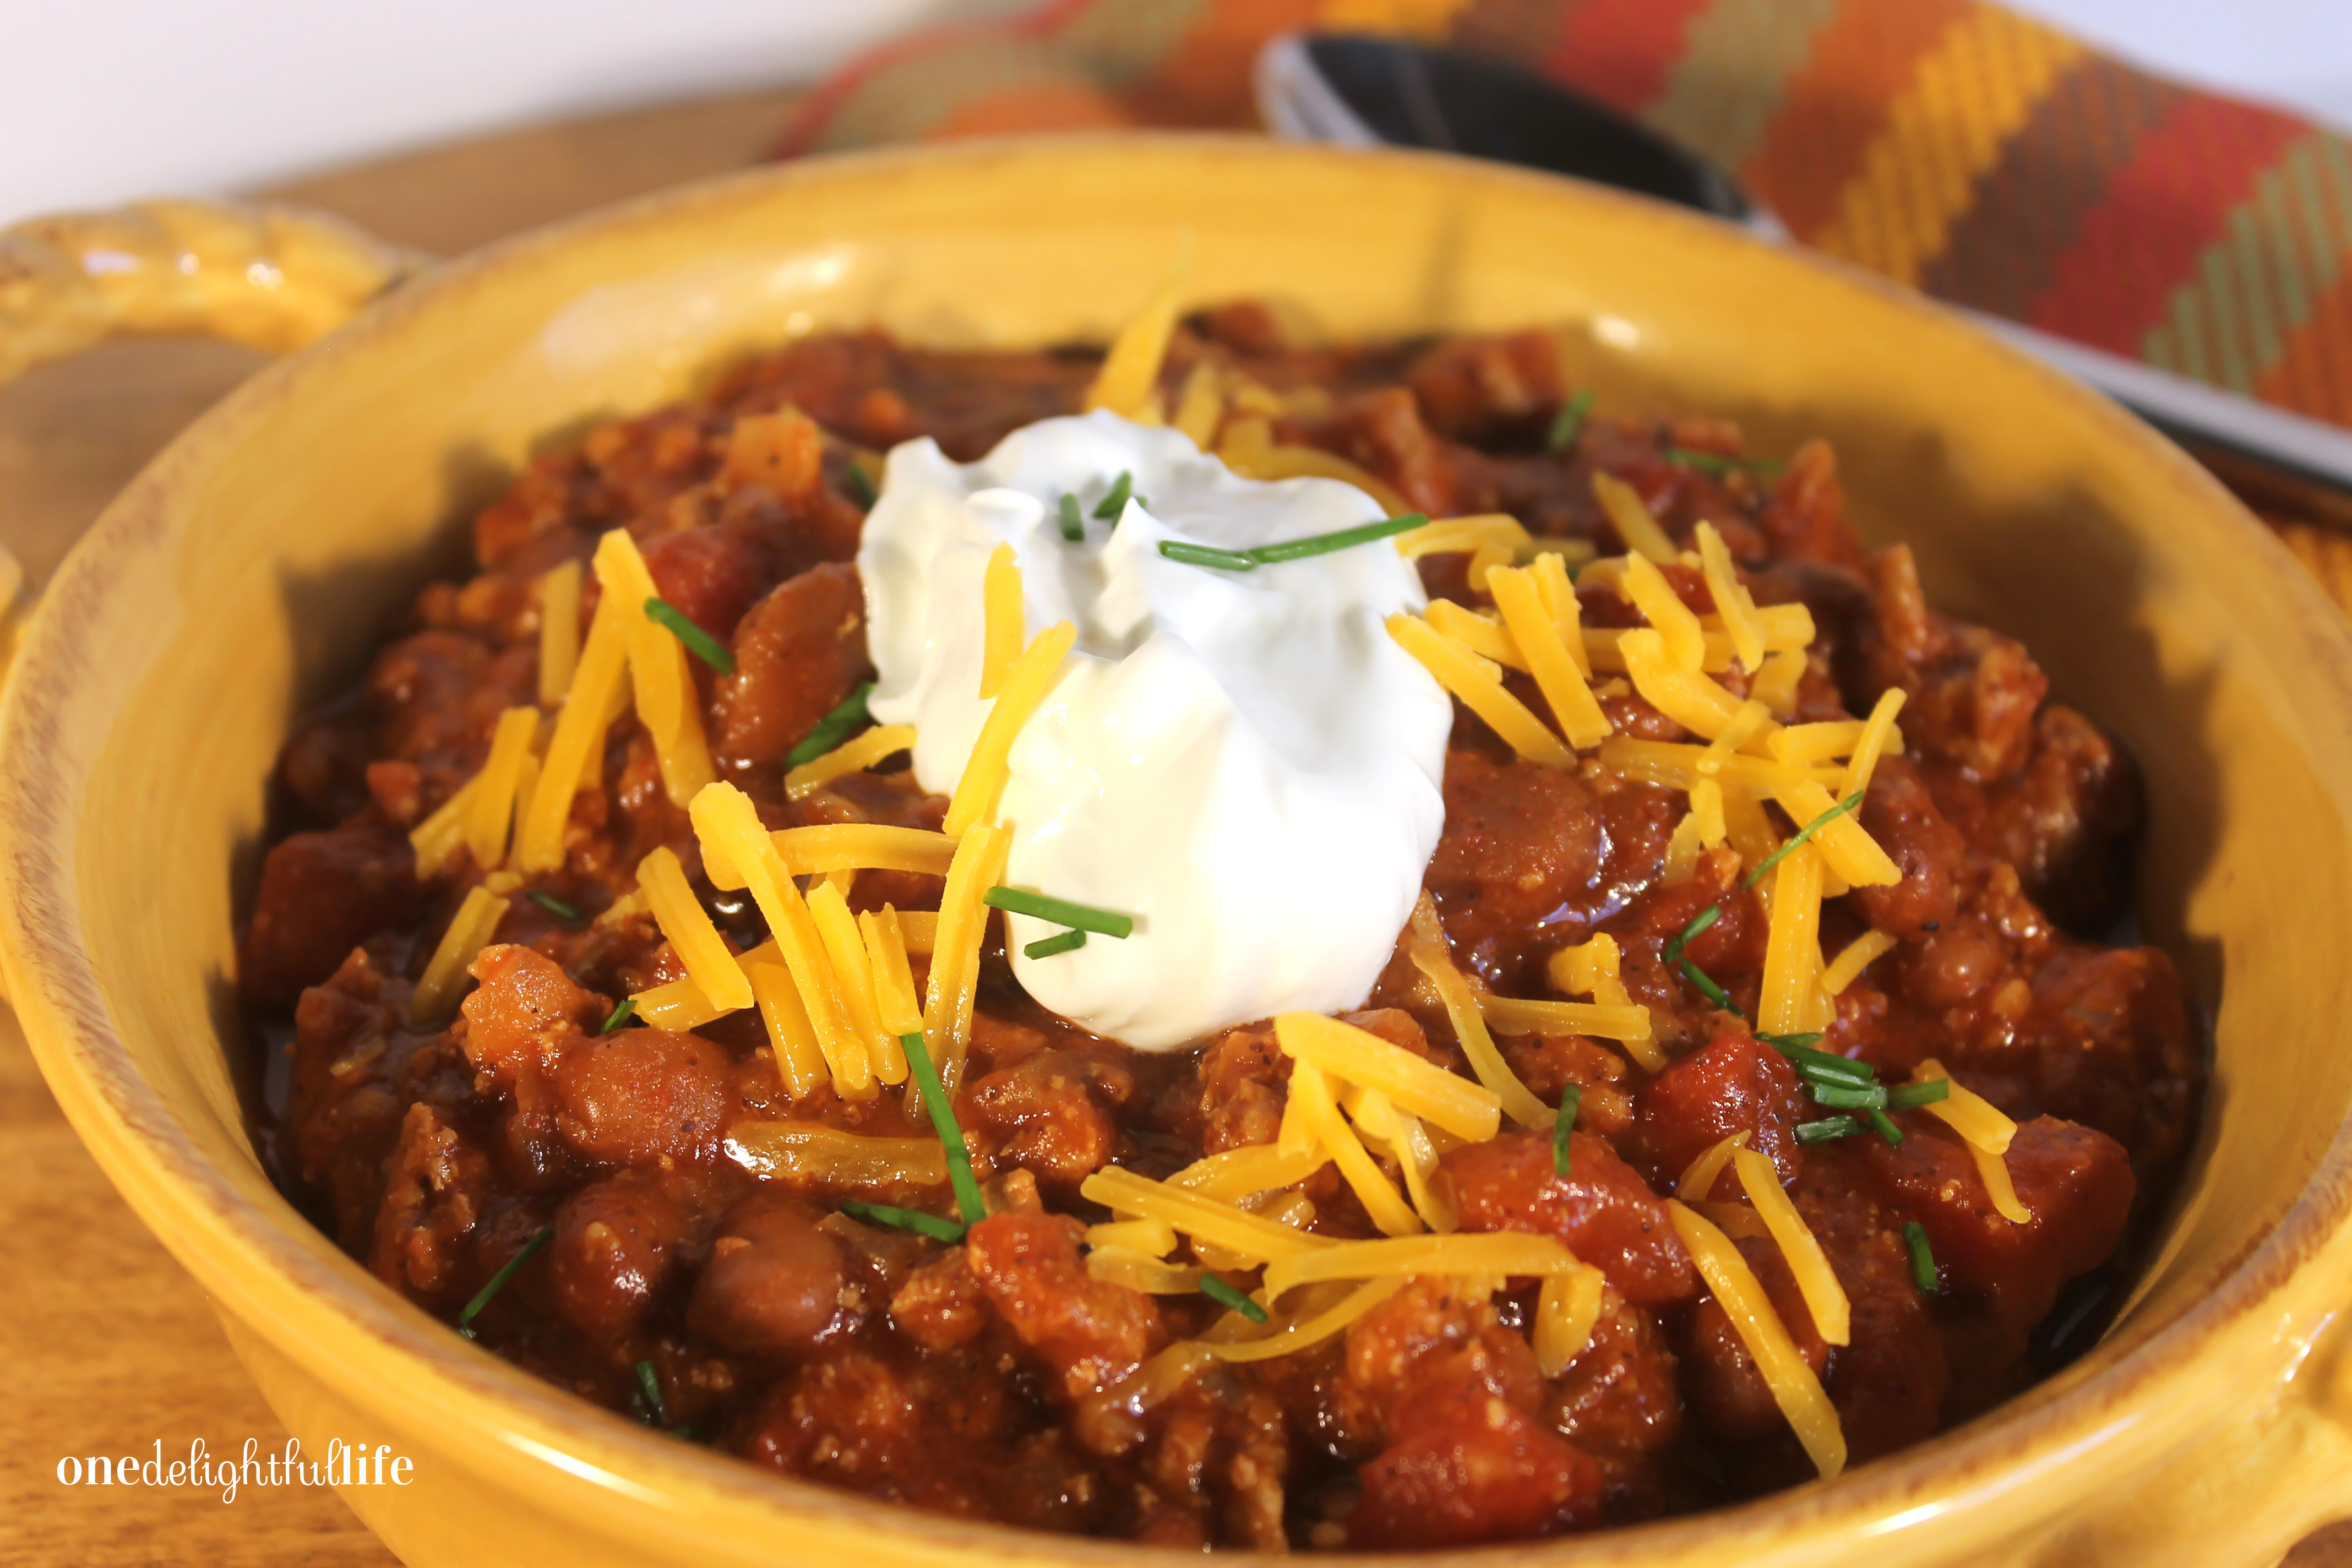
Remember to provide options for toppings for your chili fans. I grow fresh herbs in container pots so adding fresh chive was as easy as chopping some and sprinkling them on top of added sour cream and cheddar cheese.

Chives are super simple to grow as long as you provide them partial sun, maintain moist soil, and give them drainage.

This dinner recipe will serve about 6-8 bowls of chili. If cooking for two people, like me, you will have a couple days of leftovers available to pack for lunches or freeze for later use. By preparing Lone Star Turkey Chili with Sour Cream and Chives for dinner tonight, you’ll free yourself from worrying about future meals because you’ll have extra servings on-the-ready when you’re ready to heat and eat. Free up yourself from the confines of the kitchen this summer by making a big batch of this yummy, stovetop chili to feed your family for days!

(no affiliates in this post)

onedelightfullife.com

6-8 bowls

Lone Star Turkey Chili with Sour Cream and Chives

Chili is a hearty, make-ahead meal that helps keep dinnertime chaos-free for you and your family.

20 minPrep Time

30 minCook Time

50 minTotal Time

Save RecipeSave Recipe
Print Recipe
My Recipes My Lists My Calendar

Ingredients

  • 2 cloves chopped garlic
  • 1 chopped white or yellow onion
  • 1 T butter
  • 1 pound ground turkey
  • 1.5 oz (half a package) Texas Jet Lone Star Chili Seasoning
  • 1 can tomato paste
  • 1 can chili-ready canned beans (or pinto beans) undrained
  • 1 can chili-ready diced canned tomatoes undrained
  • 1 cup water (optional, if you think the chili is too thick)

Instructions

  1. In a large pot, melt butter and then add onions and garlic over medium heat. Stir continuously until garlic and onions are softened. Add in ground turkey and continue stirring until cooked thoroughly. Add the remaining ingredients and mix thoroughly. Cover the pot, reduce the heat to low, and allow the chili to simmer at least 30 minutes. Serve in bowls garnished with sour cream, cheddar cheese and chives.

Notes

Crank up the heat by adding a pinch of red pepper flake or sriracha while the chile is simmering.

7.8.1.2
76
https://onedelightfullife.com/lone-star-turkey-chili-with-sour-cream-and-chives/
onedelightfullife.com

Nutrition

Calories

177 cal

Fat

12 g

Carbs

18 g

Protein

2 g
Click Here For Full Nutrition, Exchanges, and My Plate Info
ESHA Logo

Filed Under: Dinner, Taste Tagged With: ancho chiles, beans, bowl, canned, cheddar, cheese, chili, chili-ready, chives, dinner, garlic, ground turkey, hearty, heat, herbs, jalapenos, leftovers, lone star, make-ahead, meat, onions, seasoning, smoked, sour cream, spices, spicy, sriracha, stovetop, summer, taste of home, Texas, tomato

Grilled Bloomin’ Onion with Barbecue Sauce

September 17, 2016 by Vanessa Leave a Comment

Sometimes I’m not in charge of cooking dinner and it’s A-OK with me.

Why wouldn’t I not want to make dinner? Because when my guy gets around the grill, everyone wins. This time he wanted to re-create the Outback Steakhouse bloomin’ onion but rather than dredging it and frying it, he grilled it.

grilled_bloomin-onion2
The barbecue sauce ran a bit out of one side so we just added a bit more.

Despite what you might think you don’t need some fancy onion chopper to achieve the same fanned out affect from a Vidalia onion that you see at at steakhouse. The key to achieving that “bloom” look is to keep the stem of the onion in place, peel the skin off away from it, and use a sharp small pairing knife to divide the onion into 8-16 different sections. Don’t use any other variety of onion than a sweet Vidalia, which gets its name for where its grown in Georgia, because it is unusually sweet and caramelizes well on the grill. Any other kind of onion may have a sharp flavor and probably isn’t as large in size.

We cut this onion one more time equaling sixteen sections.
We cut this onion one more time equaling 16 sections.

grilled-bloomin-onion-6
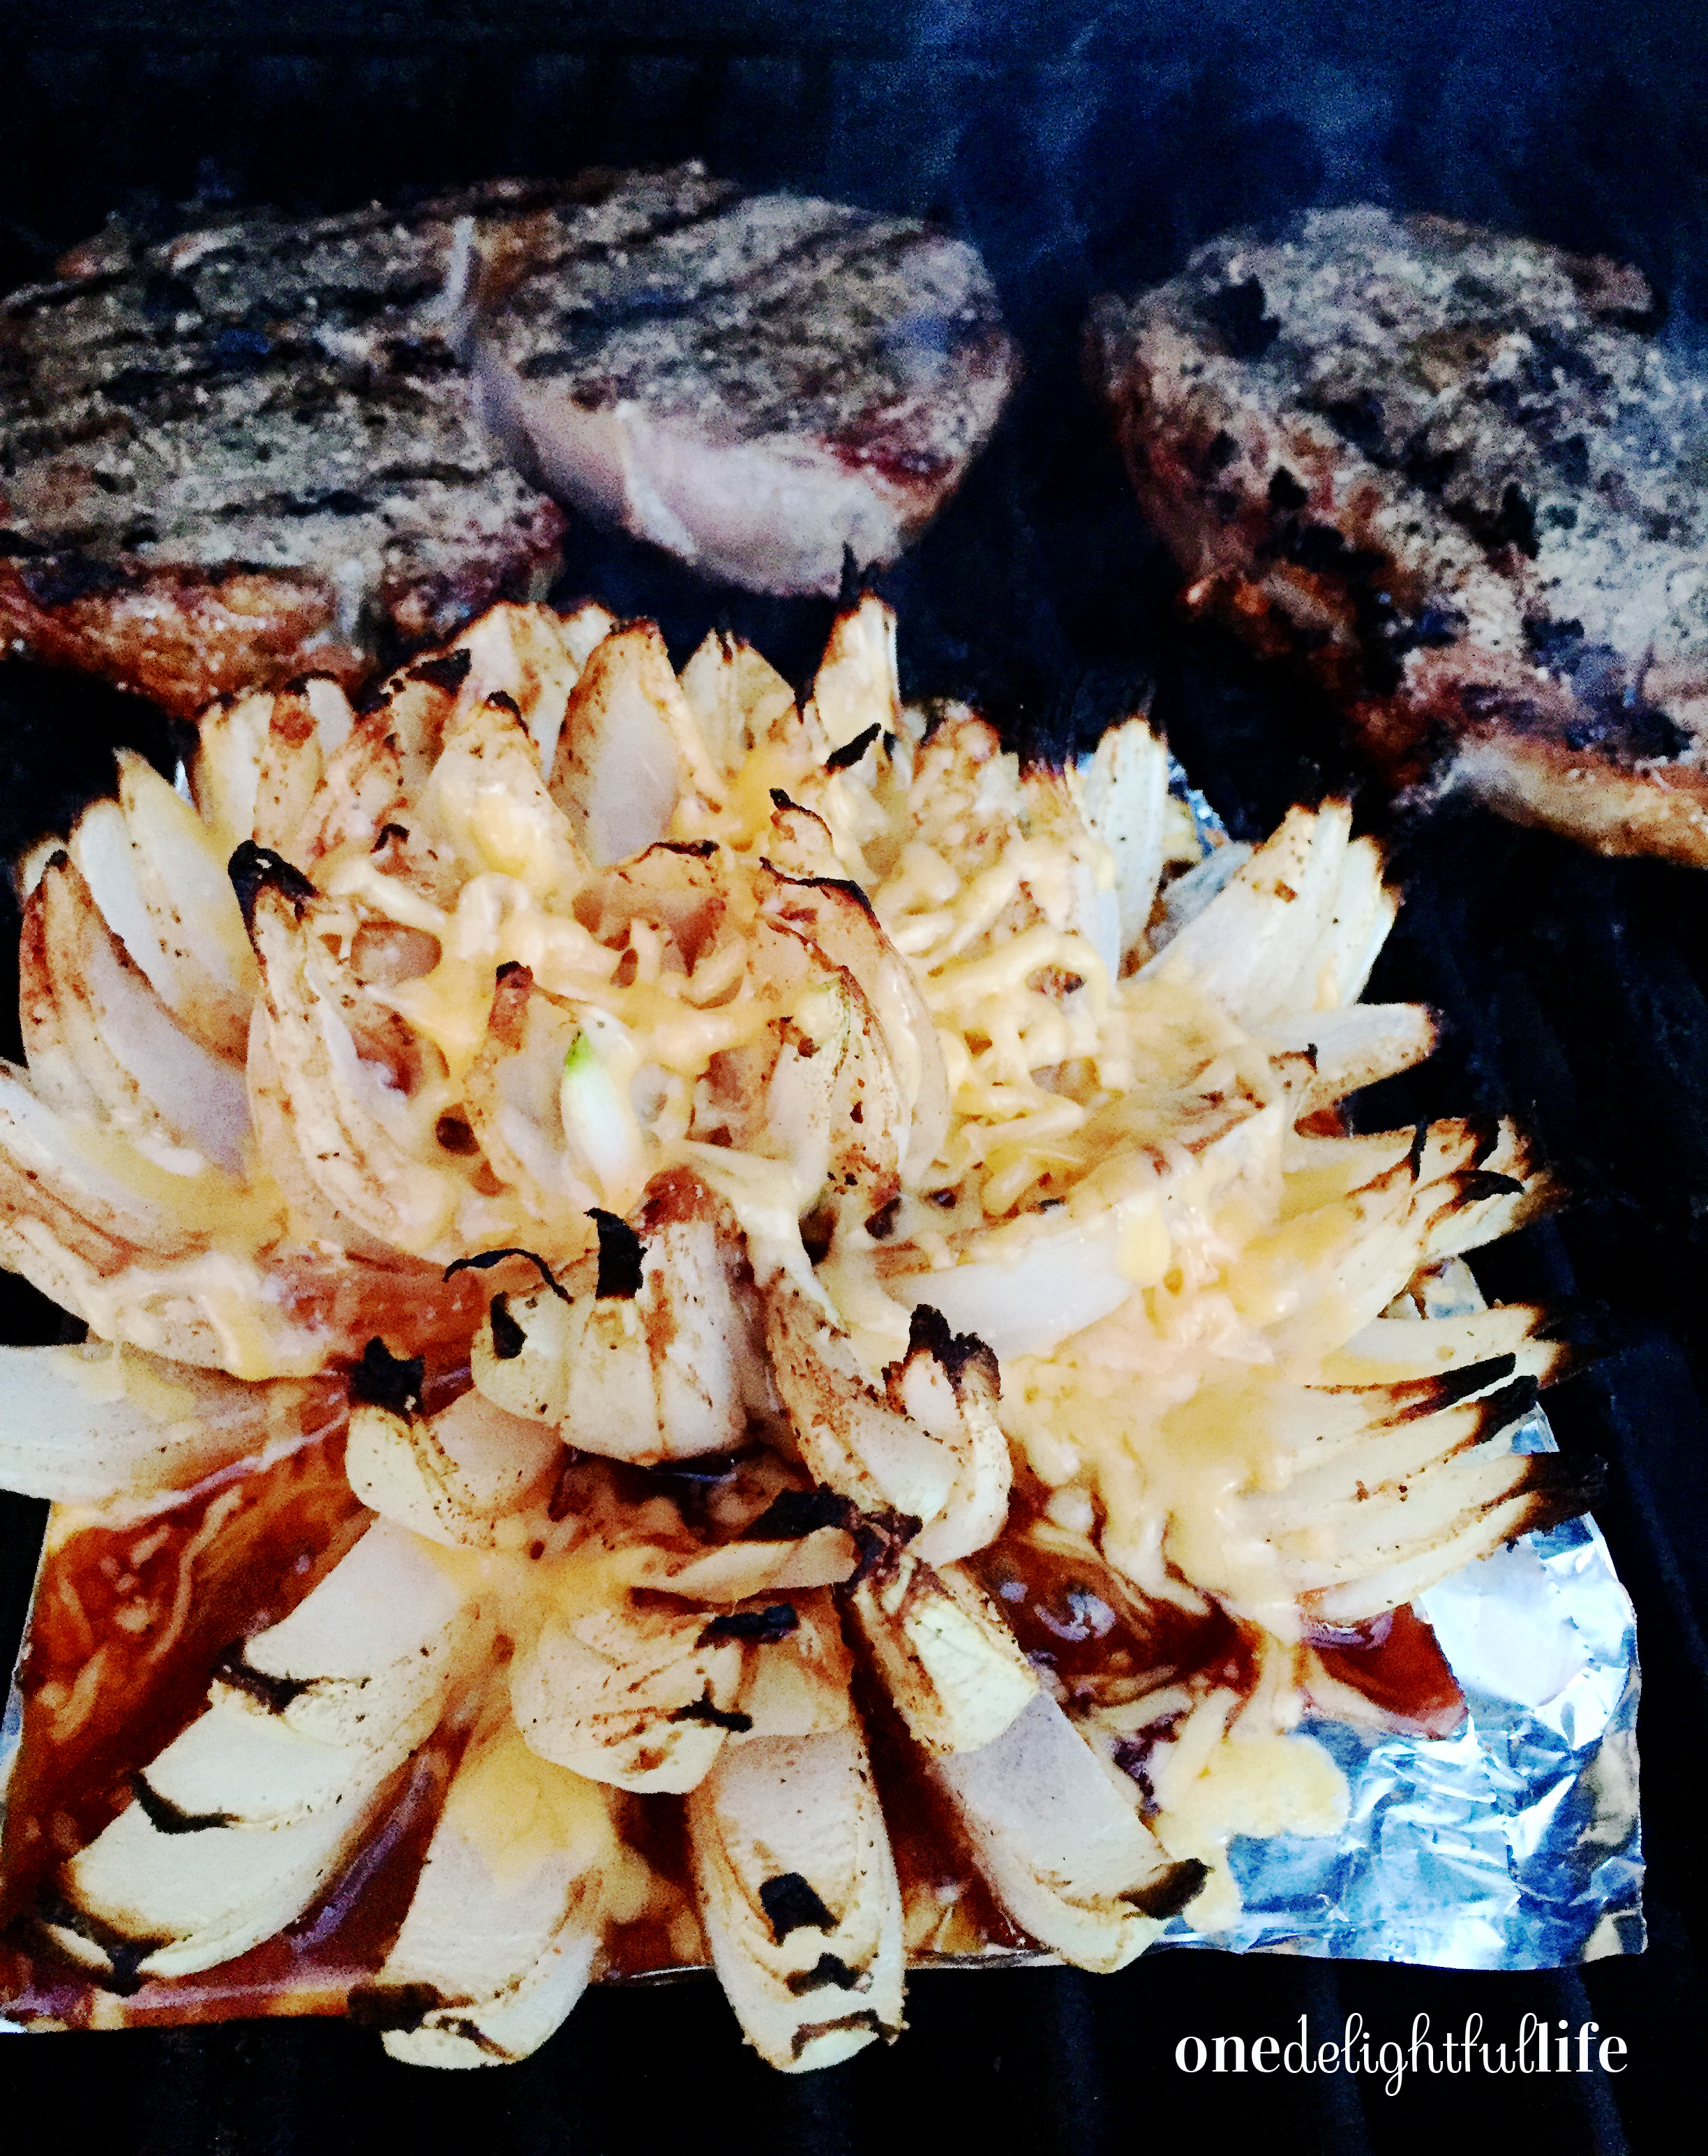
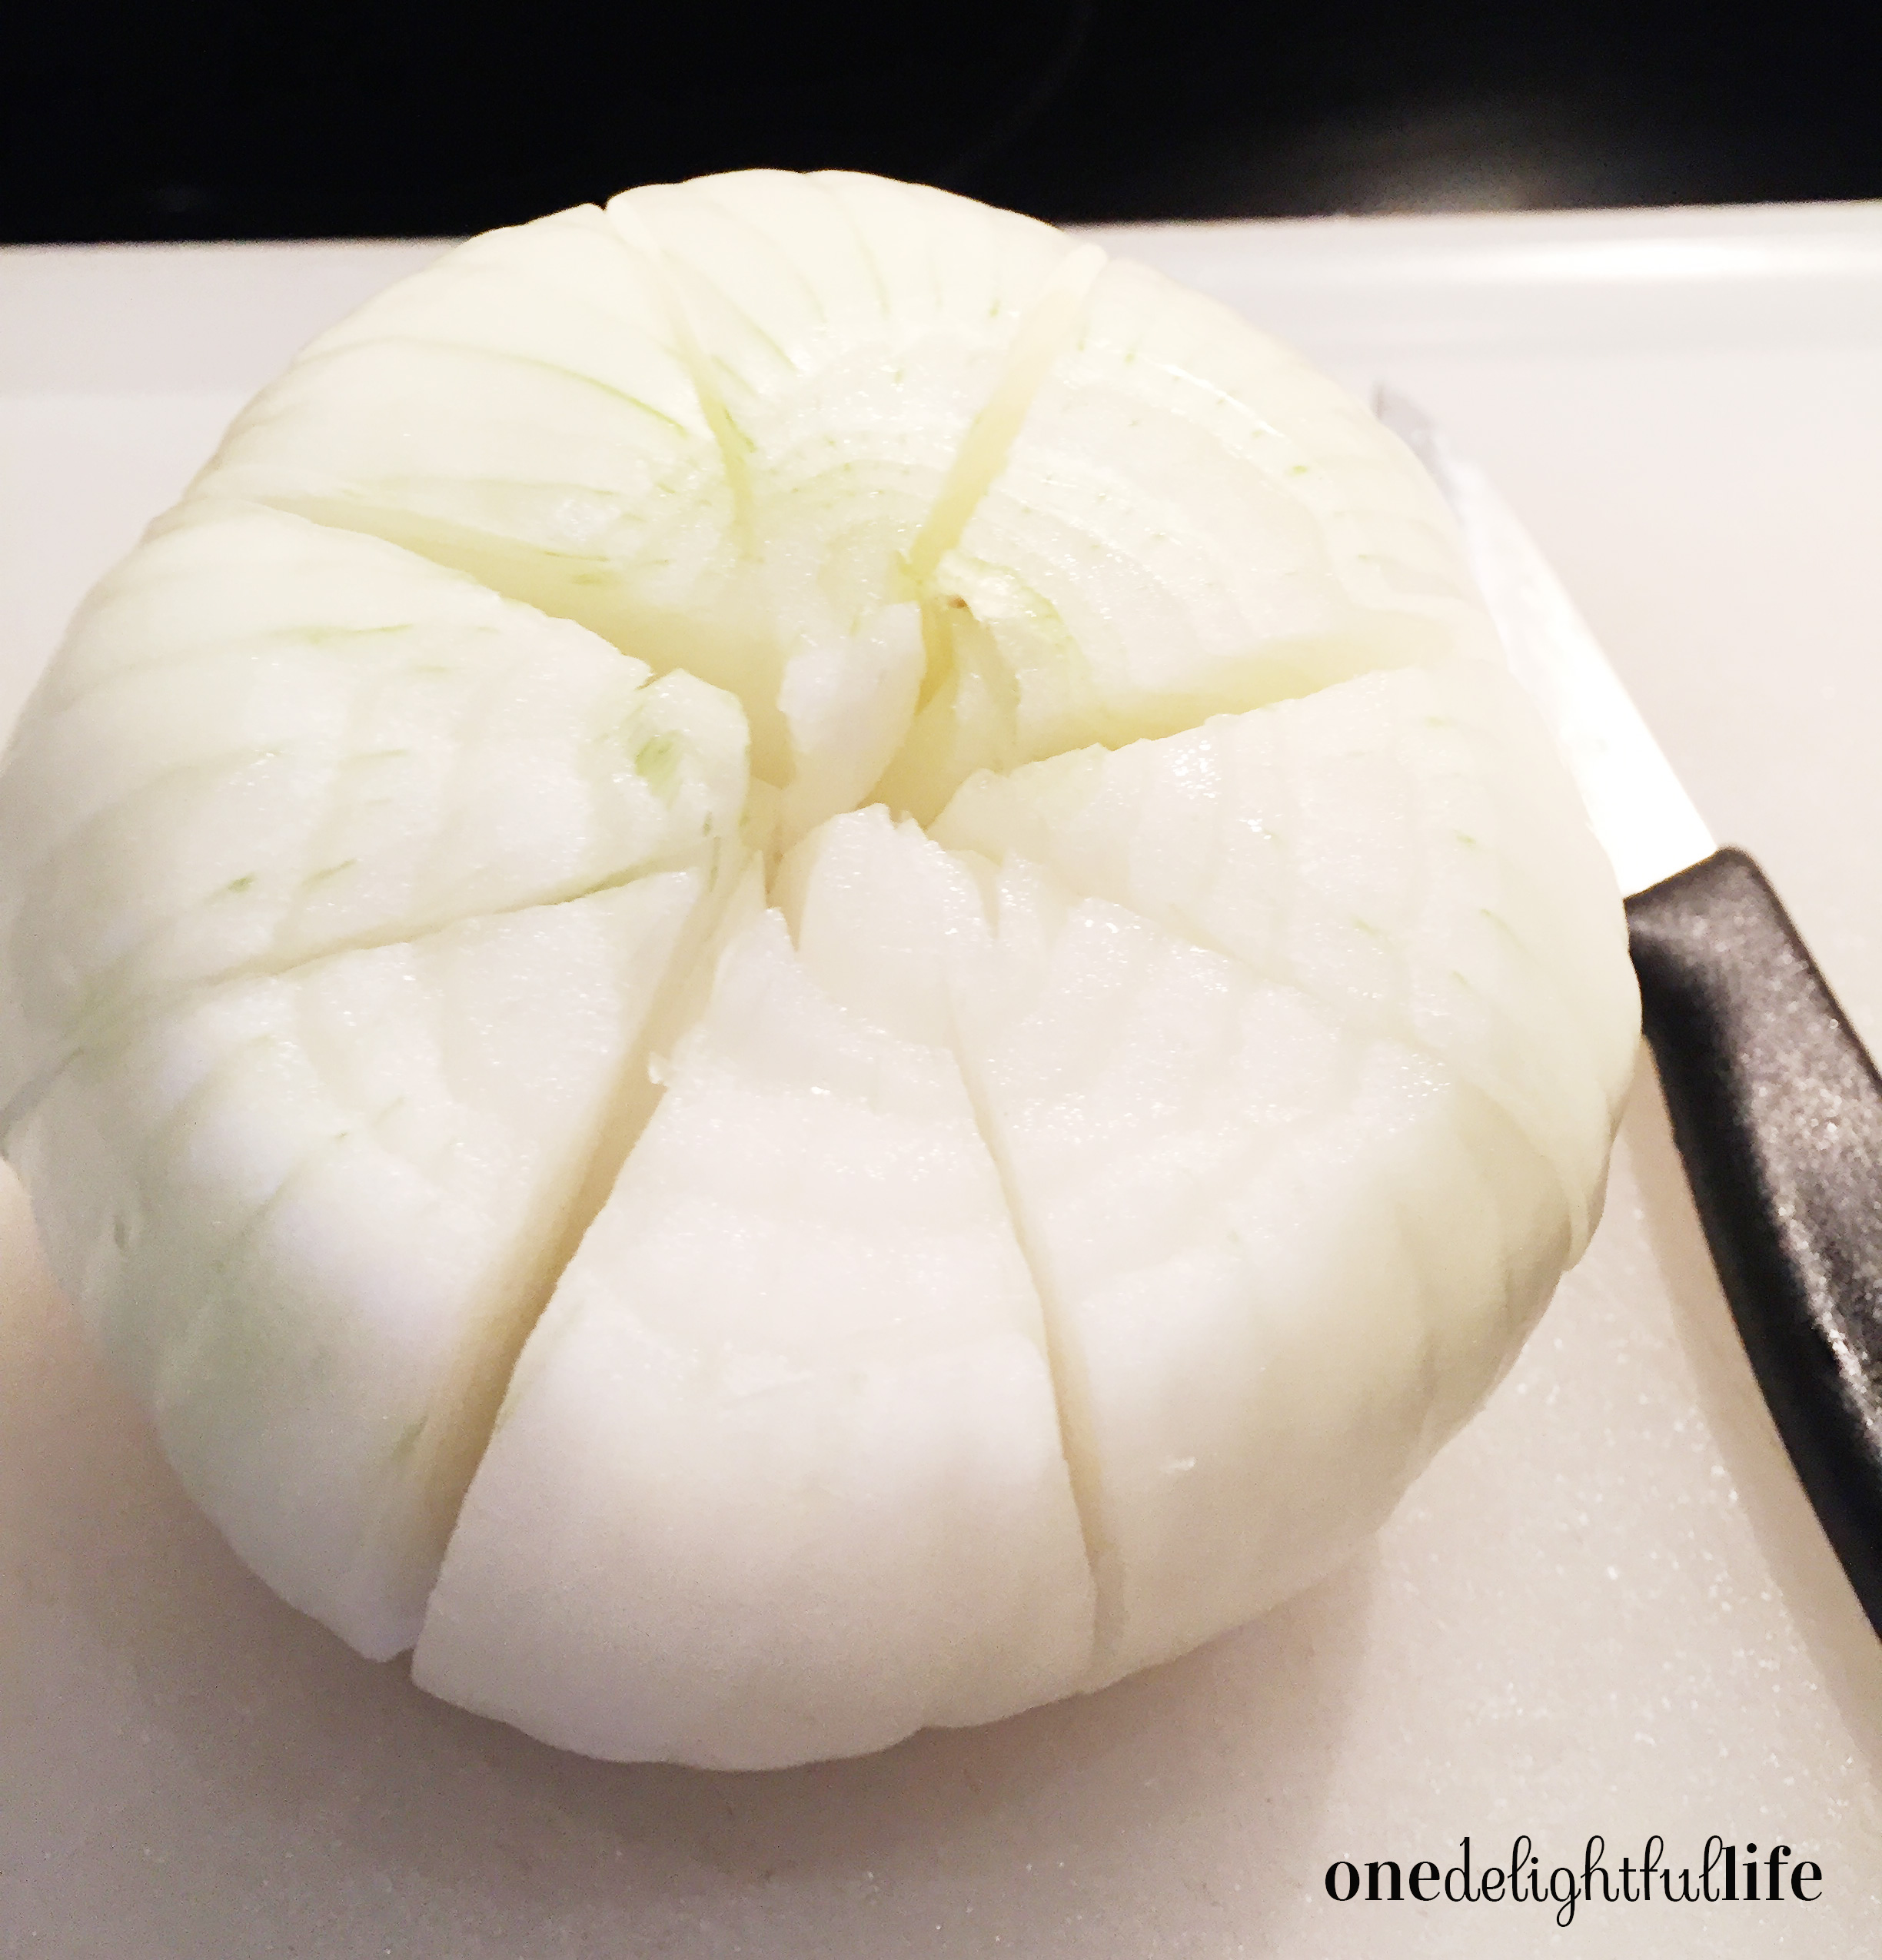
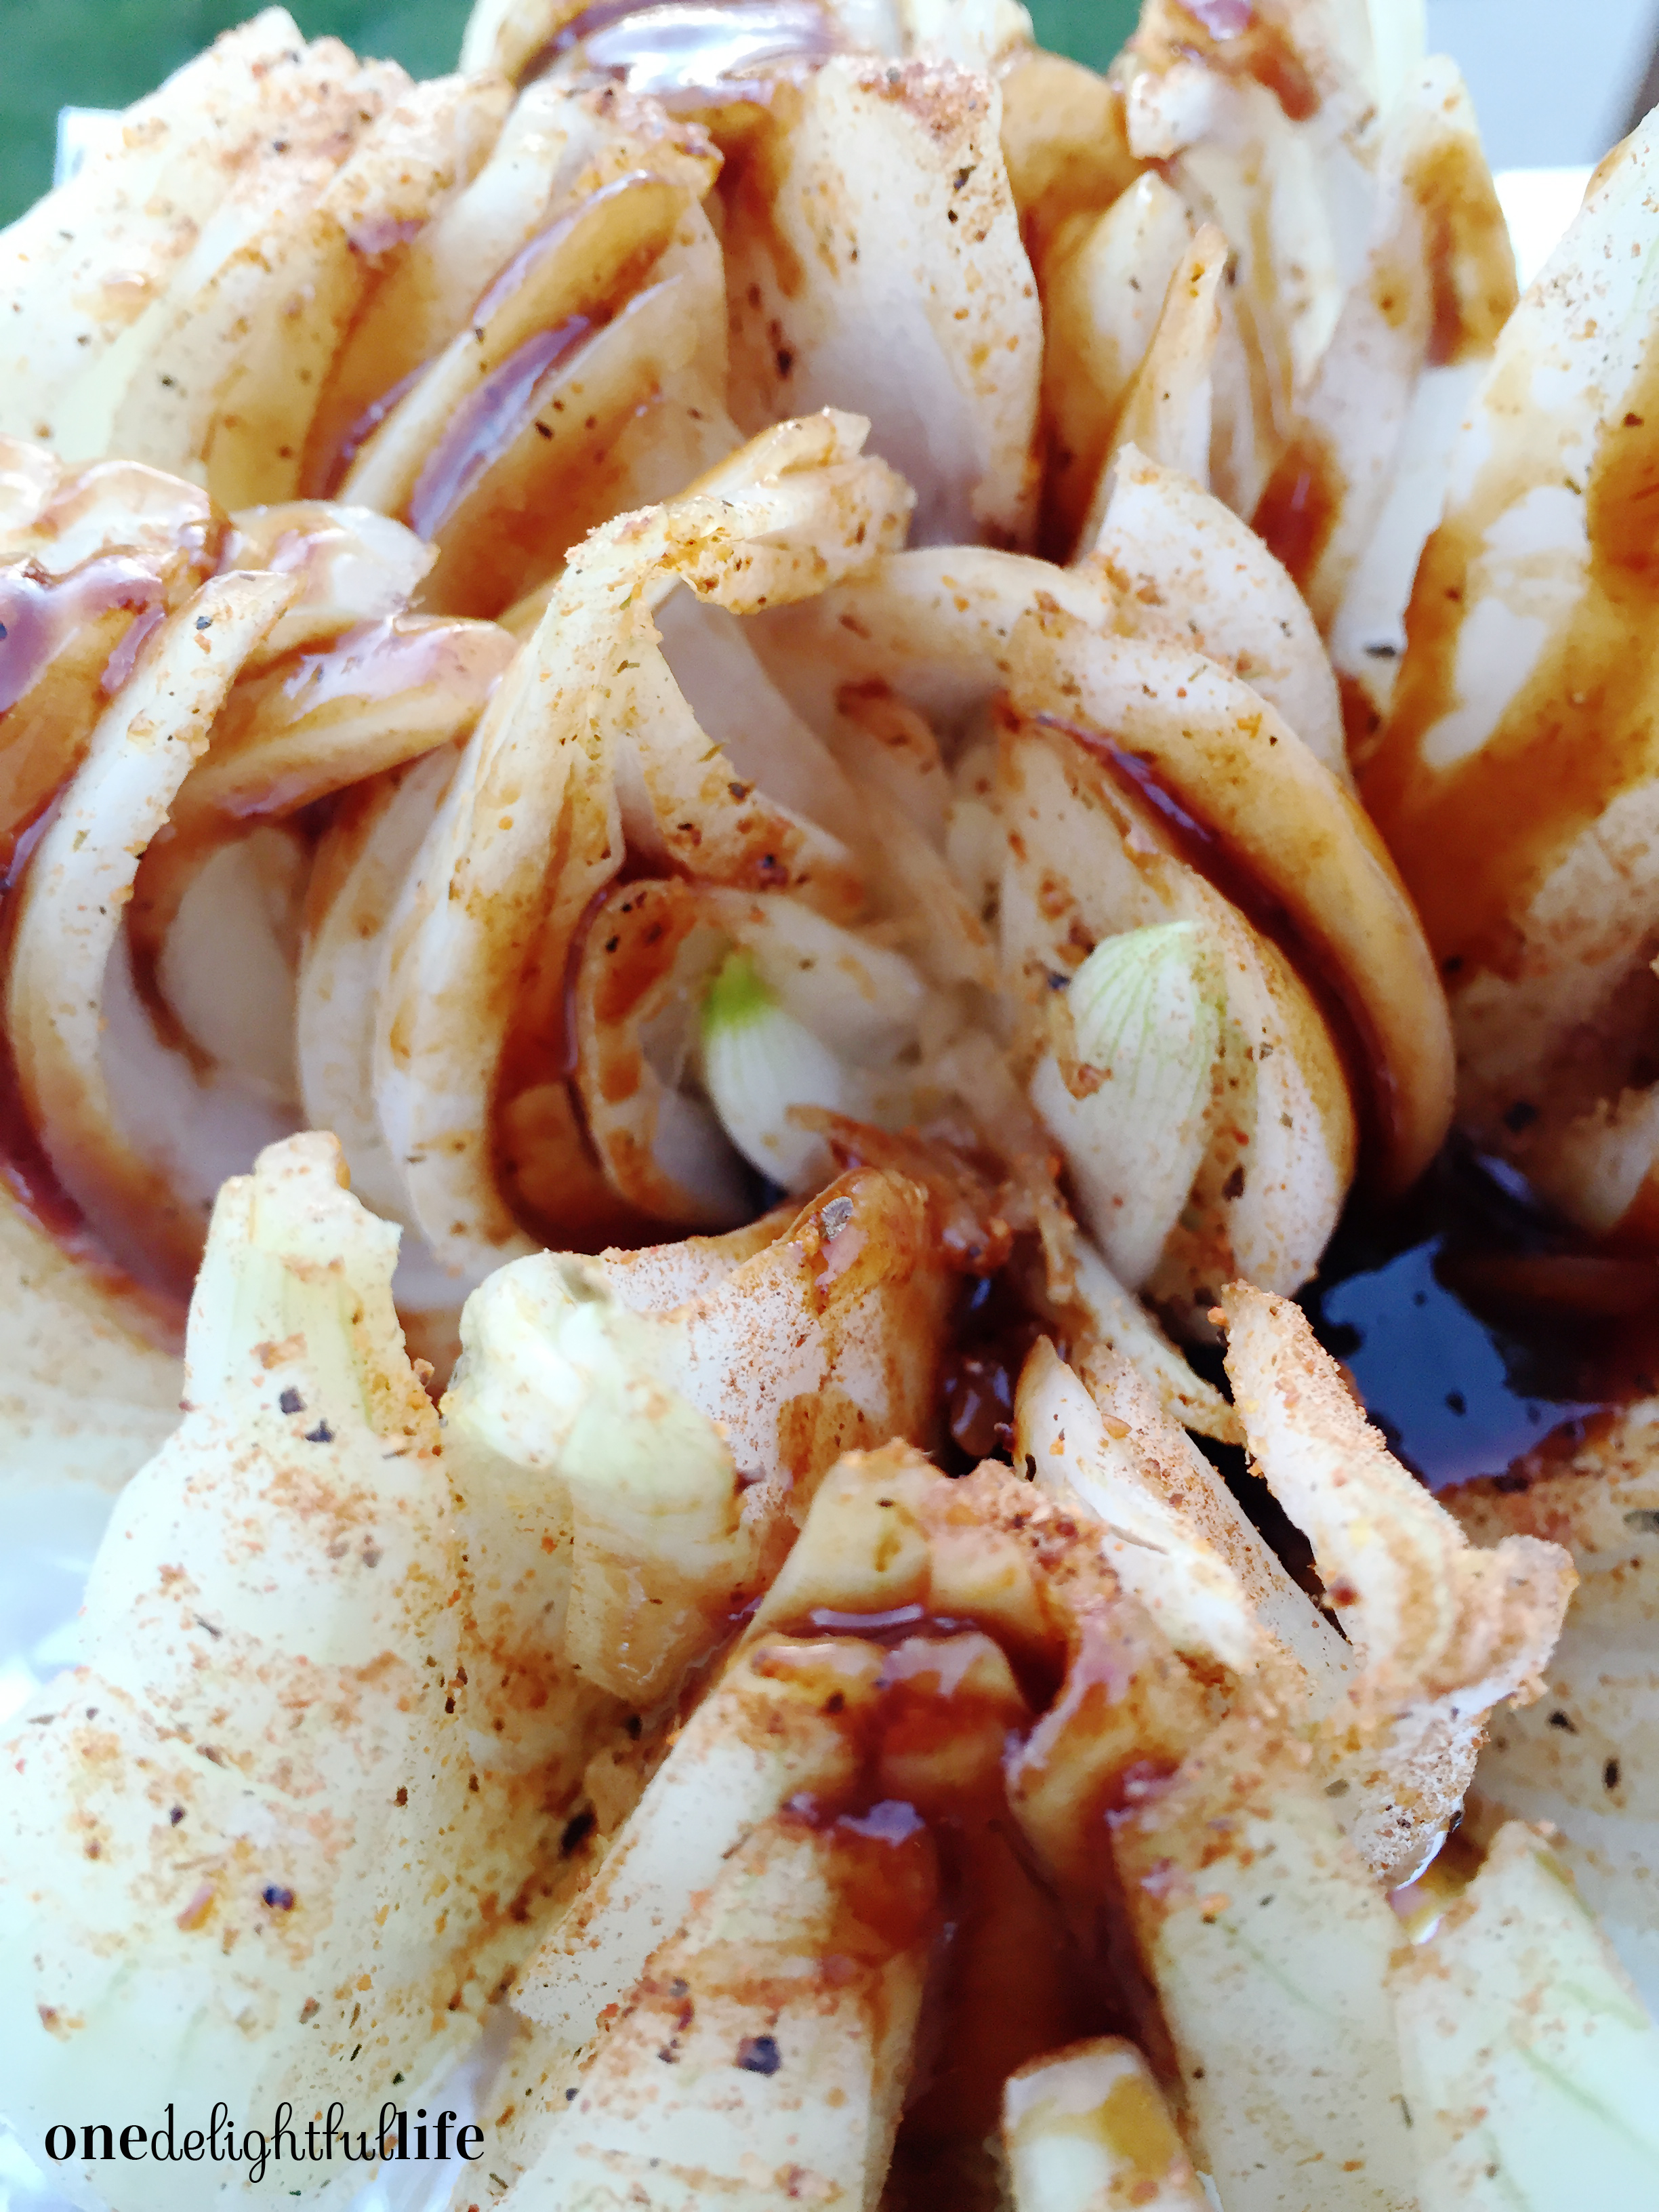
Clean up is a cinch since you only need to discard the foil. I recommend serving the onion without the stem in a bowl on the table as a side dish. It serves two people easily. I could see us recreating this side dish again using other seasoning options to accompany Italian or Mexican entrees. Check out my Easy Homemade Seasoning recipes.

Have fun grilling and let me know if you try a different seasoning combination or prefer this version. Use the comment section below to tell me about your take on the Grilled Bloomin’ Onion with Barbecue Sauce or tag @OneDelightfulLife on Instagram!

Signature ODL 170x70px


onedelightfullife.com

Serves 2 servings

Grilled Bloomin’ Onion with Barbecue Sauce

A healthier version of the Outback Steakhouse Bloomin' Onion, this version is sweet and savory hot from the grill.

10 minPrep Time

20 minCook Time

30 minTotal Time

Save RecipeSave Recipe
Print Recipe

My Recipes
My Lists
My Calendar

Ingredients

  • 1 large Vidalia onion
  • 1 T. instant chicken bouillon
  • 1 T. Kansas City style barbecue sauce
  • 1 tsp. Cajun seasoning
  • 1 tsp. olive oil
  • 1 tsp. shredded cheddar cheese
  • pinch pepper

Instructions

  1. Preheat your propane grill to 350 degrees.
  2. Slice the top of the onion off but leave on the large stem.
  3. Peel the onion's outer skin off.
  4. Slice the onion into four sections through to almost the stem on the bottom. Slice those four sections into four sections. (You should have eight sections now, but you may prefer to slice them even thinner again.)
  5. Use your fingers to carefully separate the onion sections to get that "bloom" affect without removing any of the onion sections.
  6. Transfer to a square of foil slightly larger than the diameter of the onion.
  7. Add bouillon, barbecue sauce, and Cajun seasonings inside the onion's sections.
  8. Drizzle on top with olive oil.
  9. Place on a hot grill and allow to cook for 15 minutes.
  10. Sprinkle with cheese and grill another 5 minutes.
  11. Remove transfer onion from foil to a plate and serve hot.
7.8.1.2
54

https://onedelightfullife.com/bloomin-onion-with-barbecue-sauce/

onedelightfullife.com

Nutrition

Calories

161 cal

Fat

6 g

Carbs

10 g

Protein

16 g

Click Here For Full Nutrition, Exchanges, and My Plate Info


ESHA Logo

Filed Under: Grilled, Sides Tagged With: bbq, bloomin' onion, Cajun, cheddar, grilled bloomin' onion, grilled onion, Kansas City barbecue, Vidalia onion

Homemade Bacon Cheddar Dog Biscuits and Frozen Yogurt Pupcakes

August 2, 2016 by Vanessa Leave a Comment

My  first puppy, a tan cocker spaniel male, won me over. We drove to a local farmer’s house to possible adopt a puppy only to find him the one of the last two boys in the litter sitting on the front porch. He hid timidly behind the leg of a antique metal chair and looked up at me with nervous eyes that said “take me home.” He was mine. I named him Waffles, for the color of his coat, and he became my buddy. Boy did he change as he grew up. He was a rambunctious dog that pulled my tall clumsy frame down the street with abandon. The neighbors would stare at us, but he didn’t care. He was born to explore.

I was food obsessed at an early age to name my first dog Waffles.
Isn’t he cute? That’s a picture of me doing my homework after school. Check out the stylish Trapper Keeper.

Many years later, when I turned sixteen, I knew exactly what I wanted for my birthday. Most teen girls want a car. Not me. I wanted to adopt a shelter pup, a collie to be specific. We brought Shelby, a blue merele collie, home and she stole our hearts for many years. She passed away while I was away at college leaving mom’s empty nest a bit more empty.

Always ready to cuddle, Shelby melted hearts.

After college I lived with roommates’ dogs. I remember three labrador brother dogs that ate trays of holiday candied nuts and got so sick they had to sleep in the garage on Christmas Eve. Oh, and there was a white Akita that walked delicately through the house leaving a trail of fur puff balls in his path. But these dogs weren’t mine and I wanted one of my own.

Today, my heart melts for Sasha, our nine year old lab mix. She was adopted by my boyfriend from the Bartlesville, Oklahoma SPCA shelter as a puppy and I met her three years later. She is our fur baby. We try to take her everywhere with us. So it was no surprise to our friends that I hosted a birthday party for her several years ago and invited their fur babies to join in on the fun. Every dog deserves to be celebrated!

Seriously, I love dogs. An advocate for shelter dogs, I created a Facebook page for dog lovers that promotes dog care, adoption events, and area veterinarians. I use this page to inform followers of adoptable shelter dogs and to let them know if the shelters in the area are running low on supplies. If I could adopt all shelter animals, we would have a zoo in our backyard.

Sasha has the longest tongue of any dog I've ever seen, but that makes her even cuter for photo moments like this one take on St. Patrick's Day 2011.
Sasha has the longest tongue of any dog I’ve ever seen, but that makes her even cuter for photo moments like this one take on St. Patrick’s Day 2011.

But since I can’t adopt every dog, I try to spoil them by making dog treats for my family and friends’ dogs. My Homemade Bacon Cheddar Dog Biscuits and Frozen Yogurt Pupcakes, are crazy easy to make and human-grade. You can even sample them yourself. I dare ya! If your pup is anything like Sasha, he or she will follow you around the house begging for just-one-more. Seriously people, your dog will be at your side like magnet. These treats are puppy approved!

Instead of buying a box of artificially dyed dog treats made with non-pronounceable ingredients, make the recipes below. Better yet, tag One Delightful Life on Instagram with a picture of your pup eating one of these yummy dog biscuits or a frozen pupcake. Don’t forget to follow my Facebook page made especially for dog lovers just like you!

homemade-bacon-cheddar-dog-biscuits11

To make the dog biscuits, simply combine all ingredients into a large bowl. Knead the dough with your hands for a minute.

homemade-bacon-cheddar-dog-biscuits2

Your dough should look like the below picture when you’re done gently kneading it. At this point, preheat your oven to 350 degrees.

homemade-bacon-cheddar-dog-biscuits3

Roll out the dough to 1 1/2″ thickness on a flour covered cutting board. Use cookie cutters to create the biscuits shape.

homemade-bacon-cheddar-dog-biscuits4

homemade-bacon-cheddar-dog-biscuits5

Transfer the biscuits to a slightly greased cookie sheet. I used canola oil cooking spray.

homemade-bacon-cheddar-dog-biscuits6

Bake at 350 degrees for 30 minutes. Remove biscuits from the oven and transfer to a cooling rack. Don’t try to give a treat to Fido just yet! The biscuits will be extremely hot and are guaranteed to burn their mouth.

homemade-bacon-cheddar-dog-biscuits7

Once cooled, let your pup enjoy his or her tasty treat. Sasha didn’t want to wait much longer.

homemade-bacon-cheddar-dog-biscuits11

homemade-bacon-cheddar-dog-biscuits8
Make sure to bag up extra treats for your friends’ furry friends too. Don’t forget to tell them the ingredients in case their dog is allergic to whole wheat or dairy products. The treats must be refrigerated and last up to six months. (The blue roasting pan in the photo was an awesome find at The Cottage Collective, a cute housewares store nearby that sells vintage items and collectables.)

homemade-bacon-cheddar-dog-biscuits


onedelightfullife.com

14 dog biscuits

Homemade Bacon Cheddar Dog Biscuits

These treats are "paw-some" and super simple to make for your fur baby.

10 minPrep Time

30 minCook Time

40 minTotal Time

Save RecipeSave Recipe
Print Recipe

My Recipes
My Lists
My Calendar

Ingredients

  • 2 1/2 c. whole wheat flour
  • 1 brown egg
  • 1/2 warm beef broth
  • 1 T. shredded cheddar cheese
  • 2 diced turkey bacon slices
  • pinch salt

Instructions

  1. Preheat oven to 350 degrees.
  2. Combine all ingredients in a large mixing bowl.
  3. Use a fork to mix ingredients until completely incorporated.
  4. Using your hands, make a large ball out of the dog biscuit dough and let it rest in the bowl.
  5. Meanwhile, sprinkle a bit of whole wheat flour on to a cutting board and rolling pin.
  6. Transfer the dough to the cutting board and roll it out to 1/2" thick.
  7. Use cookie cutters to individual cut dog biscuits.
  8. Spray a cookie sheet with a light coating of cooking spray.
  9. Place cut out biscuits on the tray. (Don't worry if you need to crowd them as they don't spread out while baking.)
  10. Bake 30 minutes.
  11. Remove from the oven and transfer biscuits to cooling racks.
  12. After biscuits are cool, place them in a ziplock bag and refrigerate until serving.

Notes

Biscuits will keep in the refrigerator for about six months.

7.8.1.2
42

https://onedelightfullife.com/homemade-bacon-cheddar-dog-biscuits-and-frozen-yogurt-pupcakes/

onedelightfullife.com

Nutrition

Calories

385 cal

Fat

13 g

Carbs

55 g

Protein

18 g

Click Here For Full Nutrition, Exchanges, and My Plate Info


ESHA Logo

Recipe for Frozen Yogurt Pupcakes

Ingredients:

  • 1 c. non-fat grade A plain yogurt
  • 1/4 c. creamy peanut butter
  • 3 T. whole grain oats

Directions:

Combine all ingredients in a bowl. Transfer mixture into six baking cupcake liners. Freeze until solid (about 2 hours). frozen-yogurt-pupcakes

frozen-yogurt-pupcakes3

Remove paper liner before serving.

Happy tails, I mean trails.

Signature ODL 170x70px

Filed Under: DIY Tagged With: bacon, biscuit, canine, cheddar, dog adoption, dog biscuits, dog lovers, dog treats, frozen dog treats, frozen yogurt, pupcakes, puppy, shelter dog

Indoor Grilled Corn with White Cheddar Stuffed Sliders

July 21, 2016 by Vanessa Leave a Comment

You know it’s hot outside when you don’t even want to grill out.

The kind of heat that zaps your energy. Even your dog doesn’t even want to go out in it. My pup gave me crazy eyes when I tried to prompt her to walk to the mailbox with me mid-afternoon. It was 102 degree here yesterday and there was no way I was going to hang out over a hot flame to make one of my summer favorites, the All-American beef burger, for dinner. Then a bright idea popped into my head and I decided to use my cast iron ridged grill pan to make Indoor Grilled Corn with White Cheddar Stuffed Sliders. Problem solved.

When it’s a scorcher outside but you still want that charred flavor, bring the fun inside and enjoy some air conditioning (and maybe a cold one if you’re so inclined) while grilling on your stovetop. You’ll need a cast iron grill pan, which can be purchased at any big box store.

Reminiscent of a Juicy Lucy burger, this meaty slider is stuffed with white sharp cheddar and goes perfectly with caramelized grilled corn.

Selecting fresh corn on the cob should be pretty easy, right? All the pros tell you to peel back the top of the husk and peek inside at the kernels. If the kernels are bright in color and huge, buy it. If you have a minute, remove the husks while standing in the produce section to guarantee that you’re buying healthy-looking corn.

Tip: Having trouble shucking every bit of the husk silks from the corn before grilling? Rub a new toothbrush along the kernels to remove easily remove the silk.

After cleaning the corn, brush each cob with a light coating of olive oil. Bring the grill pan to medium high heat, turn on the vent hood on low, and grab those tongs. You’re about to make amazing caramelized corn indoors!

Since you're grilling indoors on the stove, remember to turn on the hood vent on low to catch any smoke.

Top your finished corn with a quick mixture of garlic chive butter. I used 3 T. butter with 1 tsp chopped fresh chives and 1/4 tsp garlic powder.

Top your corn with any one of the season butters as listed in this butter recipe post.
Top your corn with any one of the season butters as listed in my previous post Flavored Butter 4 Ways.

Below is my recipe for White Cheddar Stuffed Sliders, which are incredibly juicy and easy to make after removing the corn from the grill pan. (You will need to reduce the heat to medium.) Prep this hamburger mixture recipe in advance of grilling the corn. Use a tip I learned from Ina Garten and mix the burger mixture with a fork and not your hands. Nobody likes a burger with the texture of a hockey puck and this tip leaves your burgers fat and juicy. Using 90-10 ground beef is less fattening so you won’t have as much smoke when grilling indoors.

Leave space between your sliders.

Do you see that glorious oozy goozy cheddar cheese?

grilled-corn-hamburgers6
Clearly we like ketchup at our house. The only dill pickle that makes my plate is a Claussen kosher dill spear. Their jars are packed with flavorful pickles that snap when you eat them. Save any leftover pickle juice for Saturday morning bloody marys.


onedelightfullife.com

Serves 4 sliders

Indoor Grilled Corn with White Cheddar Stuffed Sliders

If you can't take the heat, get away from the grill? Try caramelized grilled corn and juicy burgers made INDOORS!

20 minPrep Time

20 minCook Time

40 minTotal Time

Save RecipeSave Recipe
Print Recipe

My Recipes
My Lists
My Calendar

Ingredients

  • 1 lb. 90/10 ground beef
  • 2 T. French's Chardonnay dijon mustard
  • 2 diced garlic cloves
  • 1 T Grill Mates Hamburger Seasoning
  • 2 chopped slices of sharp white aged cheddar
  • heavy pinch pepper
  • 2 T. butter

Instructions

  1. Add all of your ingredients, except the butter and the cheese, into a large bowl.
  2. Slowly incorporate the ingredients using a fork-not your hands!
  3. After thoroughly mixed remove the fork and form four small burger patties with your hands.
  4. Create a divot inside each patty with your thumb and place cheddar cheese inside.
  5. Fold up the edges of each patty around the burger to re-form it. Set all four patties on a plate.
  6. Brush butter on the outside of both sides of each patty.
  7. Heat a indoor cast iron grill pan to medium heat.
  8. Place all patties in the pan and grill 5-6 minutes on each side. Don't move them until you can do so easily when nudging a spatula underneath them. Don't smash the burger with the back of the spatula either!

Notes

You can swap any cheese for the sharp white aged cheddar.
The brushed on butter gives the sliders a bit of a crispier outside crust.

7.8.1.2
34

https://onedelightfullife.com/indoor-grilled-corn-with-white-cheddar-stuffed-sliders/

onedelightfullife.com

Nutrition

Calories

285 cal

Fat

25 g

Carbs

2 g

Protein

14 g

Click Here For Full Nutrition, Exchanges, and My Plate Info


ESHA Logo

Signature ODL 170x70px


Filed Under: Dinner, Grilled, Taste Tagged With: cast iron, cheddar, cheese, chive, Claussen, dill pickle, garlic, garlic chive butter, grilled, grilled corn, grilling, hamburgers, herb butter, indoor grilling, sharp white cheddar, sliders, summer grilling

Primary Sidebar

SEARCH

Ammar
Hello! I'm Vanessa. Welcome to One Delightful Life, a blog created to add more delight to your life with delicious recipes, travel destinations, and lifestyle improvement ideas. Thanks for exploring my blog!

Archives

Contact Us

  • Email
    info@onedelightfullife.com

Popular Posts

Back to School Brain Breaks12K Total Shares
Going Underground in Historic Ellinwood, KansasGoing Underground in Historic Ellinwood, Kansas7K Total Shares
Weston, Missouri: Making the Most of a Weekend VisitWeston, Missouri: Making the Most of a Weekend Visit2K Total Shares
Cucumber Lime Vodka SplashCucumber Lime Vodka Splash1K Total Shares
Sun Palace: A Couples-Only Resort in Cancun, MexicoSun Palace: A Couples-Only Resort in Cancun, Mexico508 Total Shares
  • About
  • Taste
  • Travel
  • DIY
  • Contact
  • Lifestyle
  • 100 Things to Do in Wichita Before You Die

© 2023 · onedelightfullife ·