Isn’t it nice when someone else does the cooking for you? If you’re seeking a place to dine in Wichita, Kansas, that serves health-conscious menu items made with fresh ingredients, this list of restaurants checks all the boxes.
I’m a native Wichitan who has dined at each of these locally owned eateries, and I can vouch for their menu selections, customer service, and overall value.
10 Places to Dine in Wichita, Kansas, If You’re Seeking Healthier Menu Options
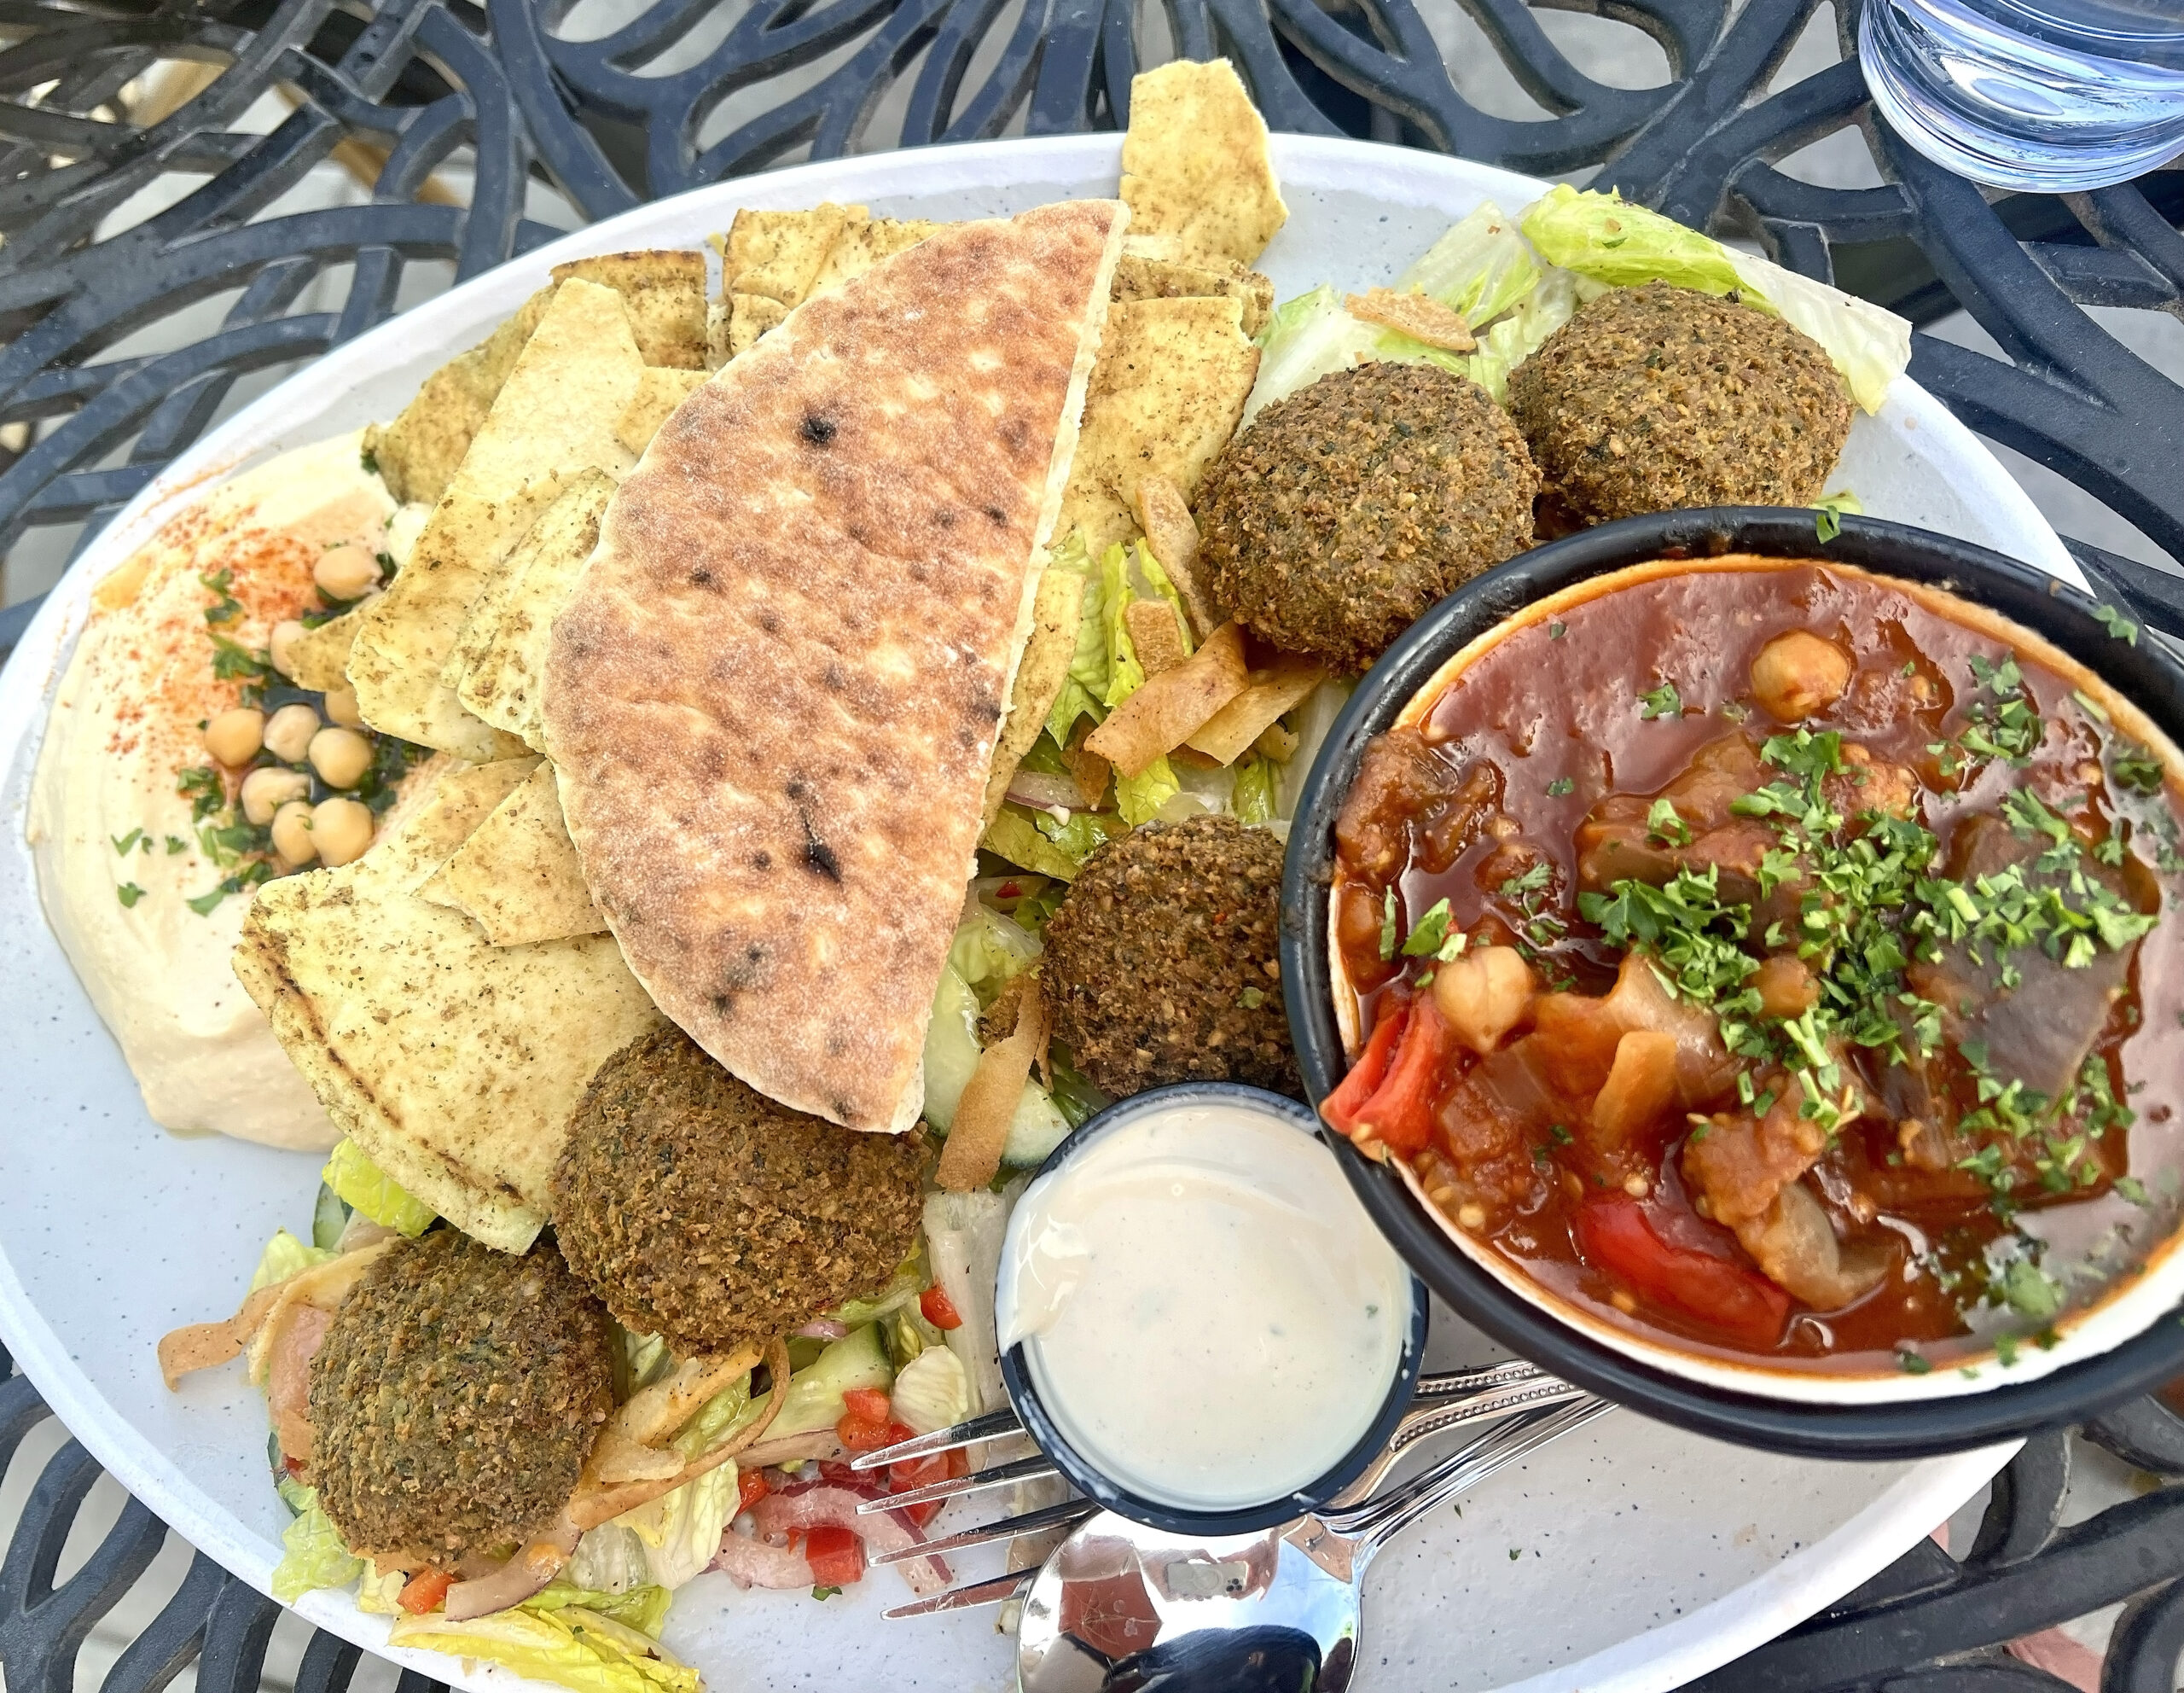
Meddys
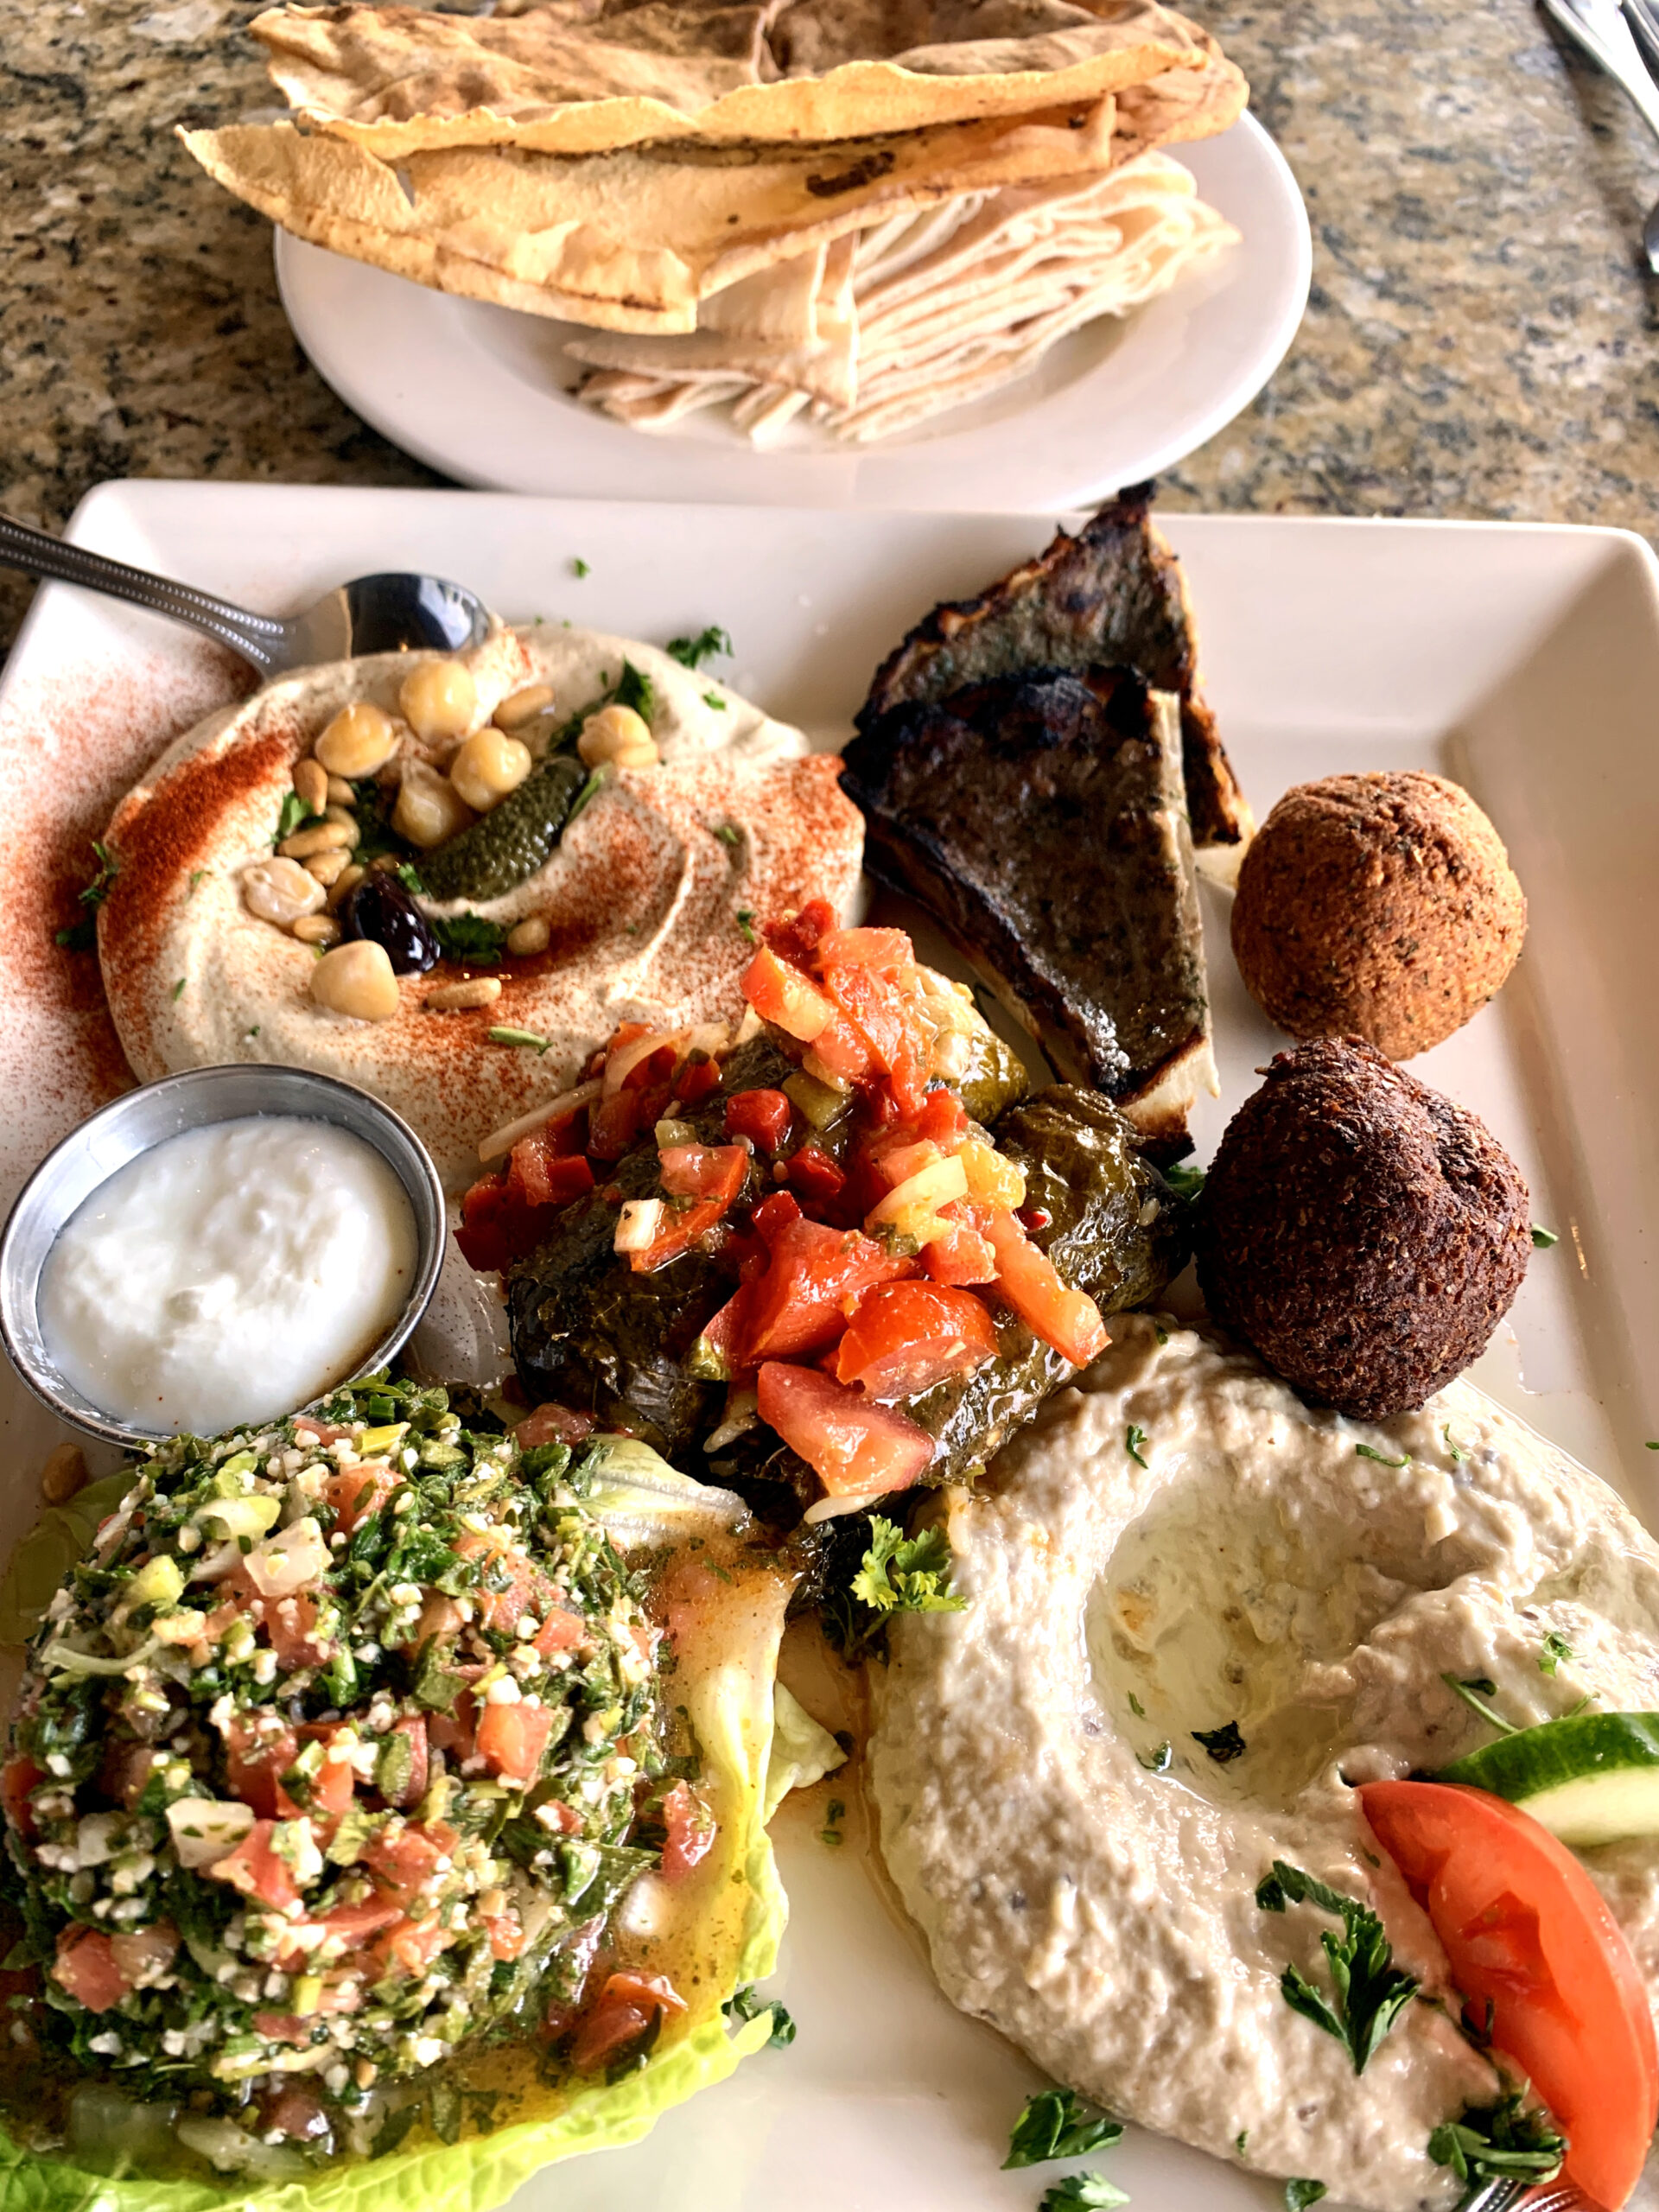
Fans of Mediterranean cuisine rave about Meddys (4 Locations) for its menu of entrees prepared fresh daily. Their shawarmas, filled with marinated meats with tomato onion relish, try to steal the show, but platters like the Fancy Falafel served with a salad of your choice, creamy hummus, and Spanish eggplant steal the show.
One may not expect a fast-casual restaurant kitchen to produce healthy selections, including Grilled Citrus Salmon and Tabbouleh Salad, but they’d be surprised.
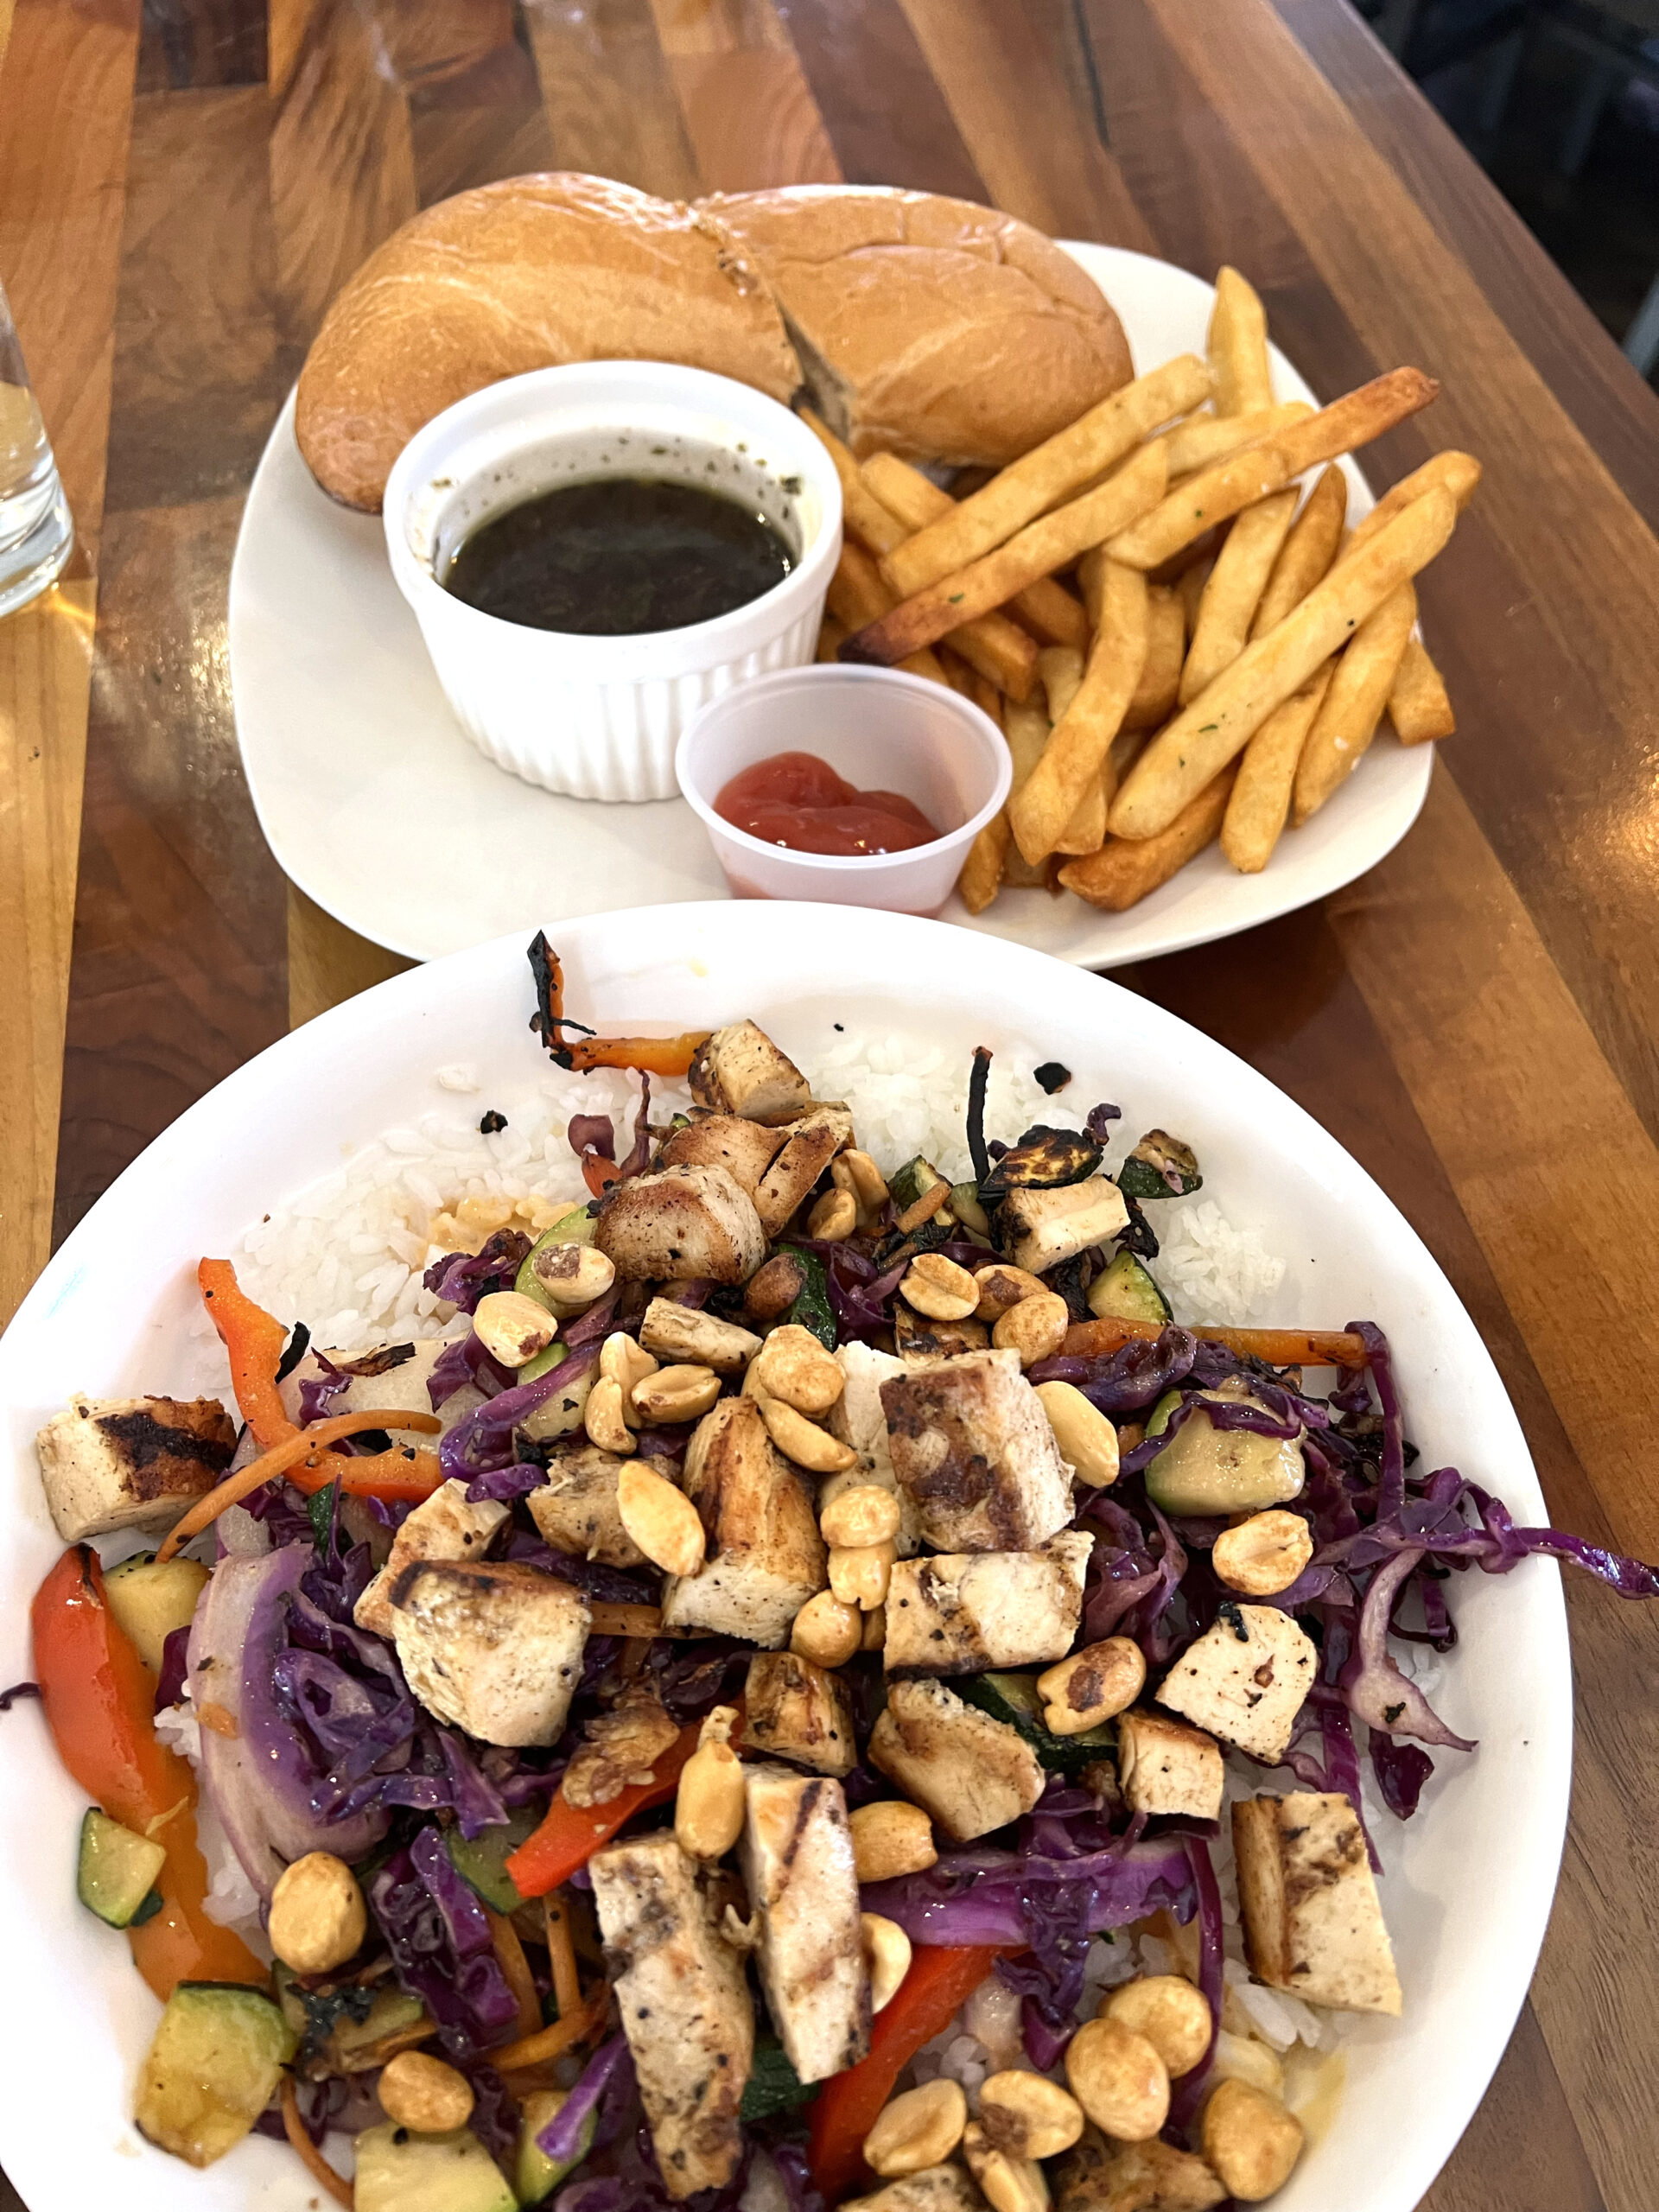
The Kitchen
Are you craving a protein bowl or a mega-sized signature salad? The Kitchen (725 E. Douglas), known for chef-prepared lunch and dinner entrees, delivers flavor-forward meals focusing on creativity.
The owner/chef Natasha Gandi-Rue is the real deal. She won Food Network’s Grocery Games, proving she can curate ingredients and produce award-winning dishes. Customize your salad or order one of six signature salads. “Good-for-you-delicious” Buddha Bowls, like the Thai bowl, arrive at the table heaped high with chicken and vegetables.
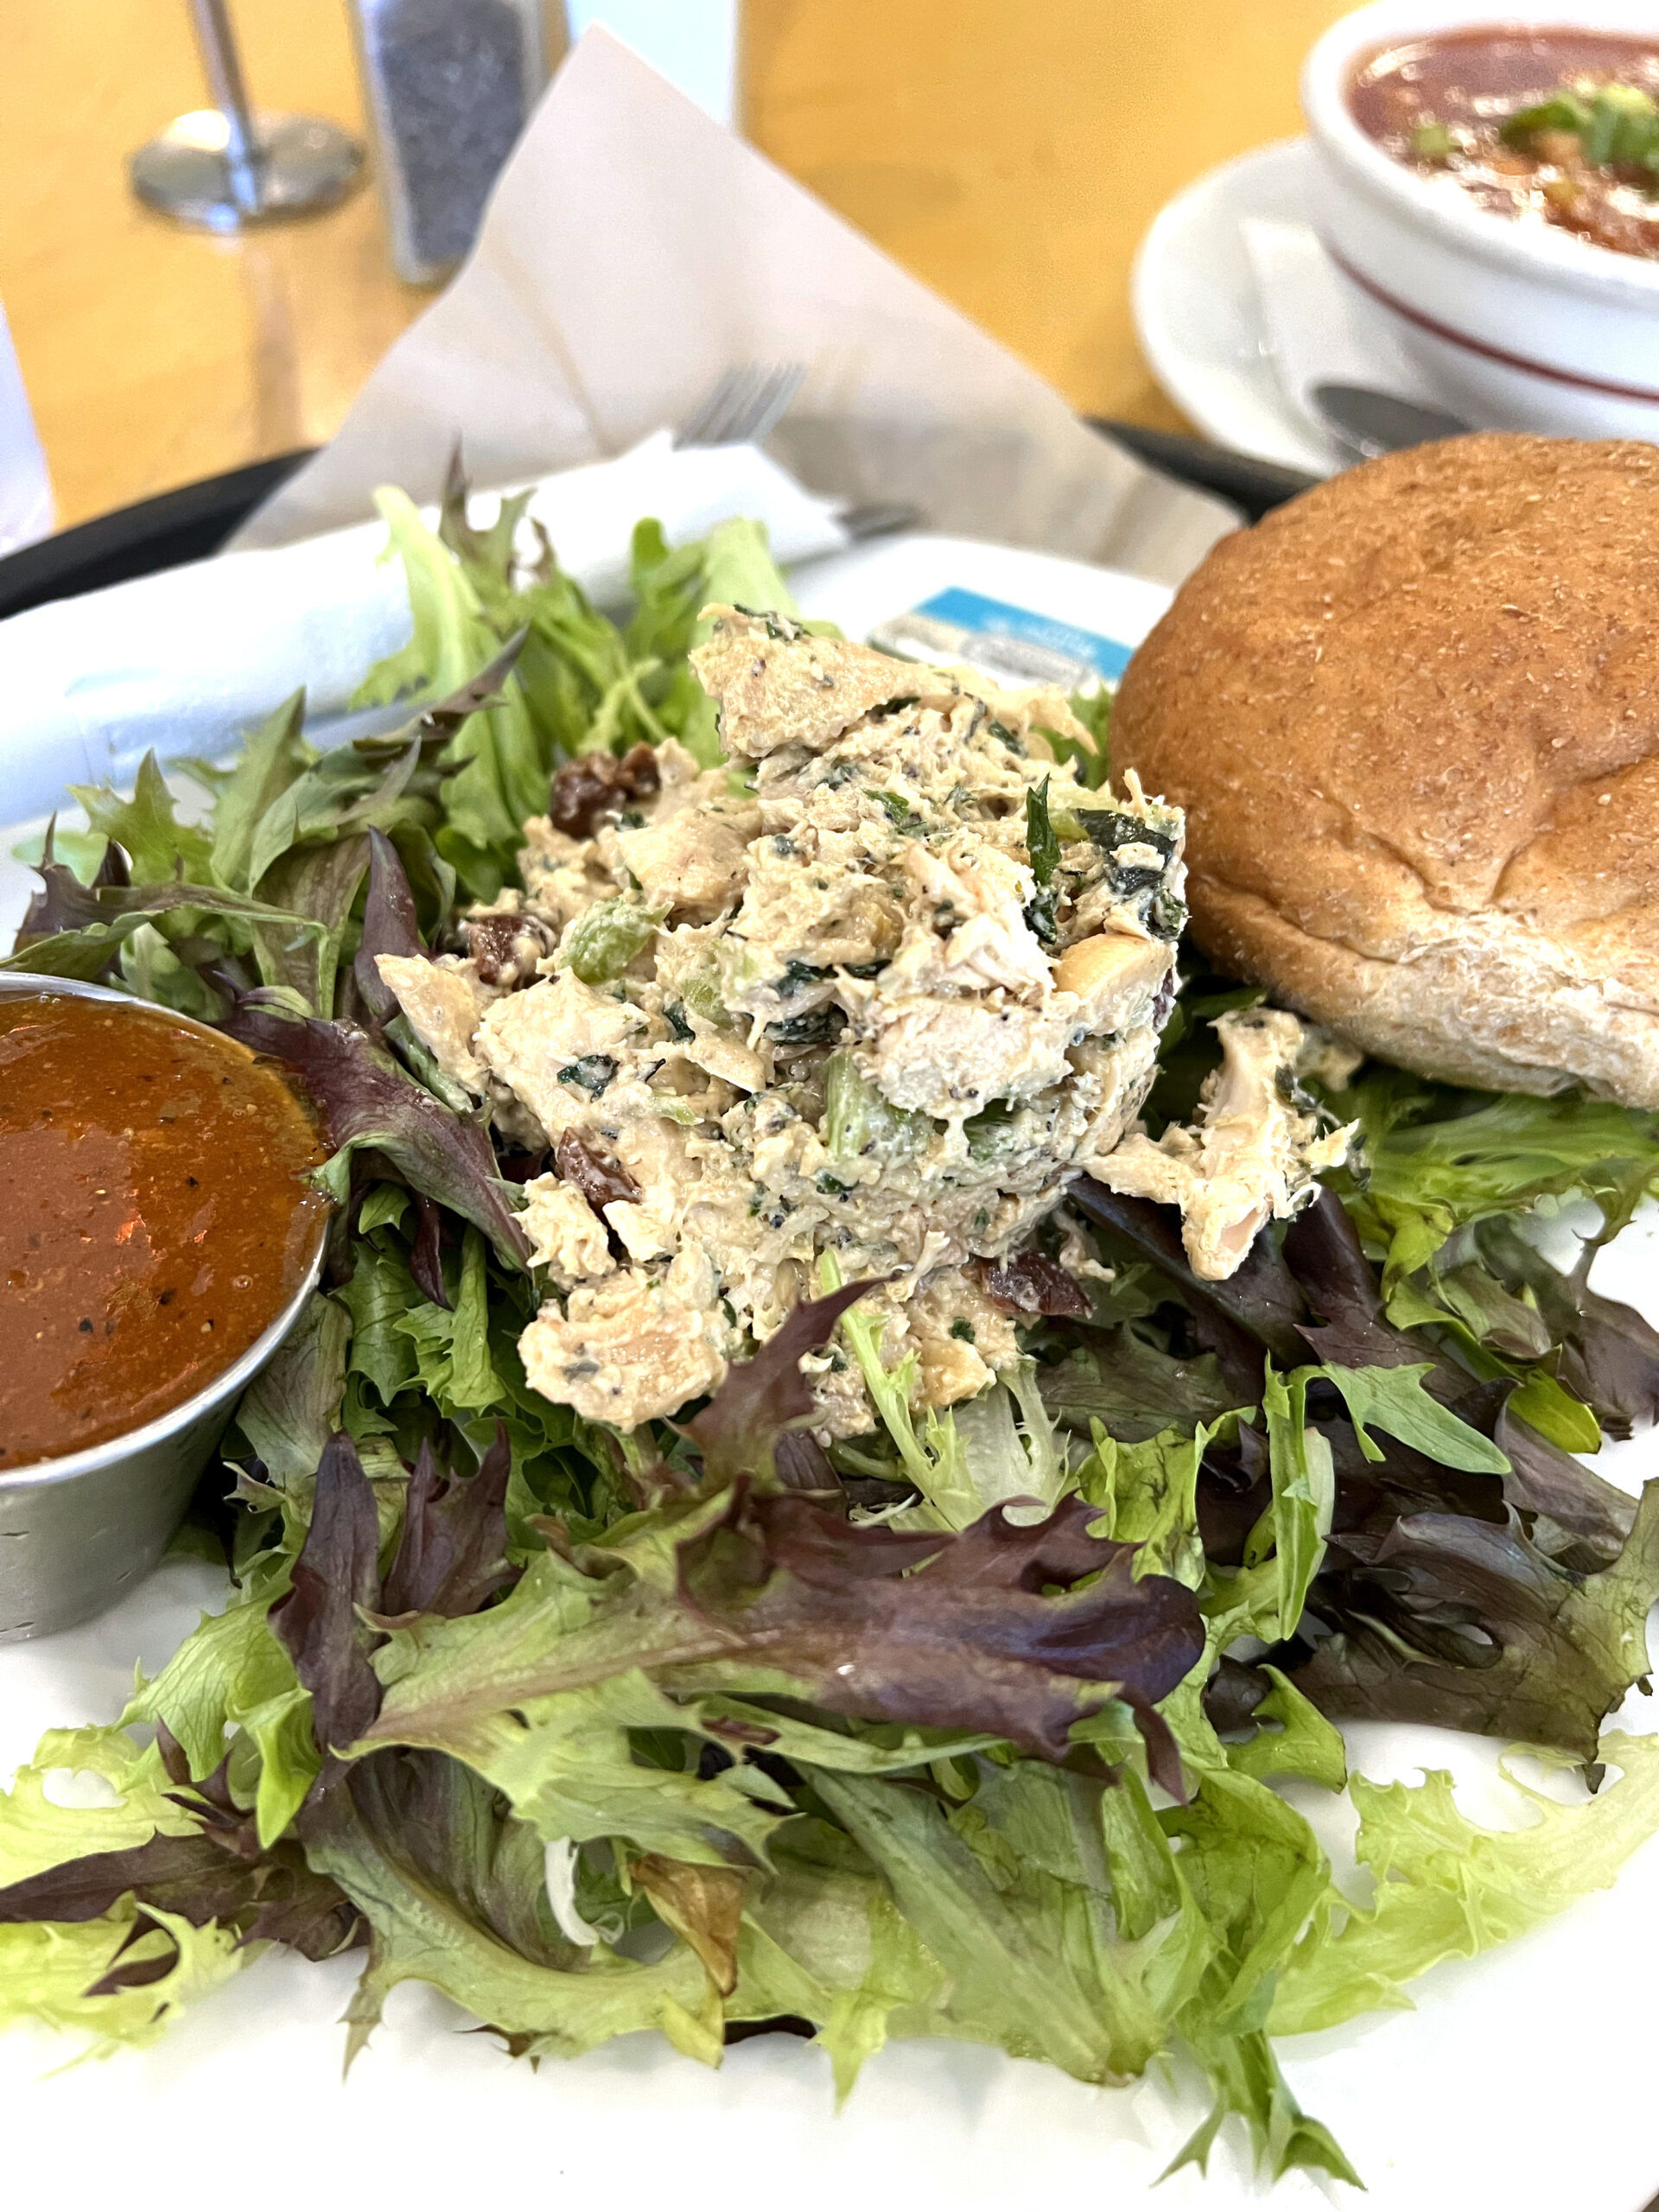
Tanya’s Soup Kitchen
The soup, salad, or sandwich combo doesn’t get much better than at Tanya’s Soup Kitchen (1725 E. Douglas). Each recipe is handcrafted in-house using only the freshest ingredients available. Plus, the chalkboard near the register features a list of four seasonal soups, which are available as a flight of 4.5-ounce servings.
Ten signature sandwiches are equally loved by vegetarians and carnivores alike. Delilah’s Light Lunch, prepared with sliced chicken breast, apricot relish, sharp cheddar and romaine and served between a onion kaiser roll, is top-notch.
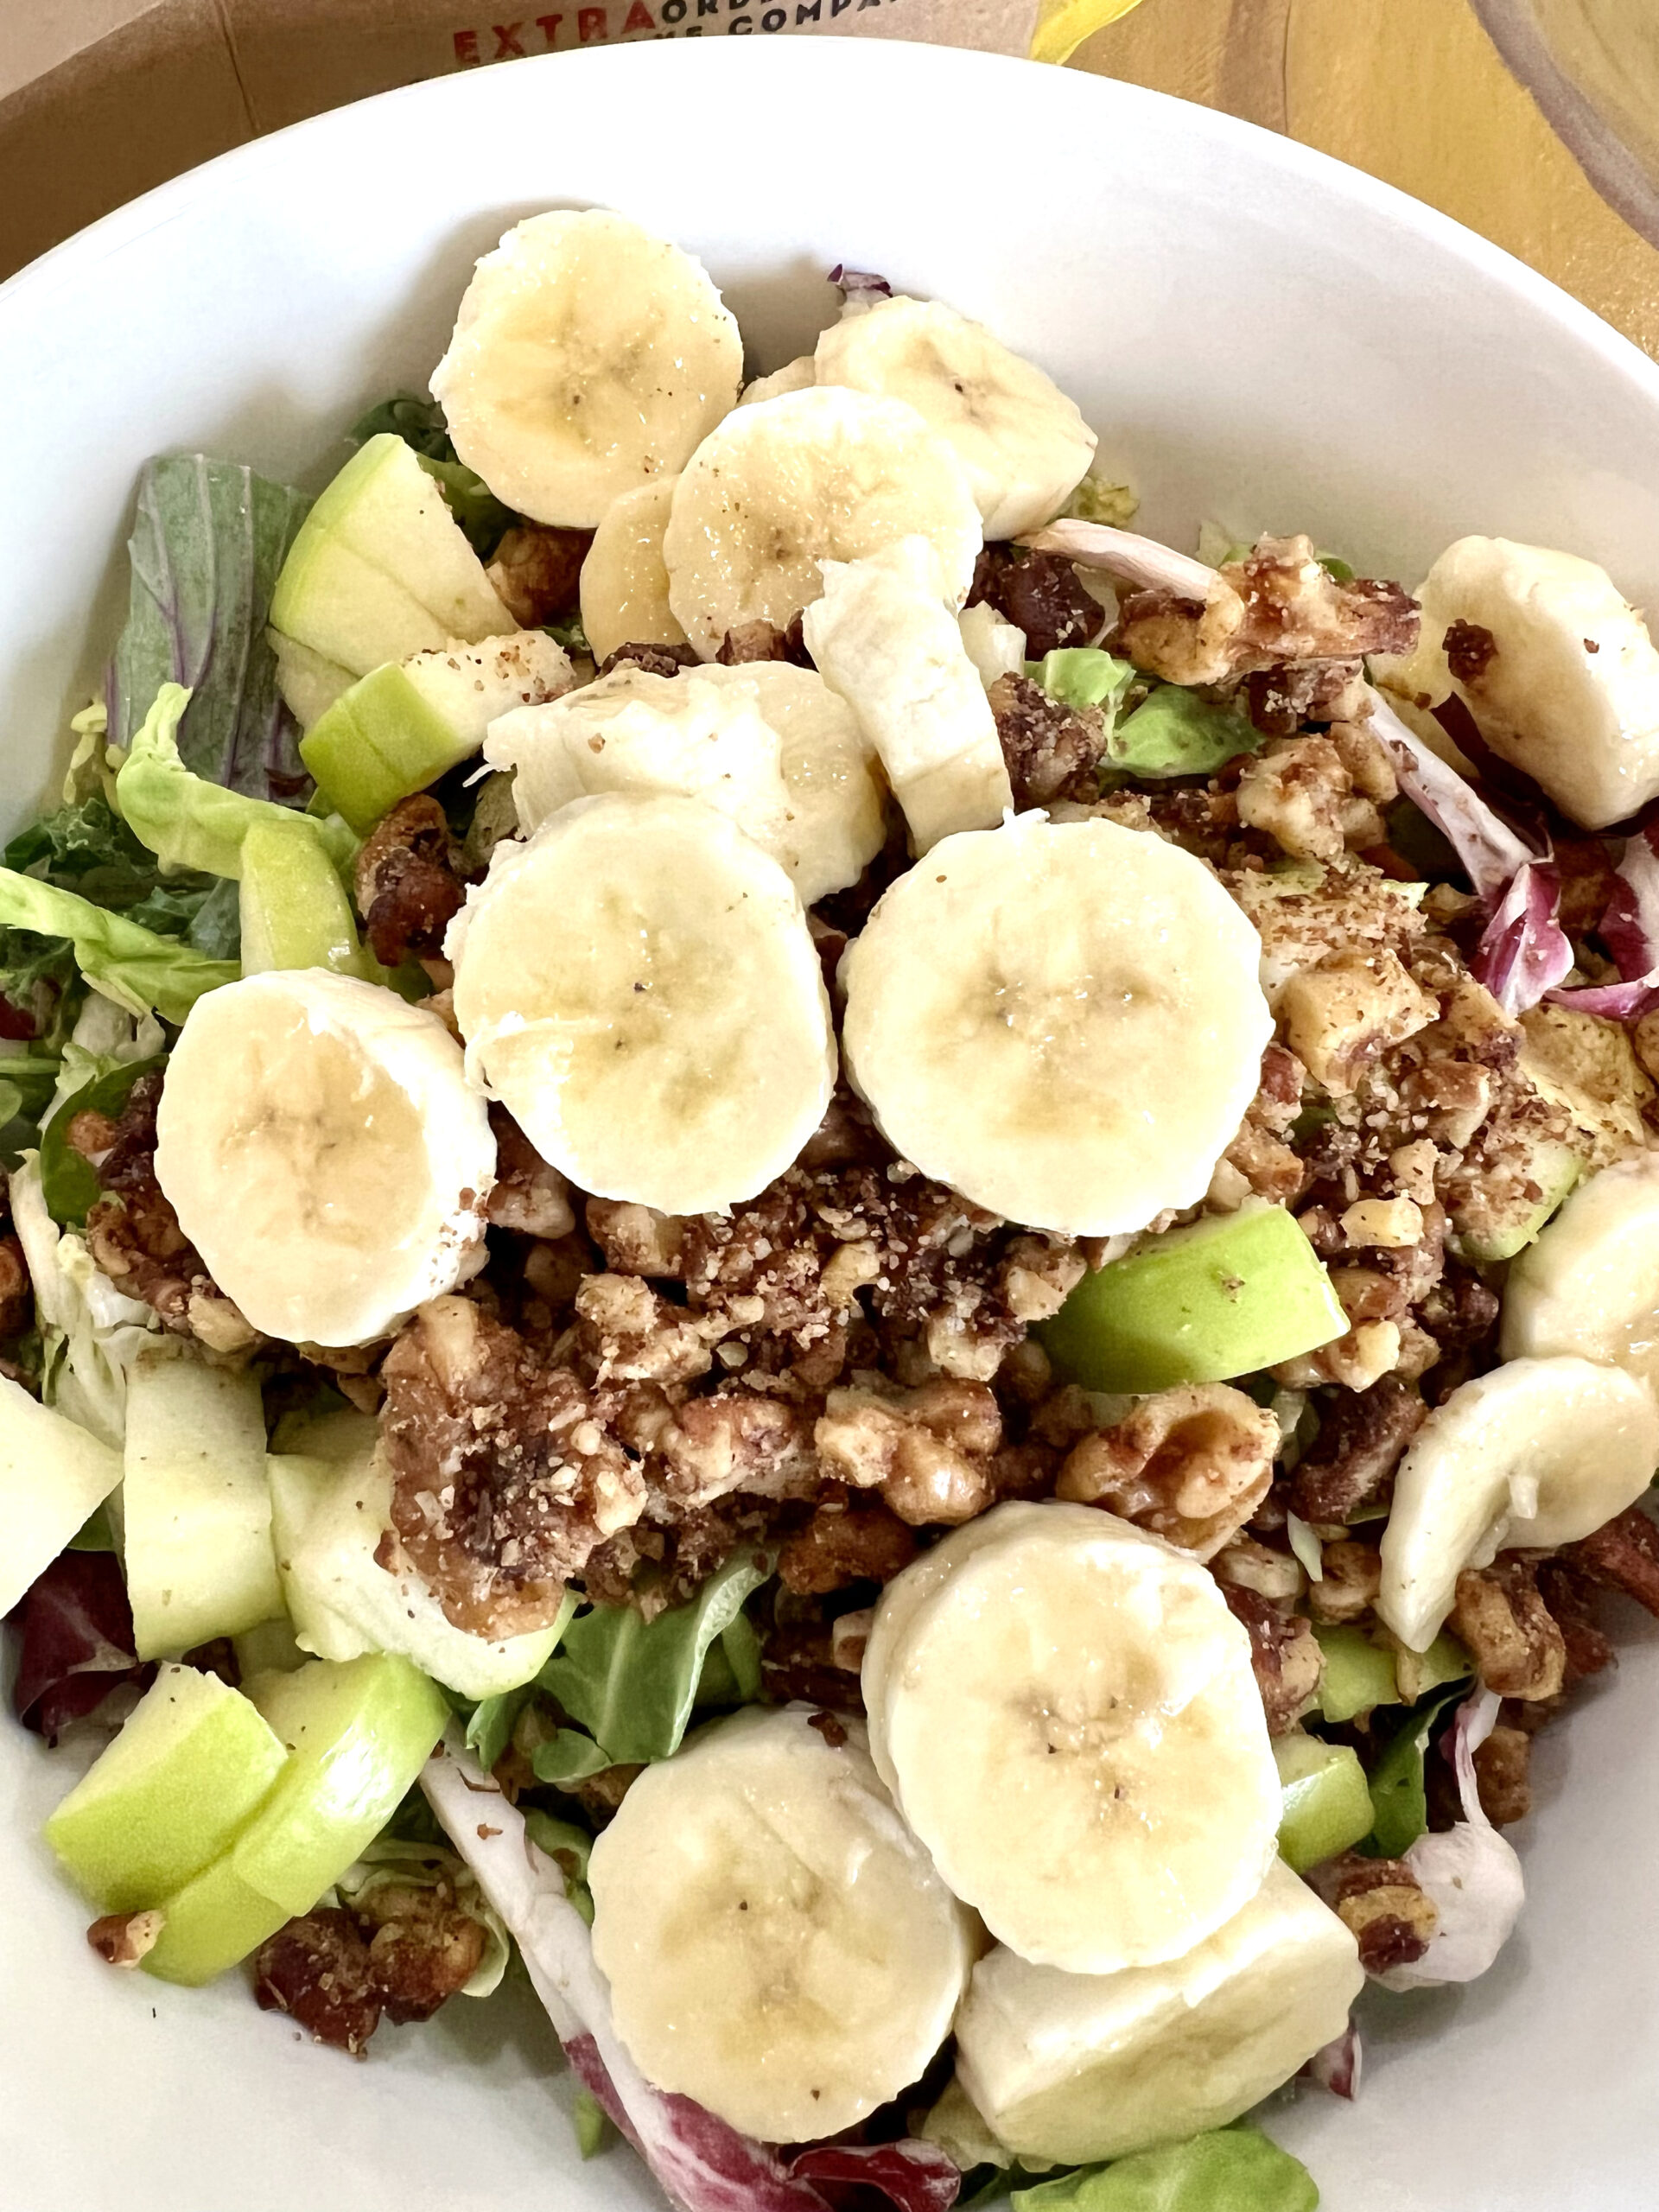
Sunflour Collective & Cafe
Sunflour Collective & Cafe’s (6120 W. Central) focus is to serve health-focused and plant-forward using whole foods and in-season ingredients. Expect the unexpected on the menu. Balsamic Fig Salad, Pistachio Basil Pesto Grilled Cheese, and Cheesy Spinach sandwich are menu favorites that you won’t find served elsewhere in the city.
Order appropriately so you leave room for a scrumptious 4″ ExtraOrdinary Cheesecake prepared gluten-free but full of flavor.
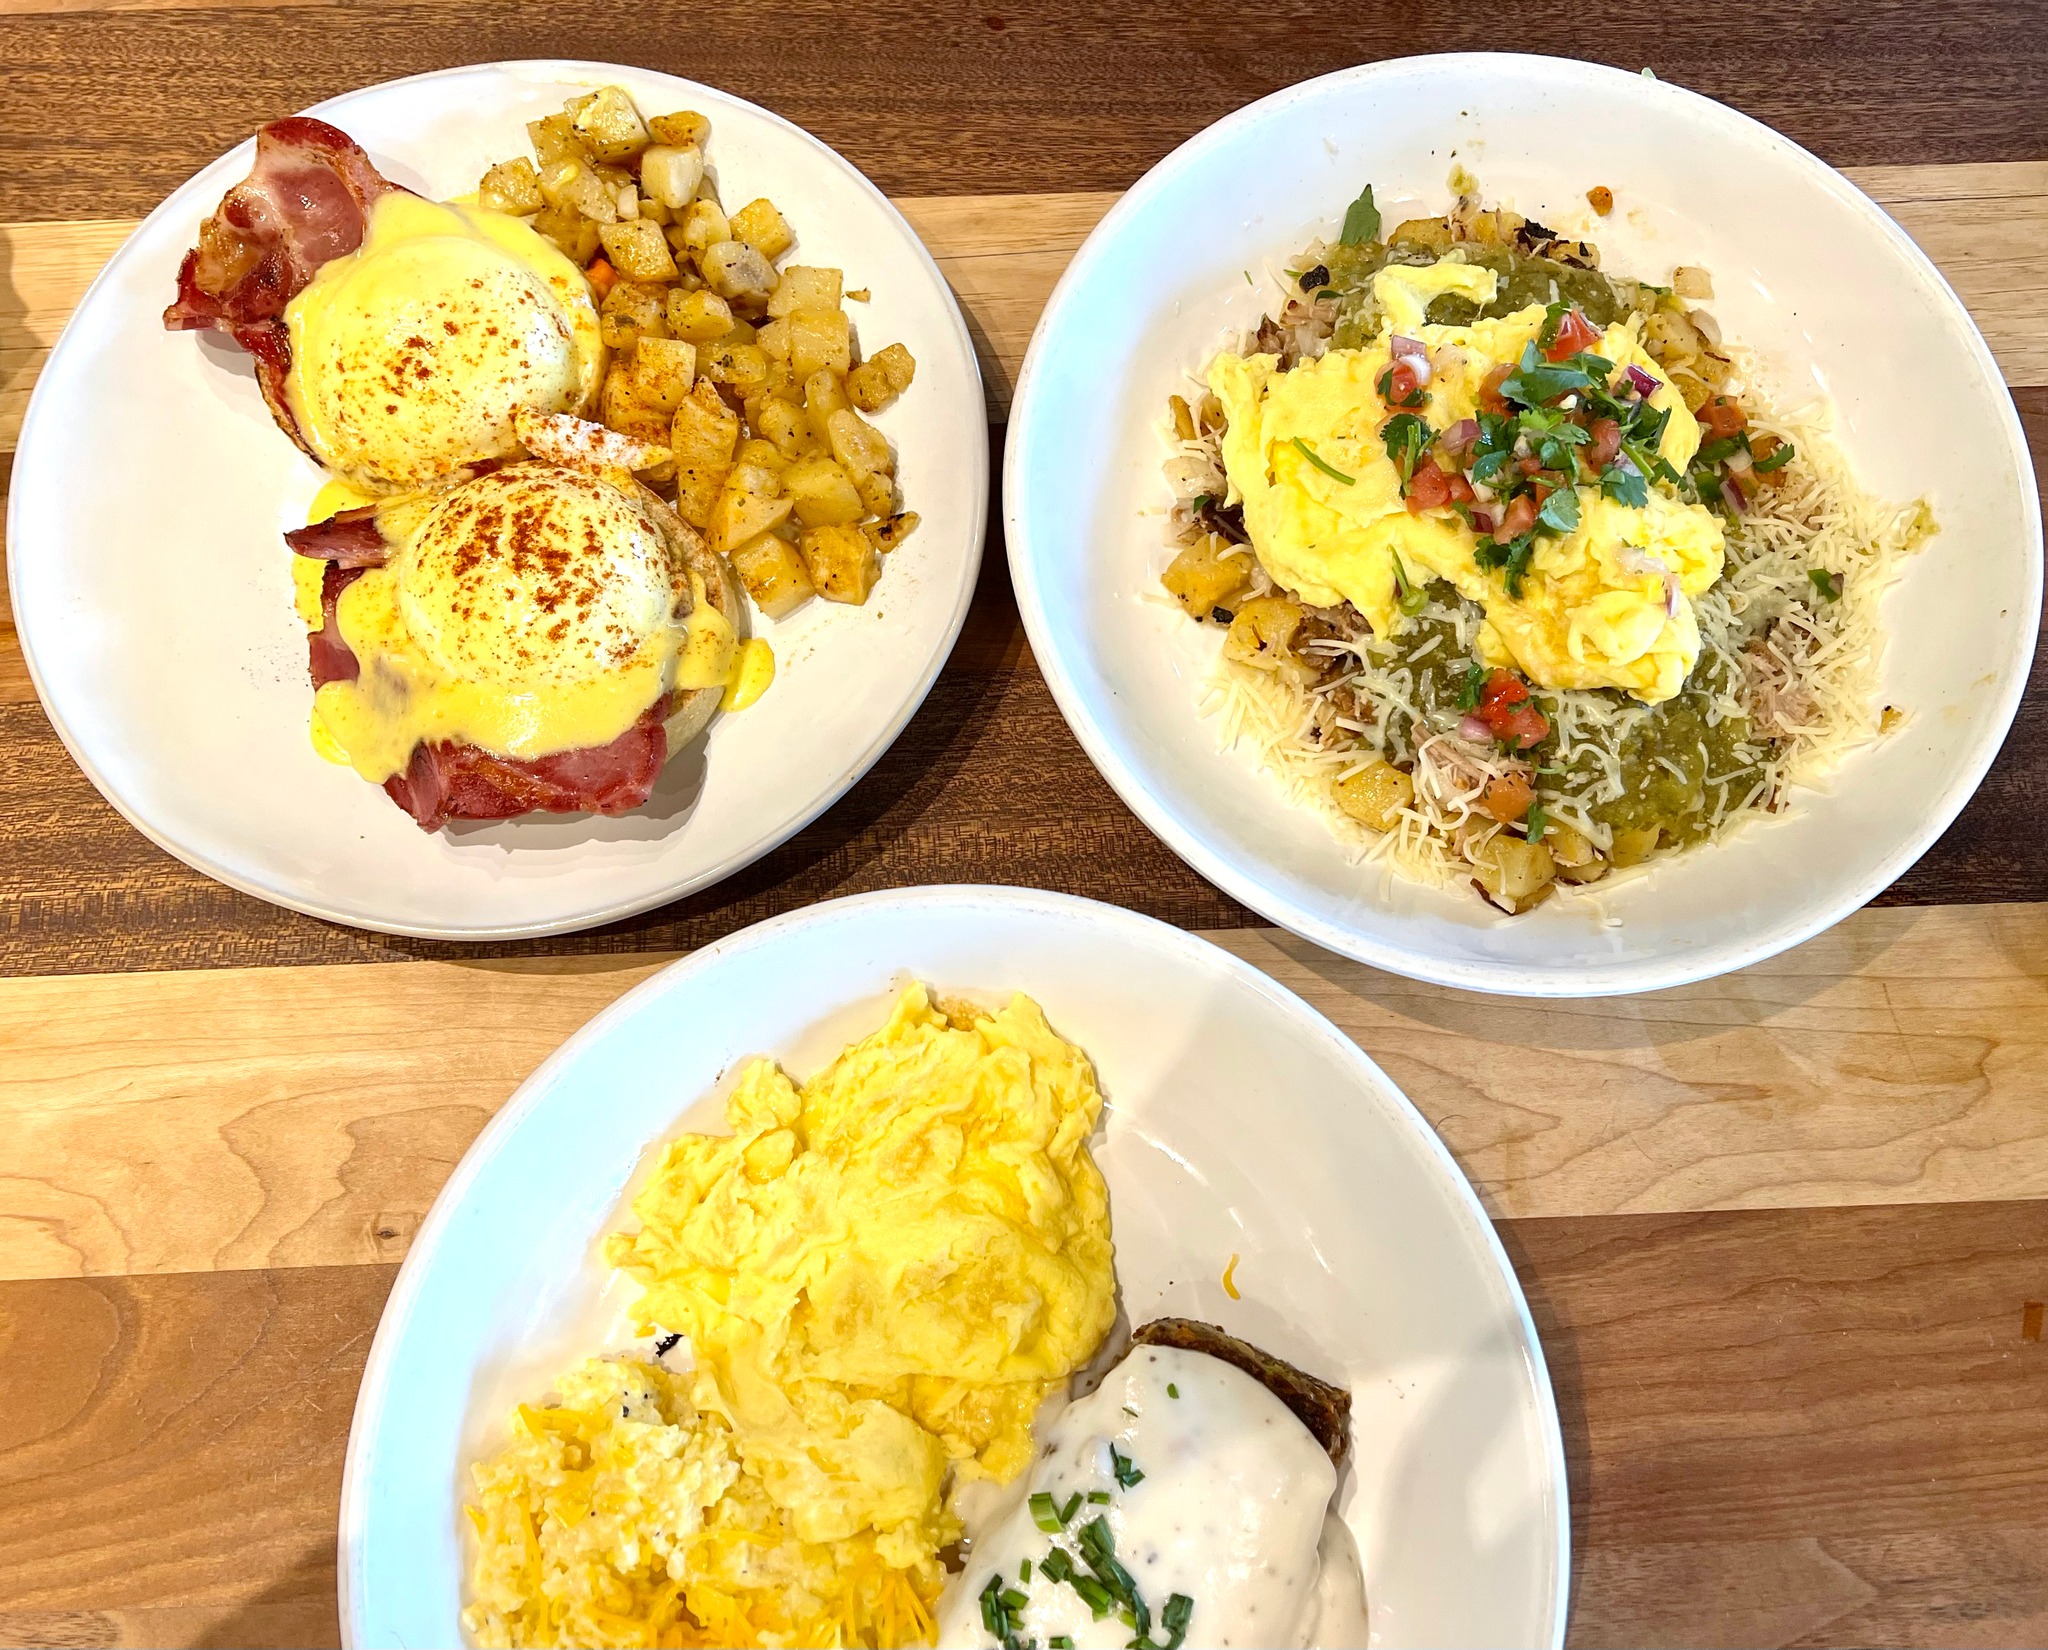
HomeGrown
If someone asks me if I want to dine for breakfast, only one restaurant that comes to mind, HomeGrown (3 locations). Perfectly ripe fruit, vegetables, and organic eggs are used in early-morning classic dishes like Salsa Verde Pork & Egg, The Ironman, and West Coast Wake Up.
For lunch, diners can choose from a short list of Sammies served on optional gluten-free bread, or Power BLT salad or bowl of soup.
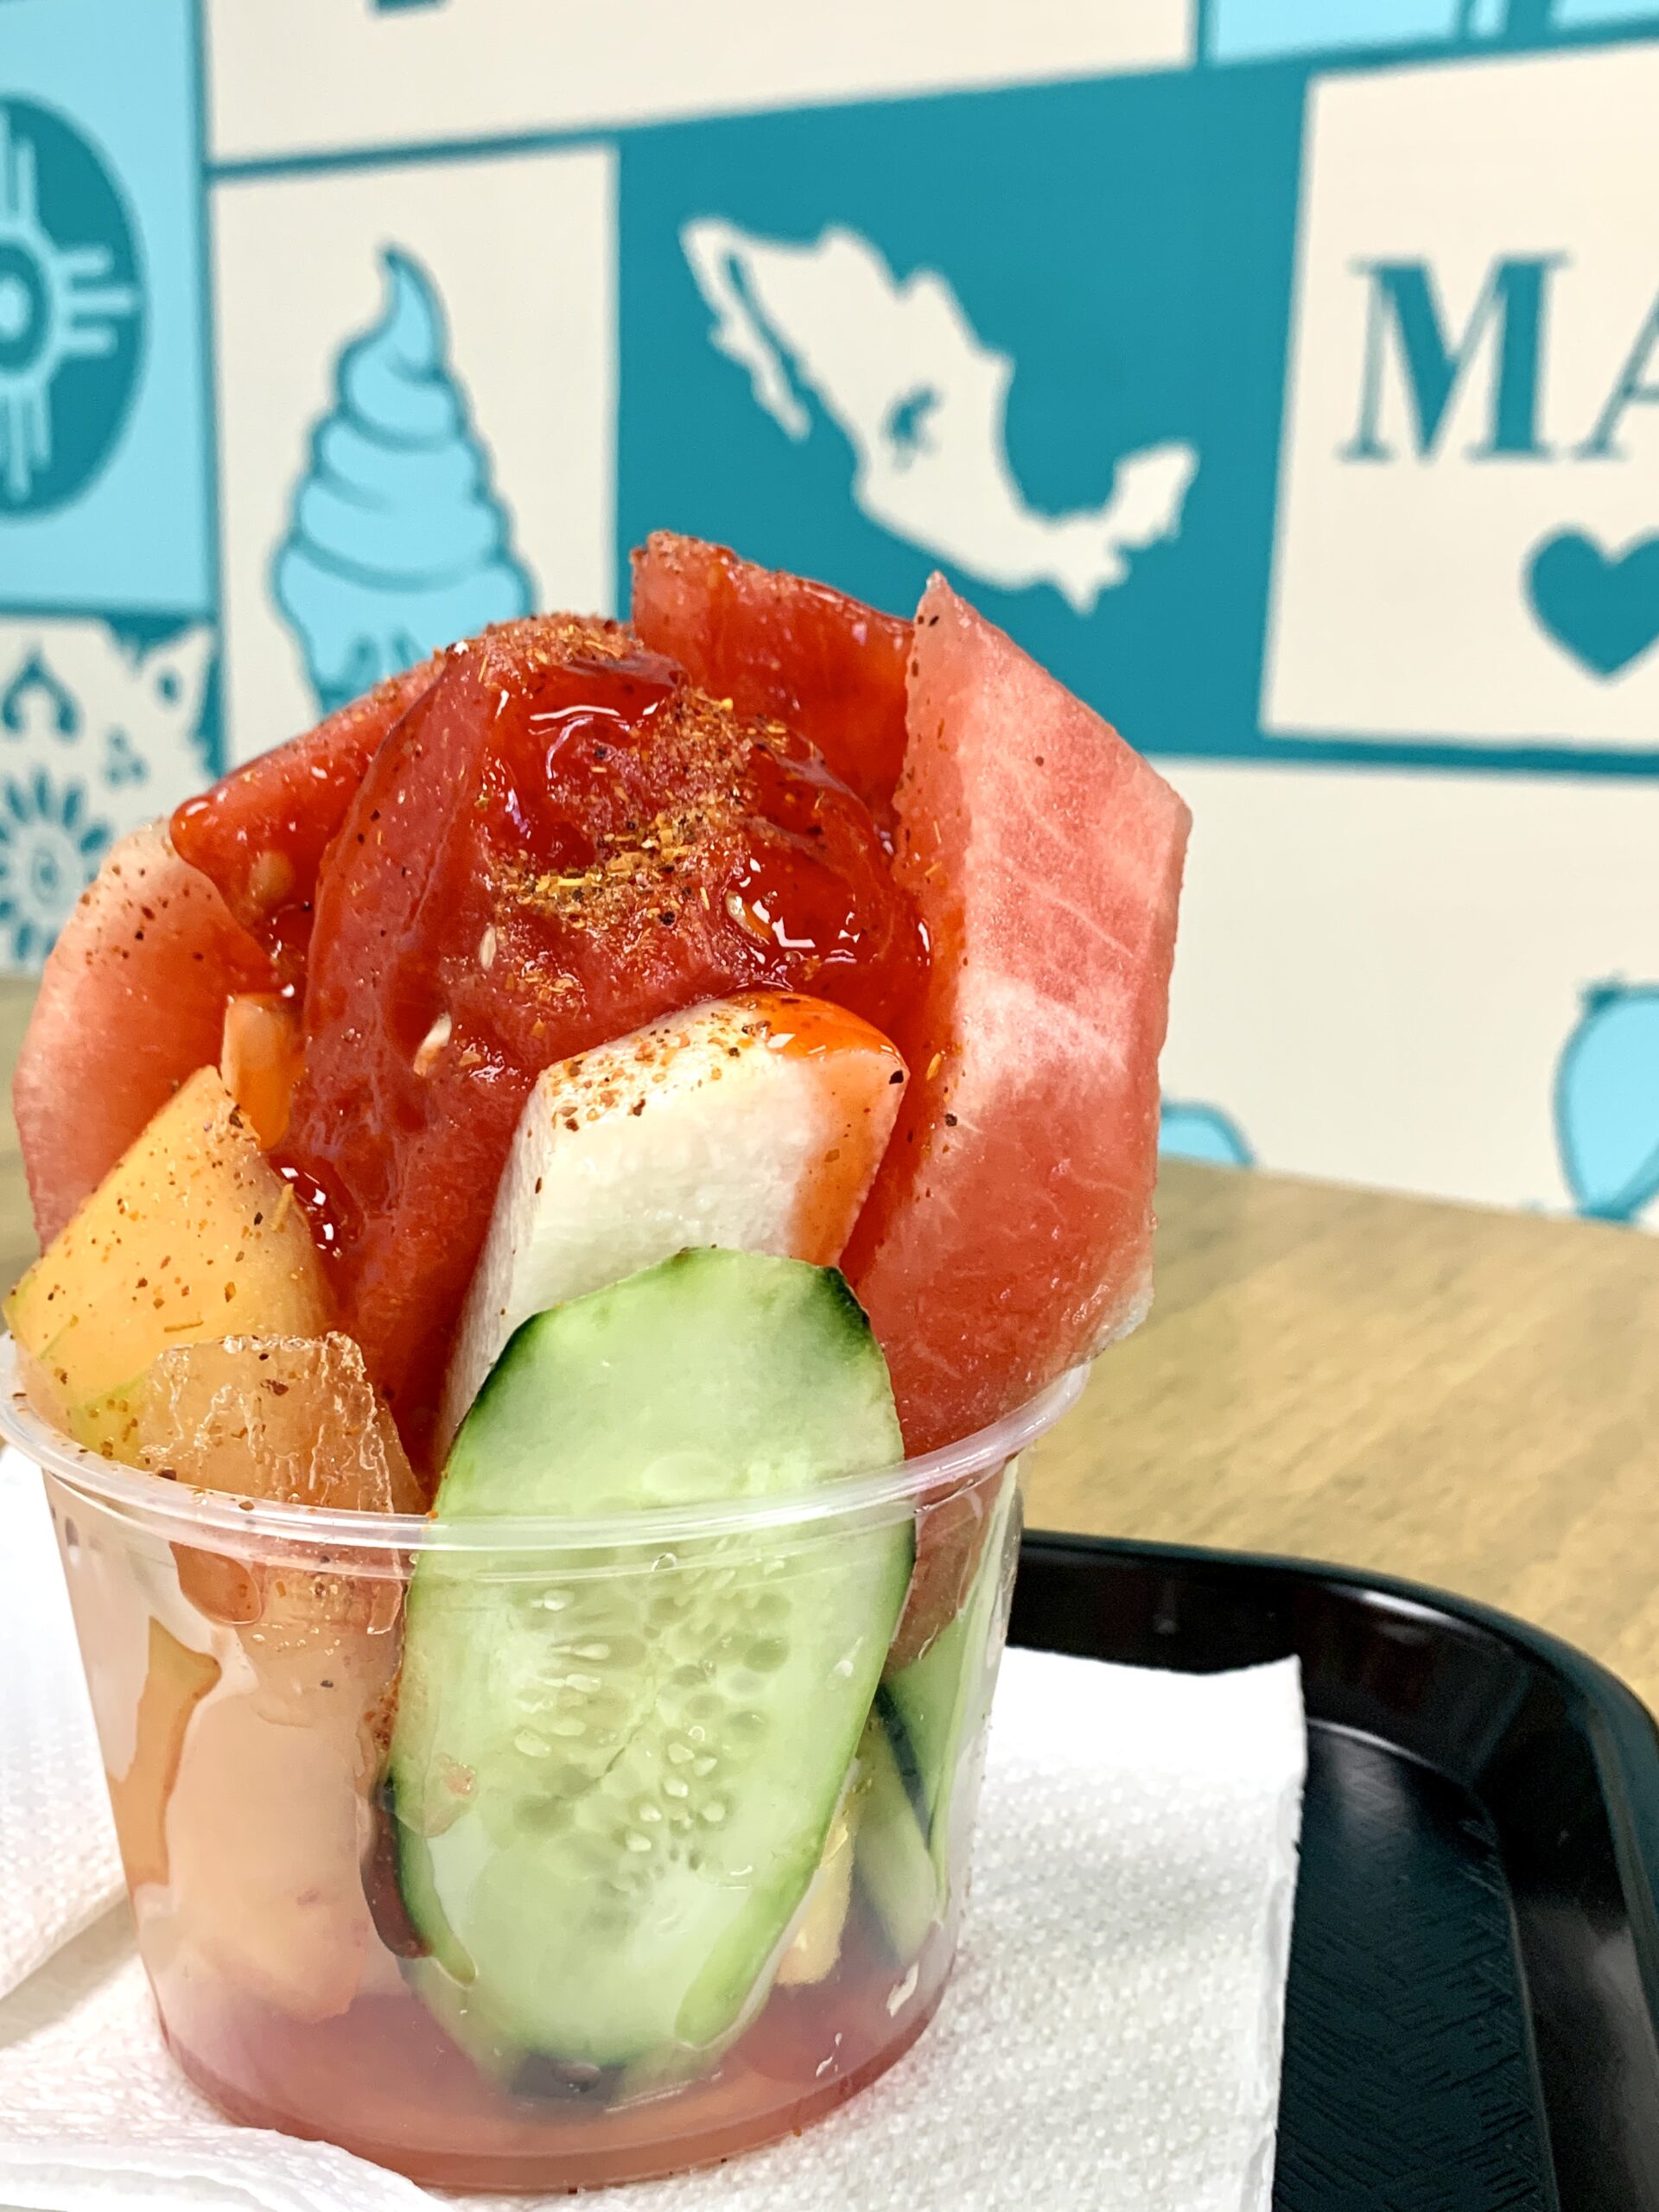
Las Delicias ICT
Not every meal needs to be a big, hearty one, and that’s why I like visiting Las Delicias ICT (1052 N. Waco) when I’m craving lighter fare. Employees stand over cutting boards, slicing watermelon, cucumber, and jicama to add to Mexican Fruit Cups drizzled with sweet but tangy Chamoy sauce.
If you’re seeking a small lunch entree, order an open-faced tostada or shrimp ceviche cup and pair it with a glass of freshly made aqua fresca.
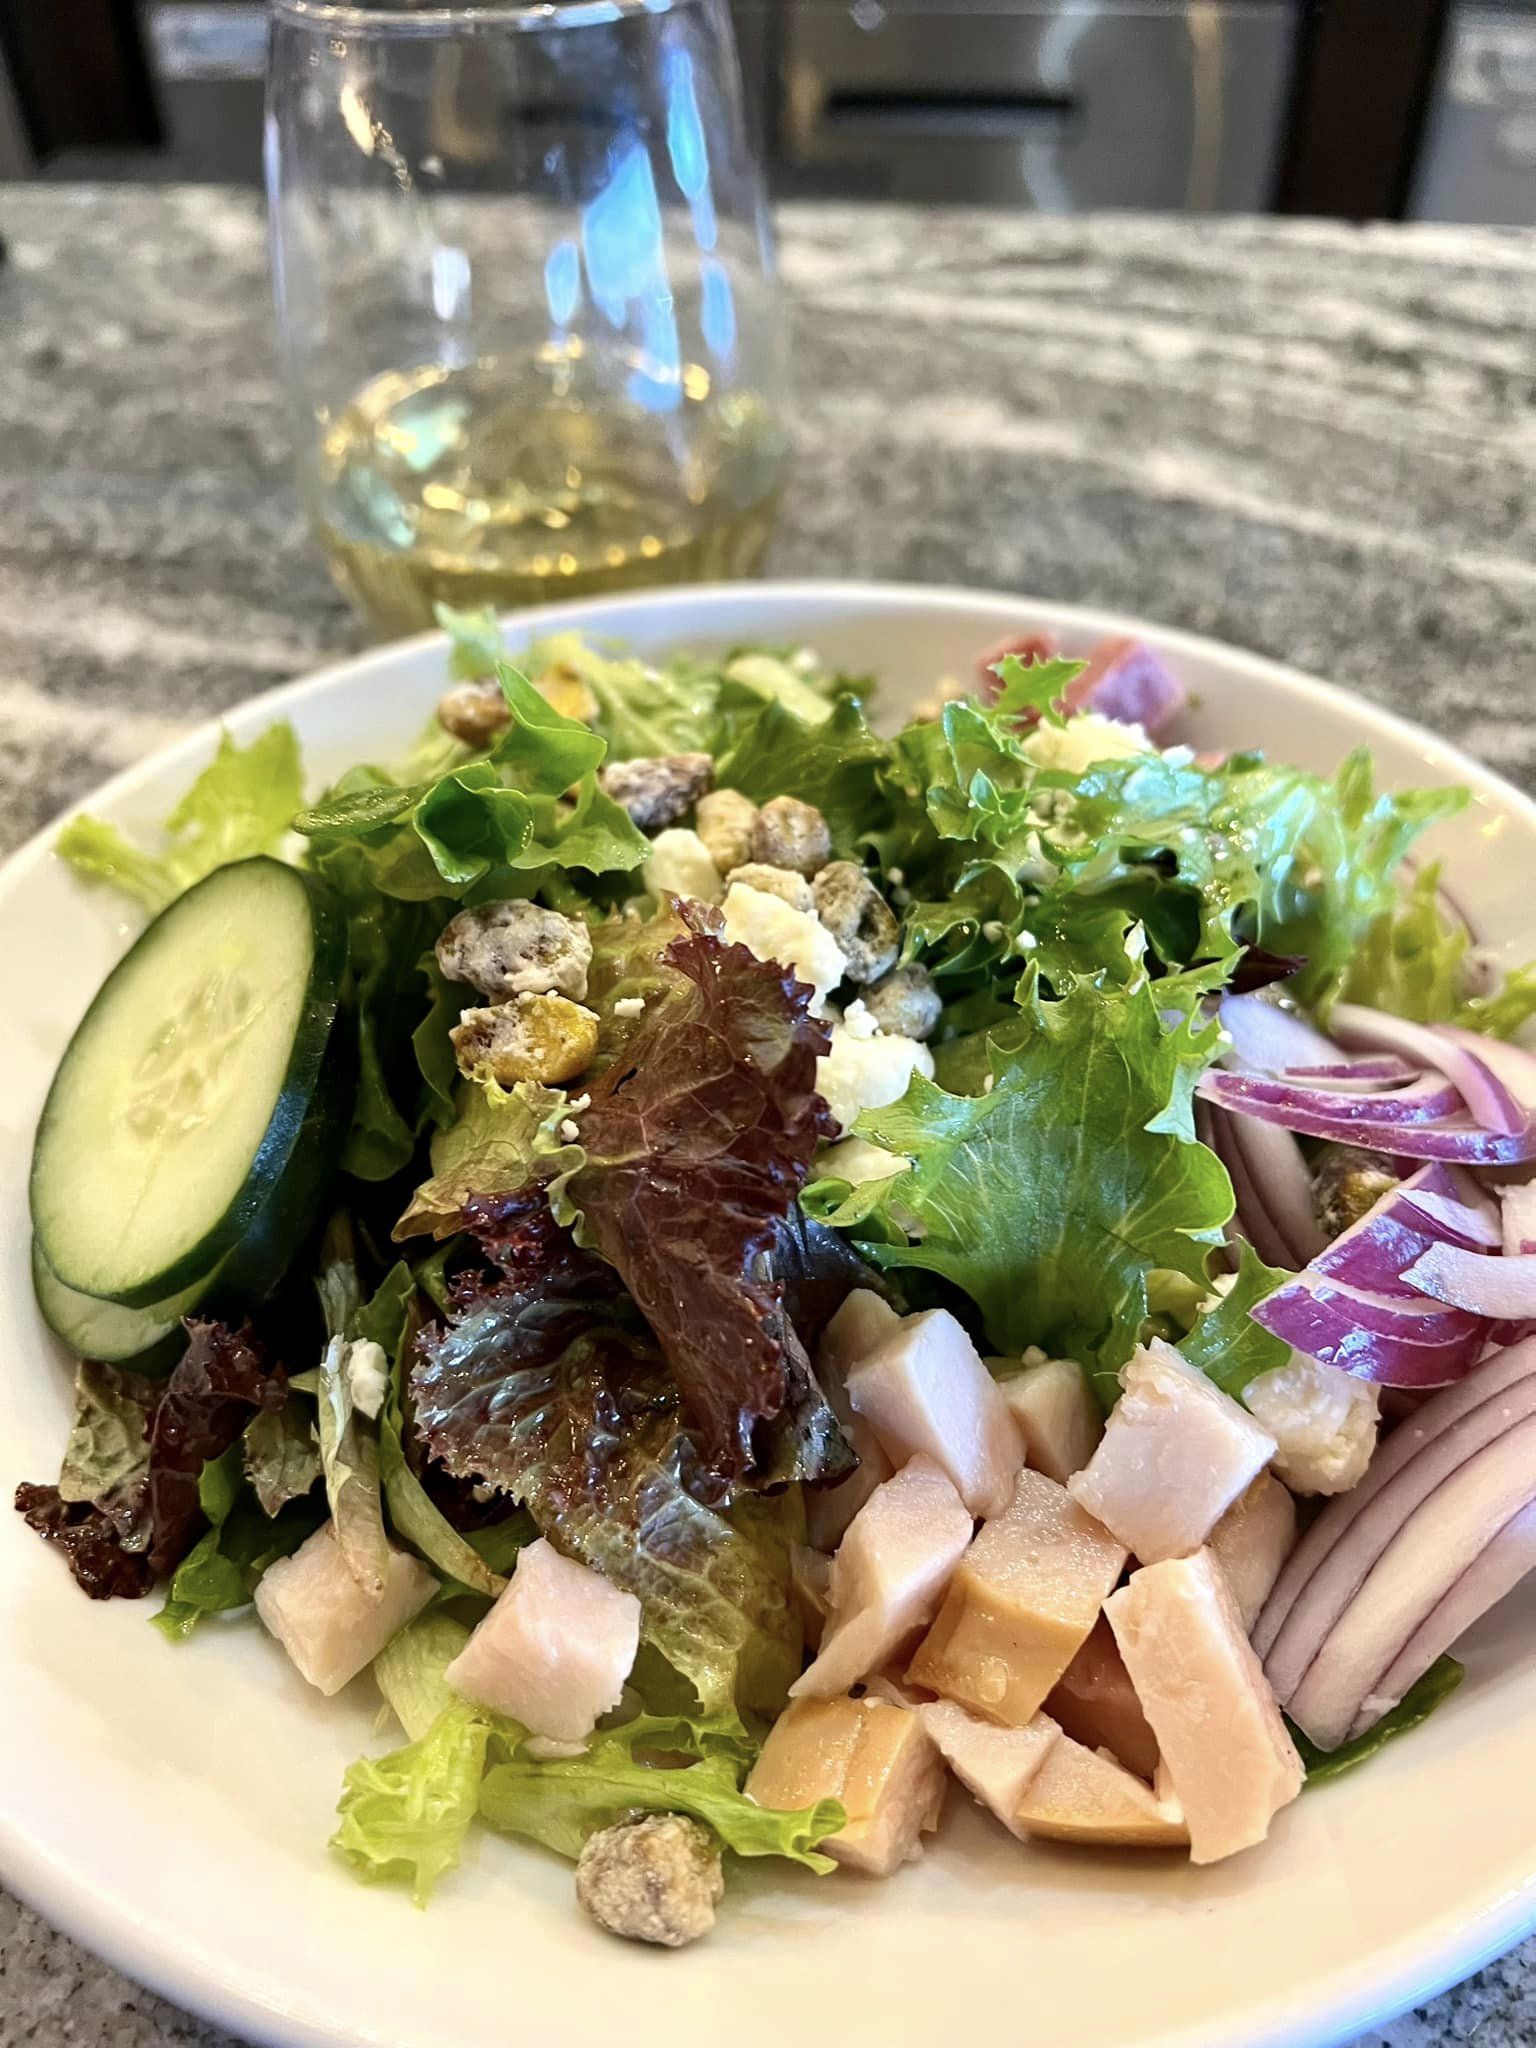
Oak & Pie
This might sound odd, but I don’t visit Oak & Pie (2244 N. Greenwich) for their pizza. For me, it’s all about the salads served in unexpectedly large portions with ingredients like candied pistachios, red wine vinaigrette, and hard salami.
Most pizza joints serve a Caesar salad or a basic garden salad, but you find far better on the menu at Oak & Pie. If you need help deciding which one to choose, order the Farmer’s Market Salad or an extra-large House Salad layered with unique ingredients.
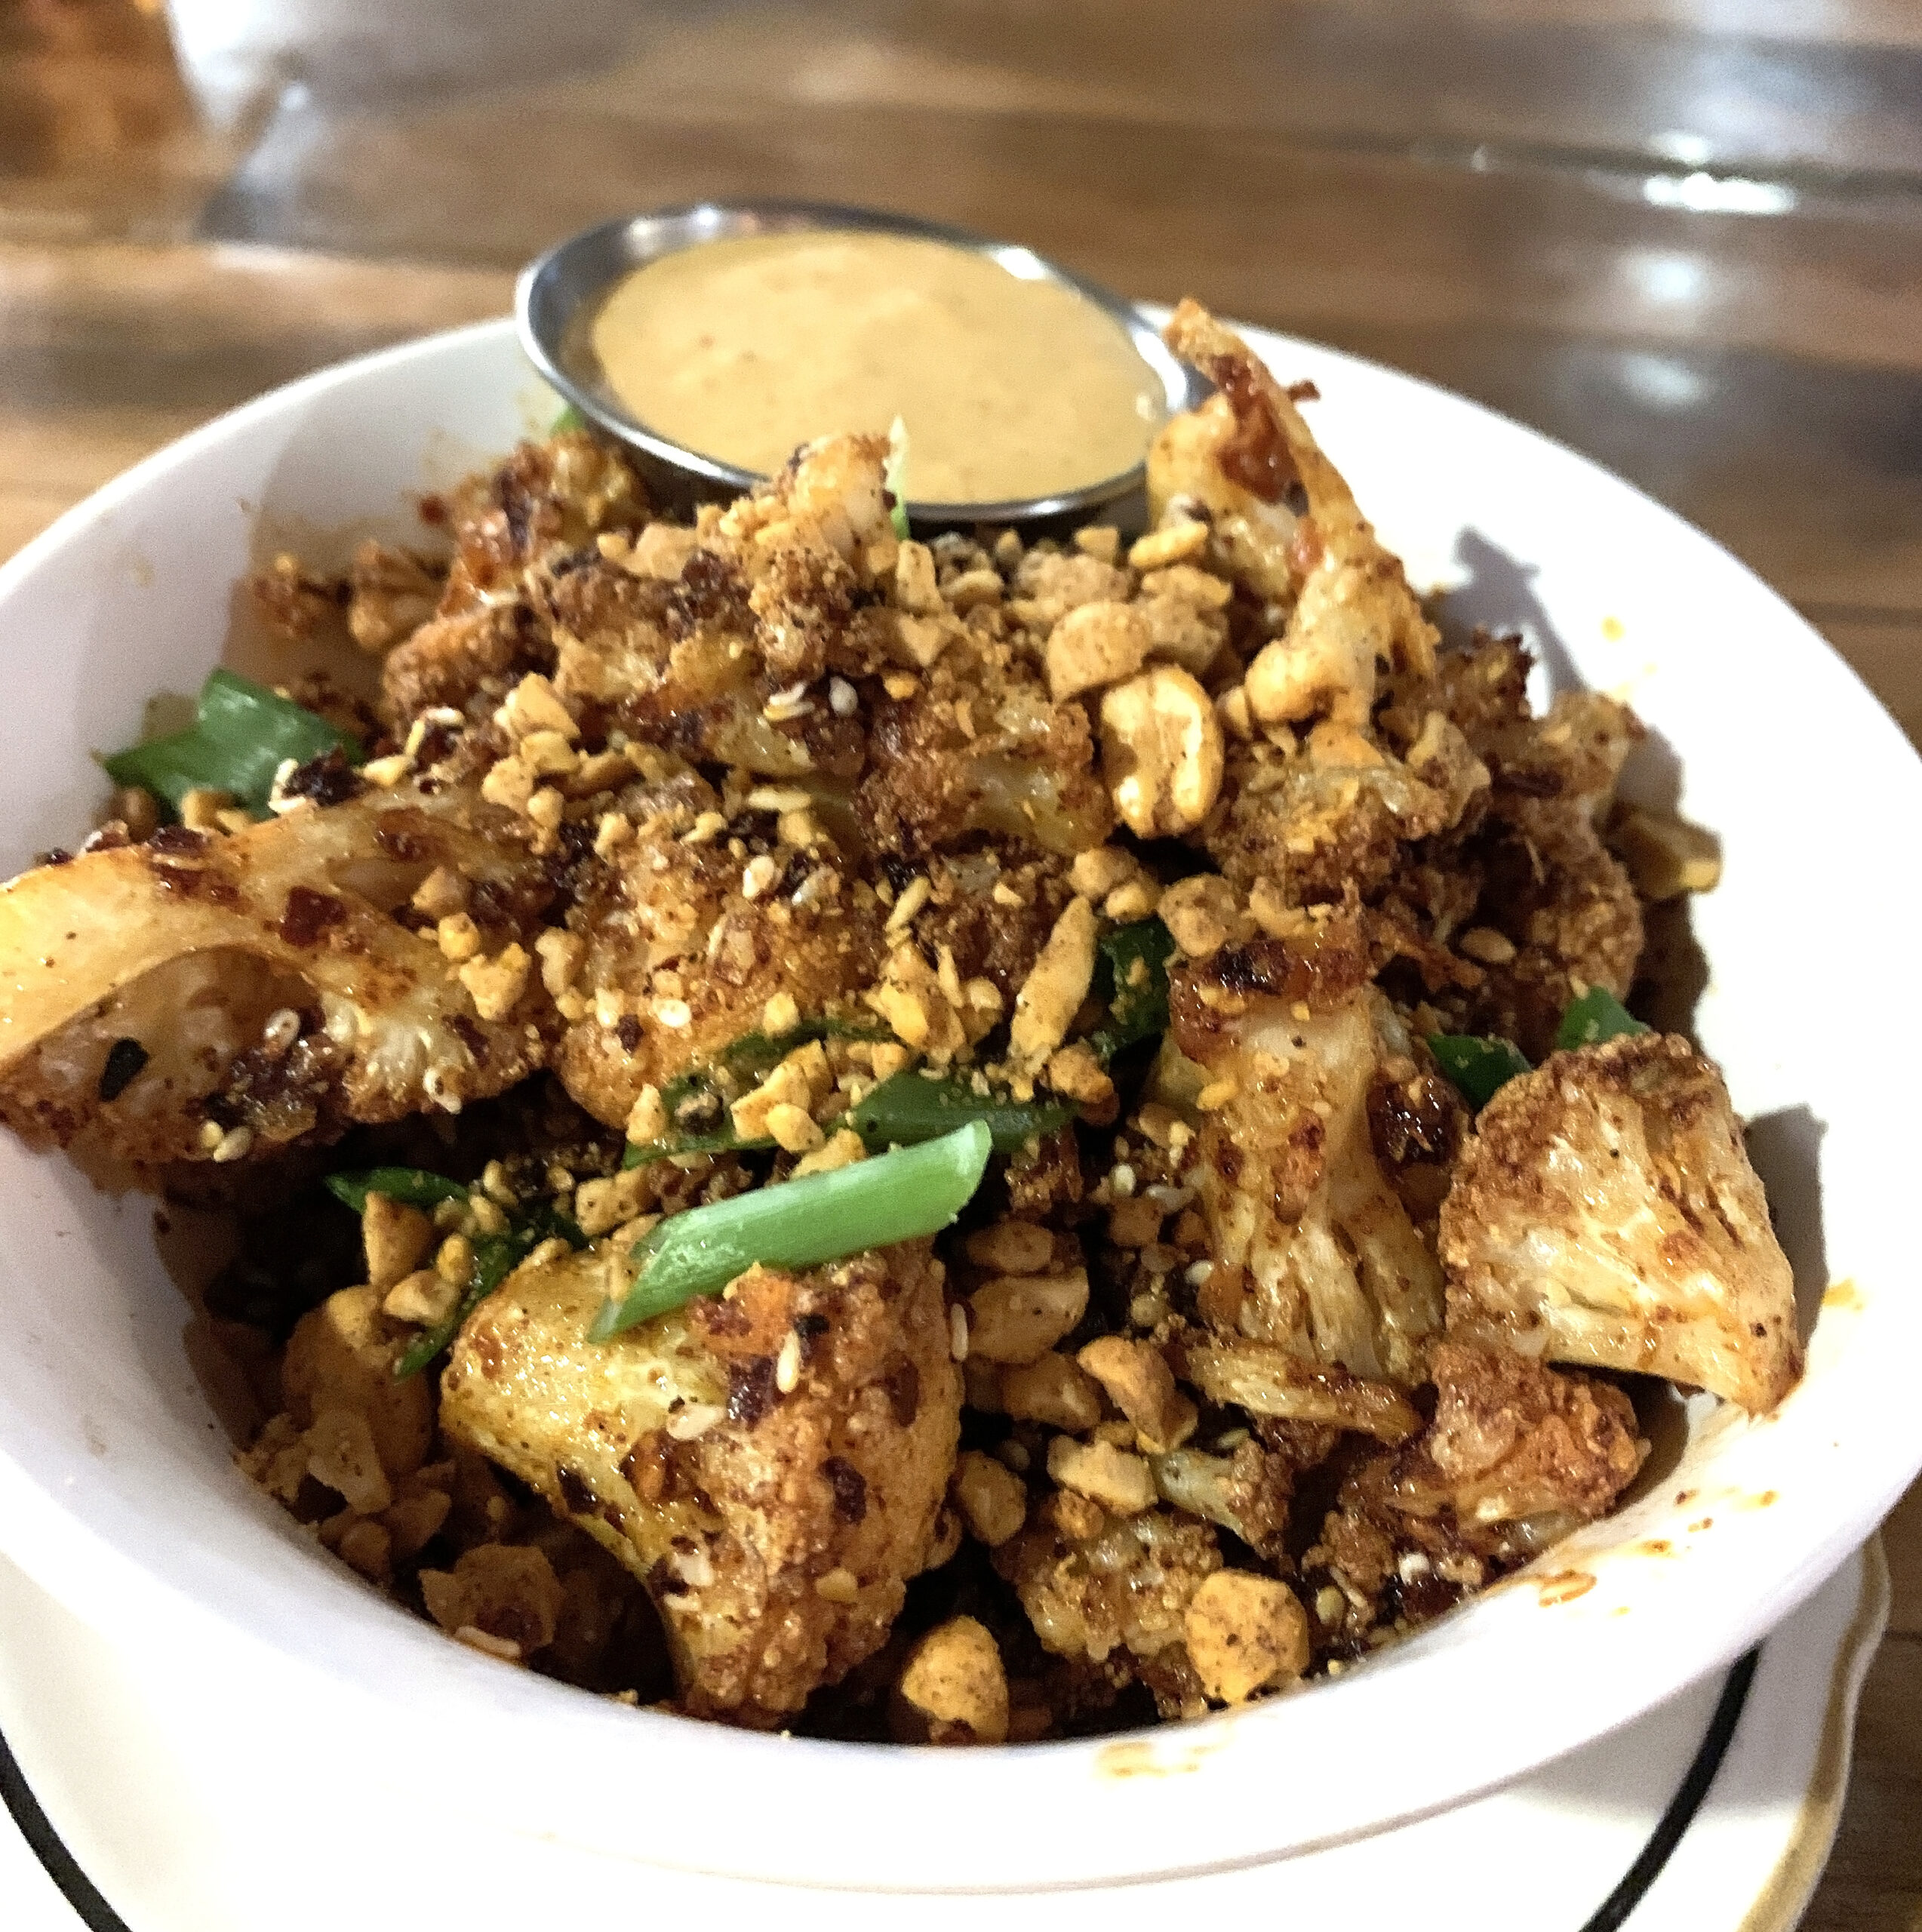
Public
I’ve lost count how many times I’ve dined at Public (129 N. Rock Island), a farm-to-table restaurant in the basement of a historic Old Town district building.
The chef uses regionally sustainable ingredients to create sought-after charcuterie boards, Prairie Bison Sliders, hearty salads, and homemade pizzas (gluten-free crust available). The Spicy Cauliflower, a starter appetizer, is a flavor punch that delivers serious spice. Ask the server about the day’s specials or plan your visit around a season, which often inspires the chef to make limited-time-only dishes.
Bella Luna
Mediterranean cuisine is known for its use of heart-healthy unsaturated fats, legumes, produce, and spices. Bella Luna‘s (2 locations) menu features a robust list of Greek and Lebanese traditional entrees. Chicken Schawarma or Grilled Portobello Sandwich are ideal lunchtime choices.
Seafood Trio and Chicken Du Chateauround out the healthier menu options for dinner. Curry lovers will feel right at home with three protein options served over rice.
Newport Grill
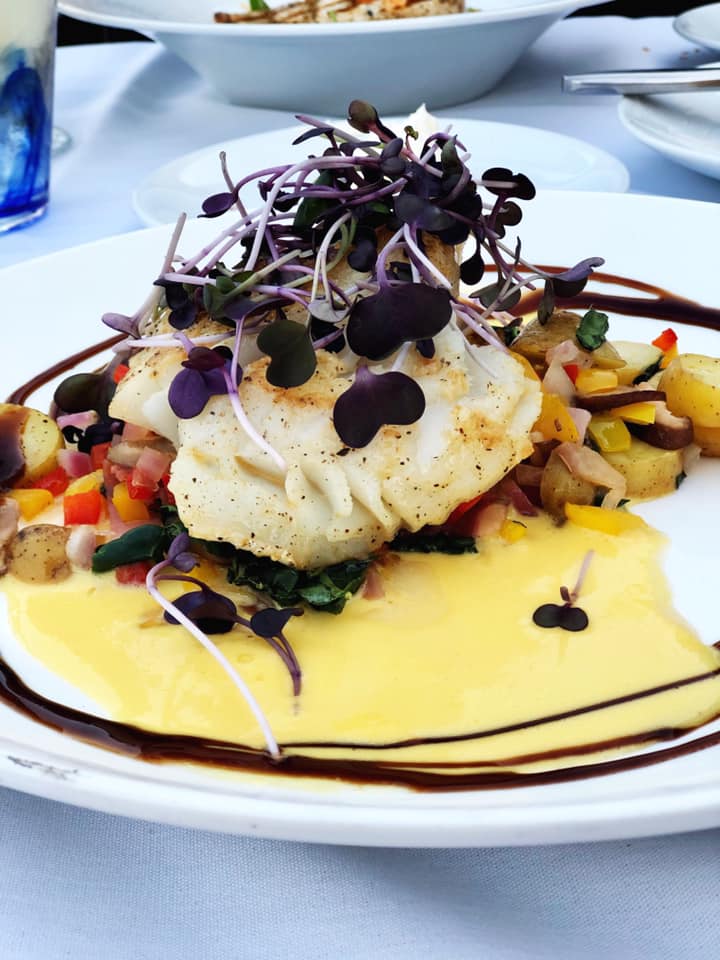
What if you could indulge in a fabulous seafood meal while viewing a scenic waterfall from your patio table? Newport Grill (1900 N. Rock Rd), a fine dining restaurant, ships fresh seafood daily.
The appetizers are so good, especially when paired with Happy Hour cocktails, that you may need to remind yourself that the shining star is the dinner menu. Fresh catch entrees ranging from swordfish to trout are the base for delectable meals that are beautifully plated.
Skip the high-caloric meal when dining out in Wichita and instead choose a meal from one of these ten restaurant menus.
A few notable runner-up restaurants include locally owned Crafted, Green Acres (Deli), and The Wine Dive. Also, refer to my blog post, Get Your Greens On: Where to Find the Best Salads in Kansas if you’re on the hunt for big bowl salads that satisfy.


 Non-wine drinkers will appreciate the Bourbon, scotch, whiskey, and tequila flights or complete bar offerings. The flatbread pizzas are a popular order.
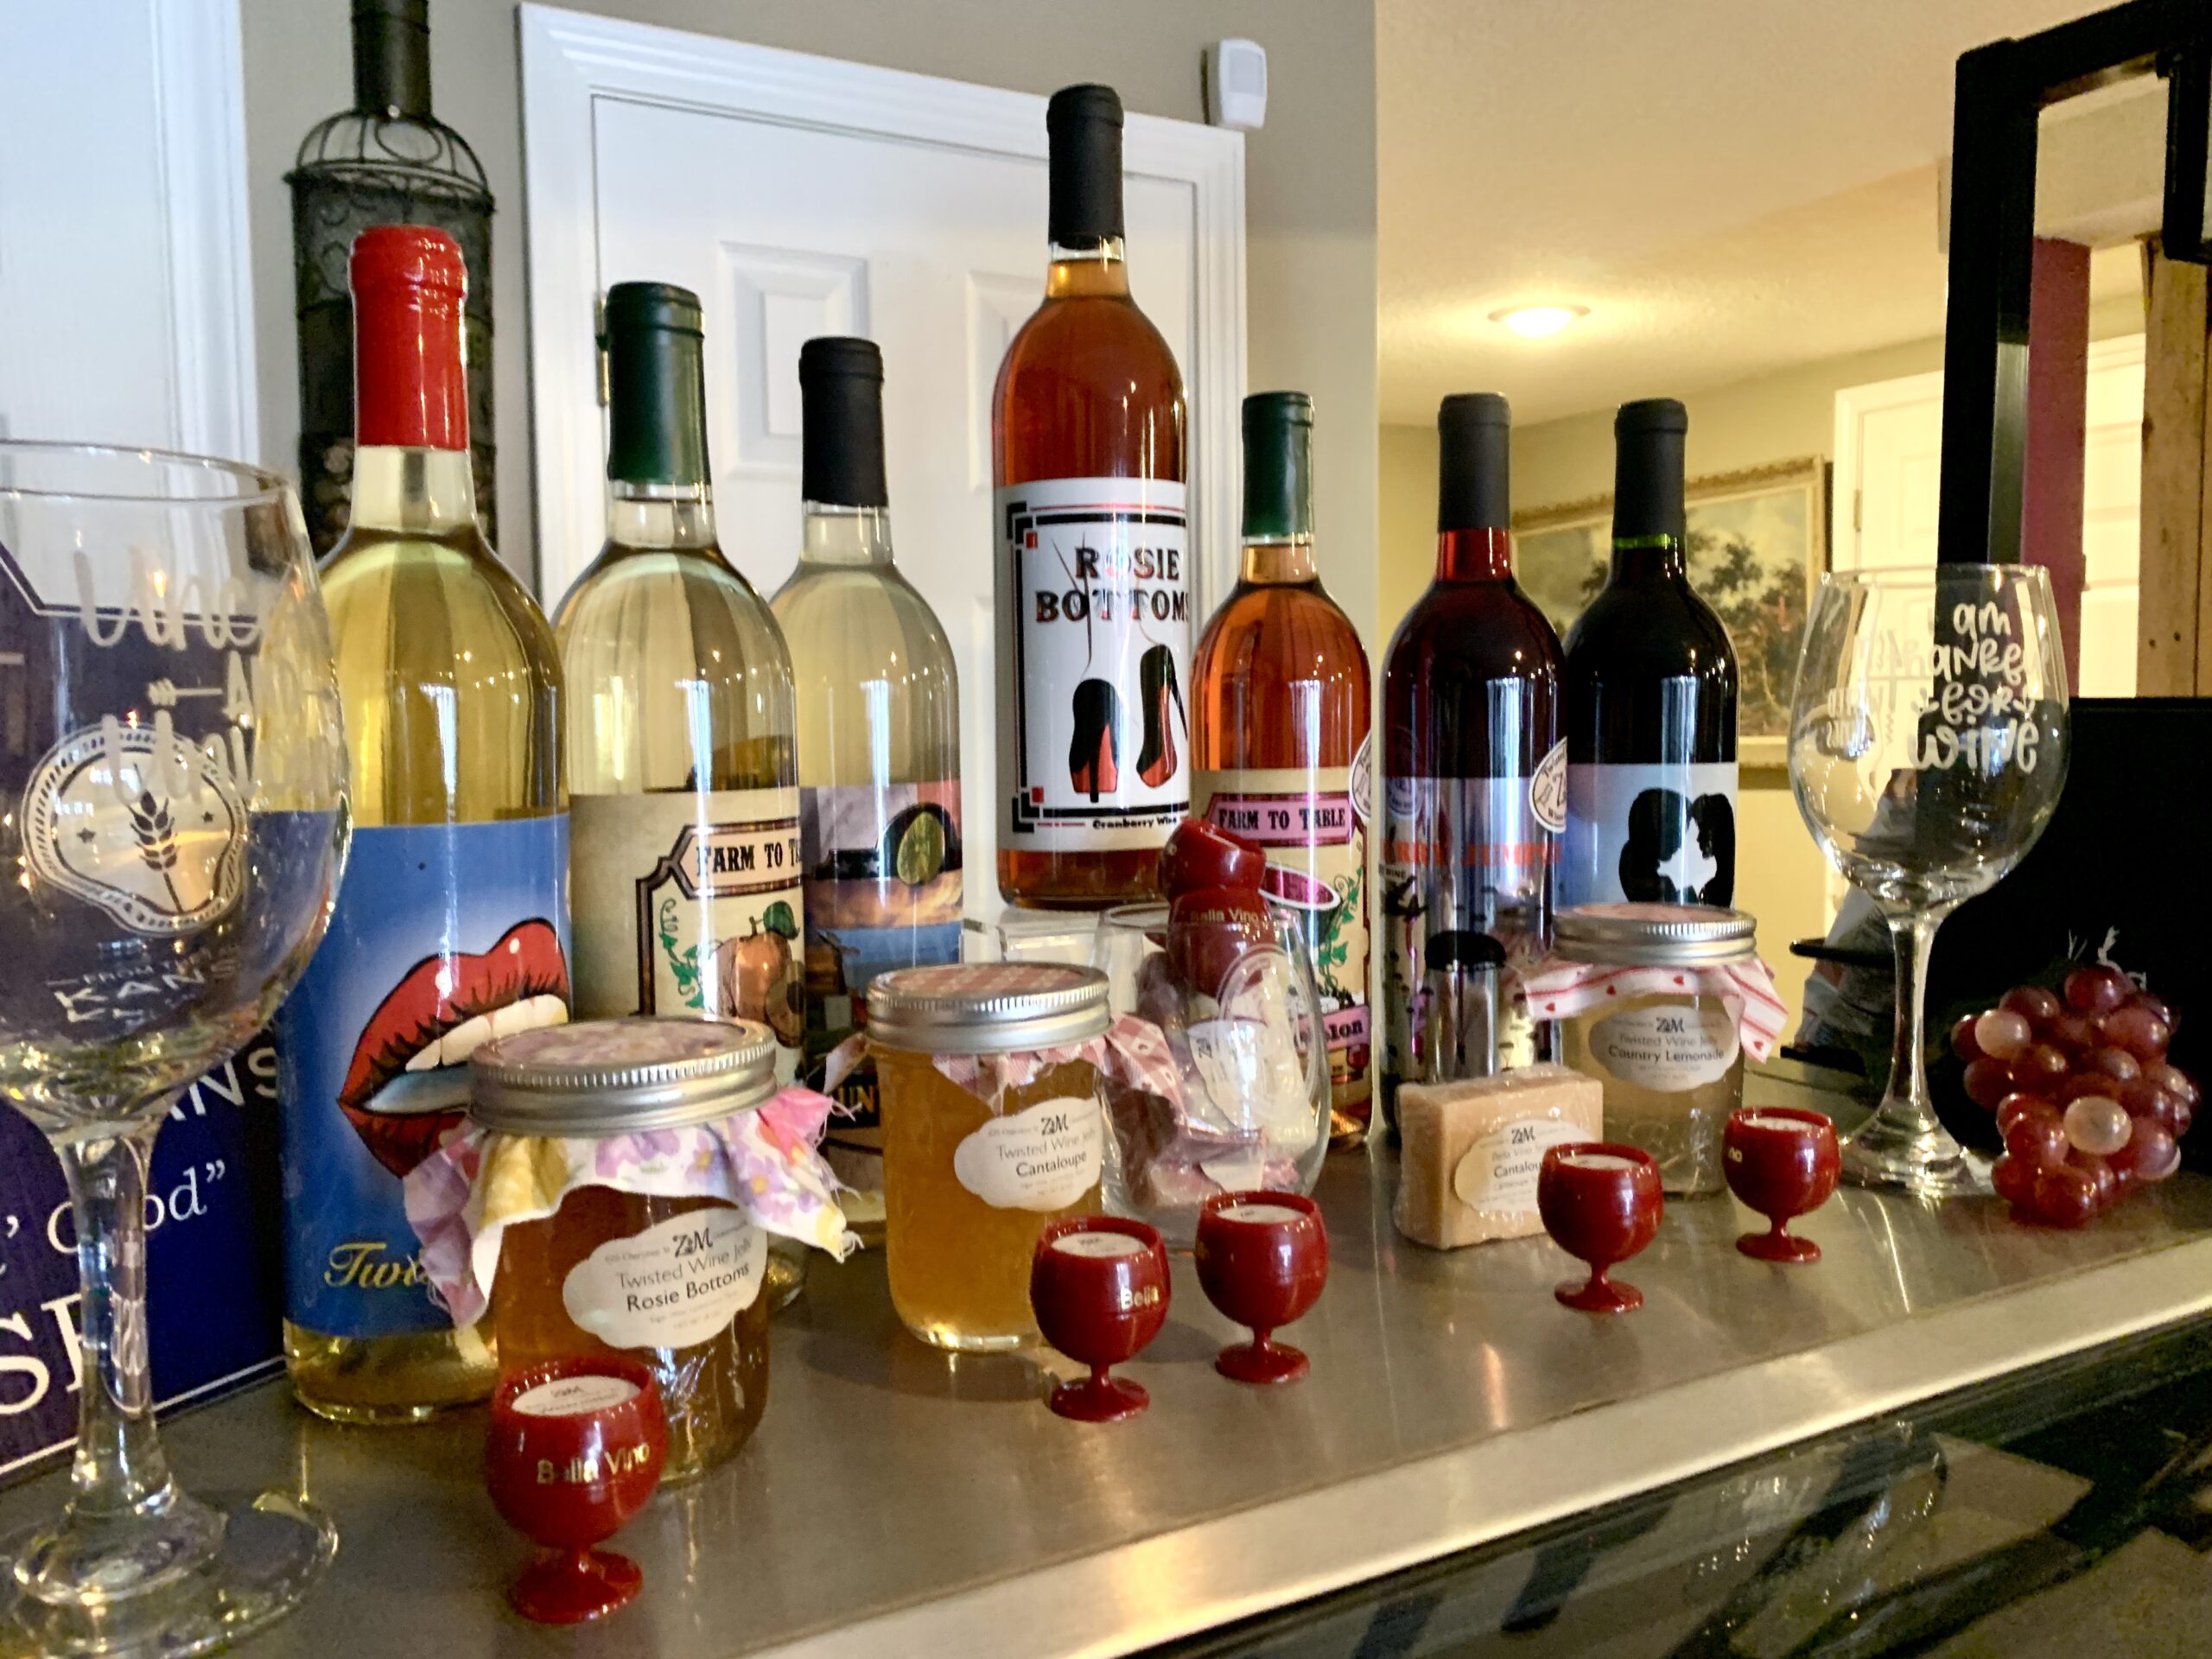
 When the owners are not busy making wine or socializing with customers, they also make preserves, jams, and jellies available for sale in the tasting room.
 The veteran-owned and operated winery’s tasting room is centrally located downtown across from Hay Market Square. They are open for wine tastings and retail shopping. I chose a seat at the tasting room counter and ordered the Tasting of the Month, a flight of five selections.
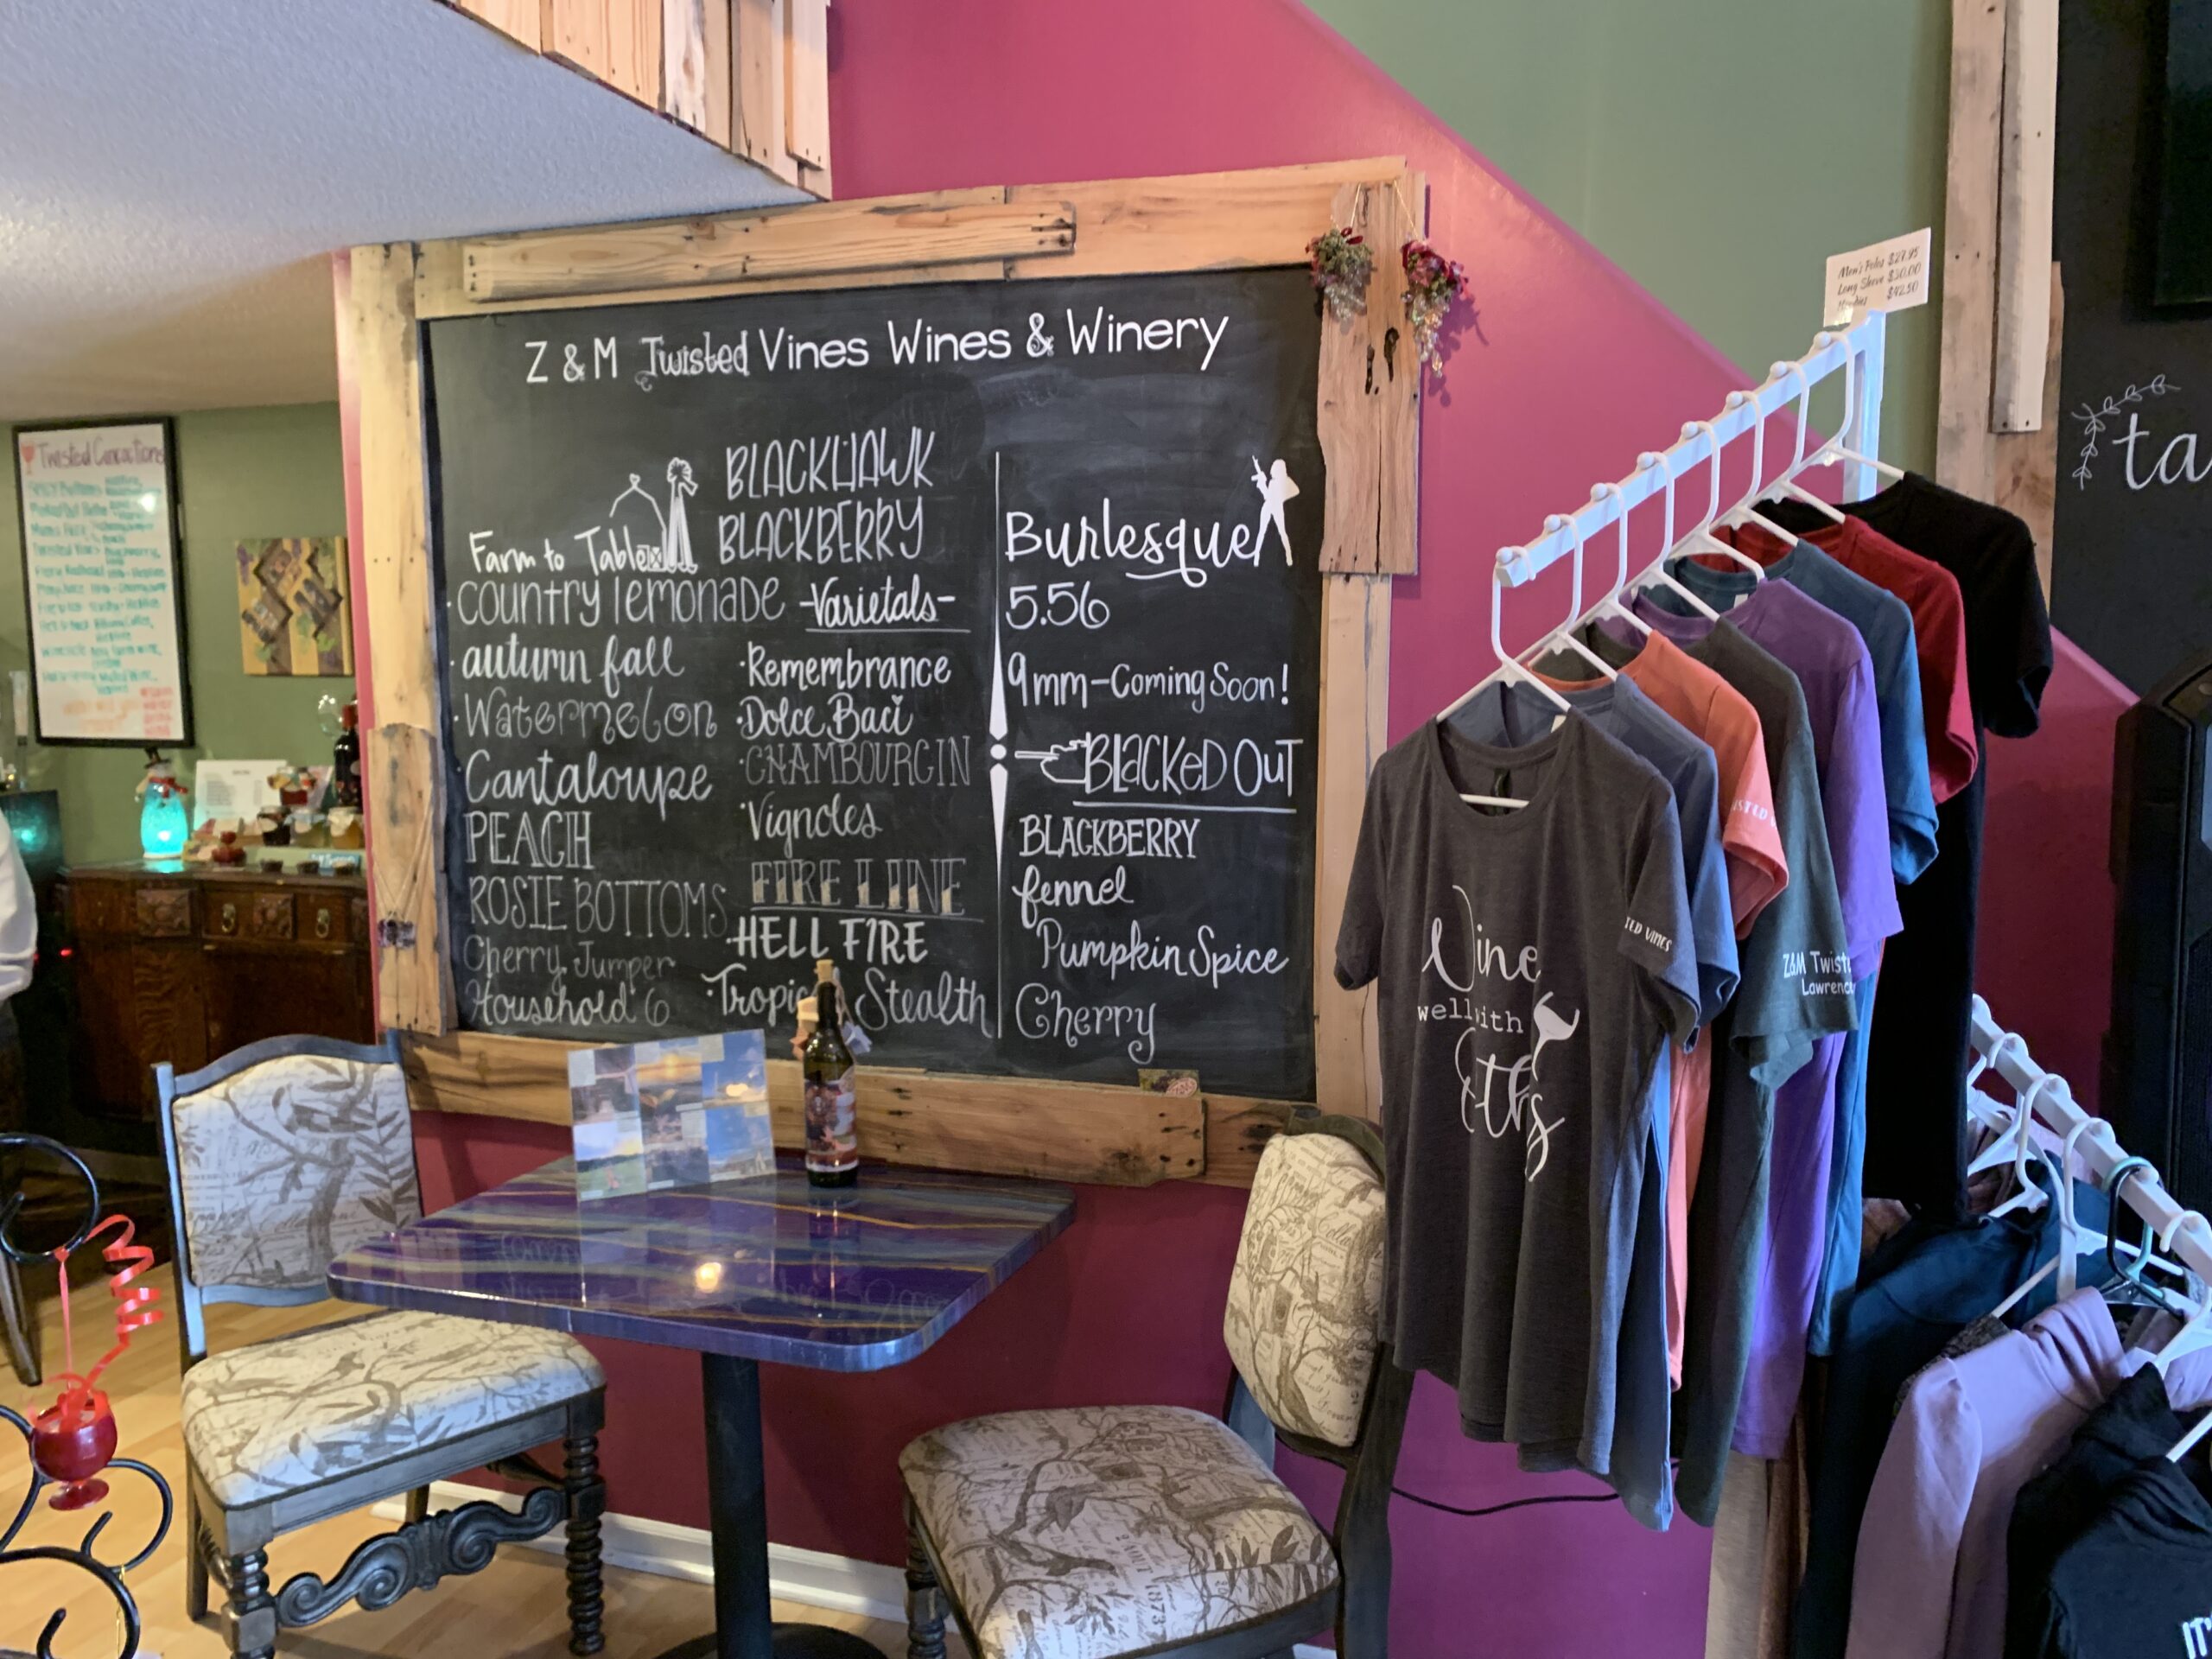 A flight lets you discover a wine you will appreciate the most – take home a bottle for your personal collection. They also sell jarred jellies and gifts for all of the wine lovers in your life.
 Established in 2014, the tasting room is open Wednesday through Sunday year-round for wine tasting flights, slushies (non-alcoholic available), hard ciders, and beers. After selecting four one-ounce pours for my dry wine flight, we exited to the partially sun-drenched patio. I preferred to sip Petite Pearl, a medium-bodied blend of Cabernet Sauvignon and Aronia.
 The tasting room also serves flatbread naan and artisan pizza prepared fresh to order with farm-to-table ingredients.
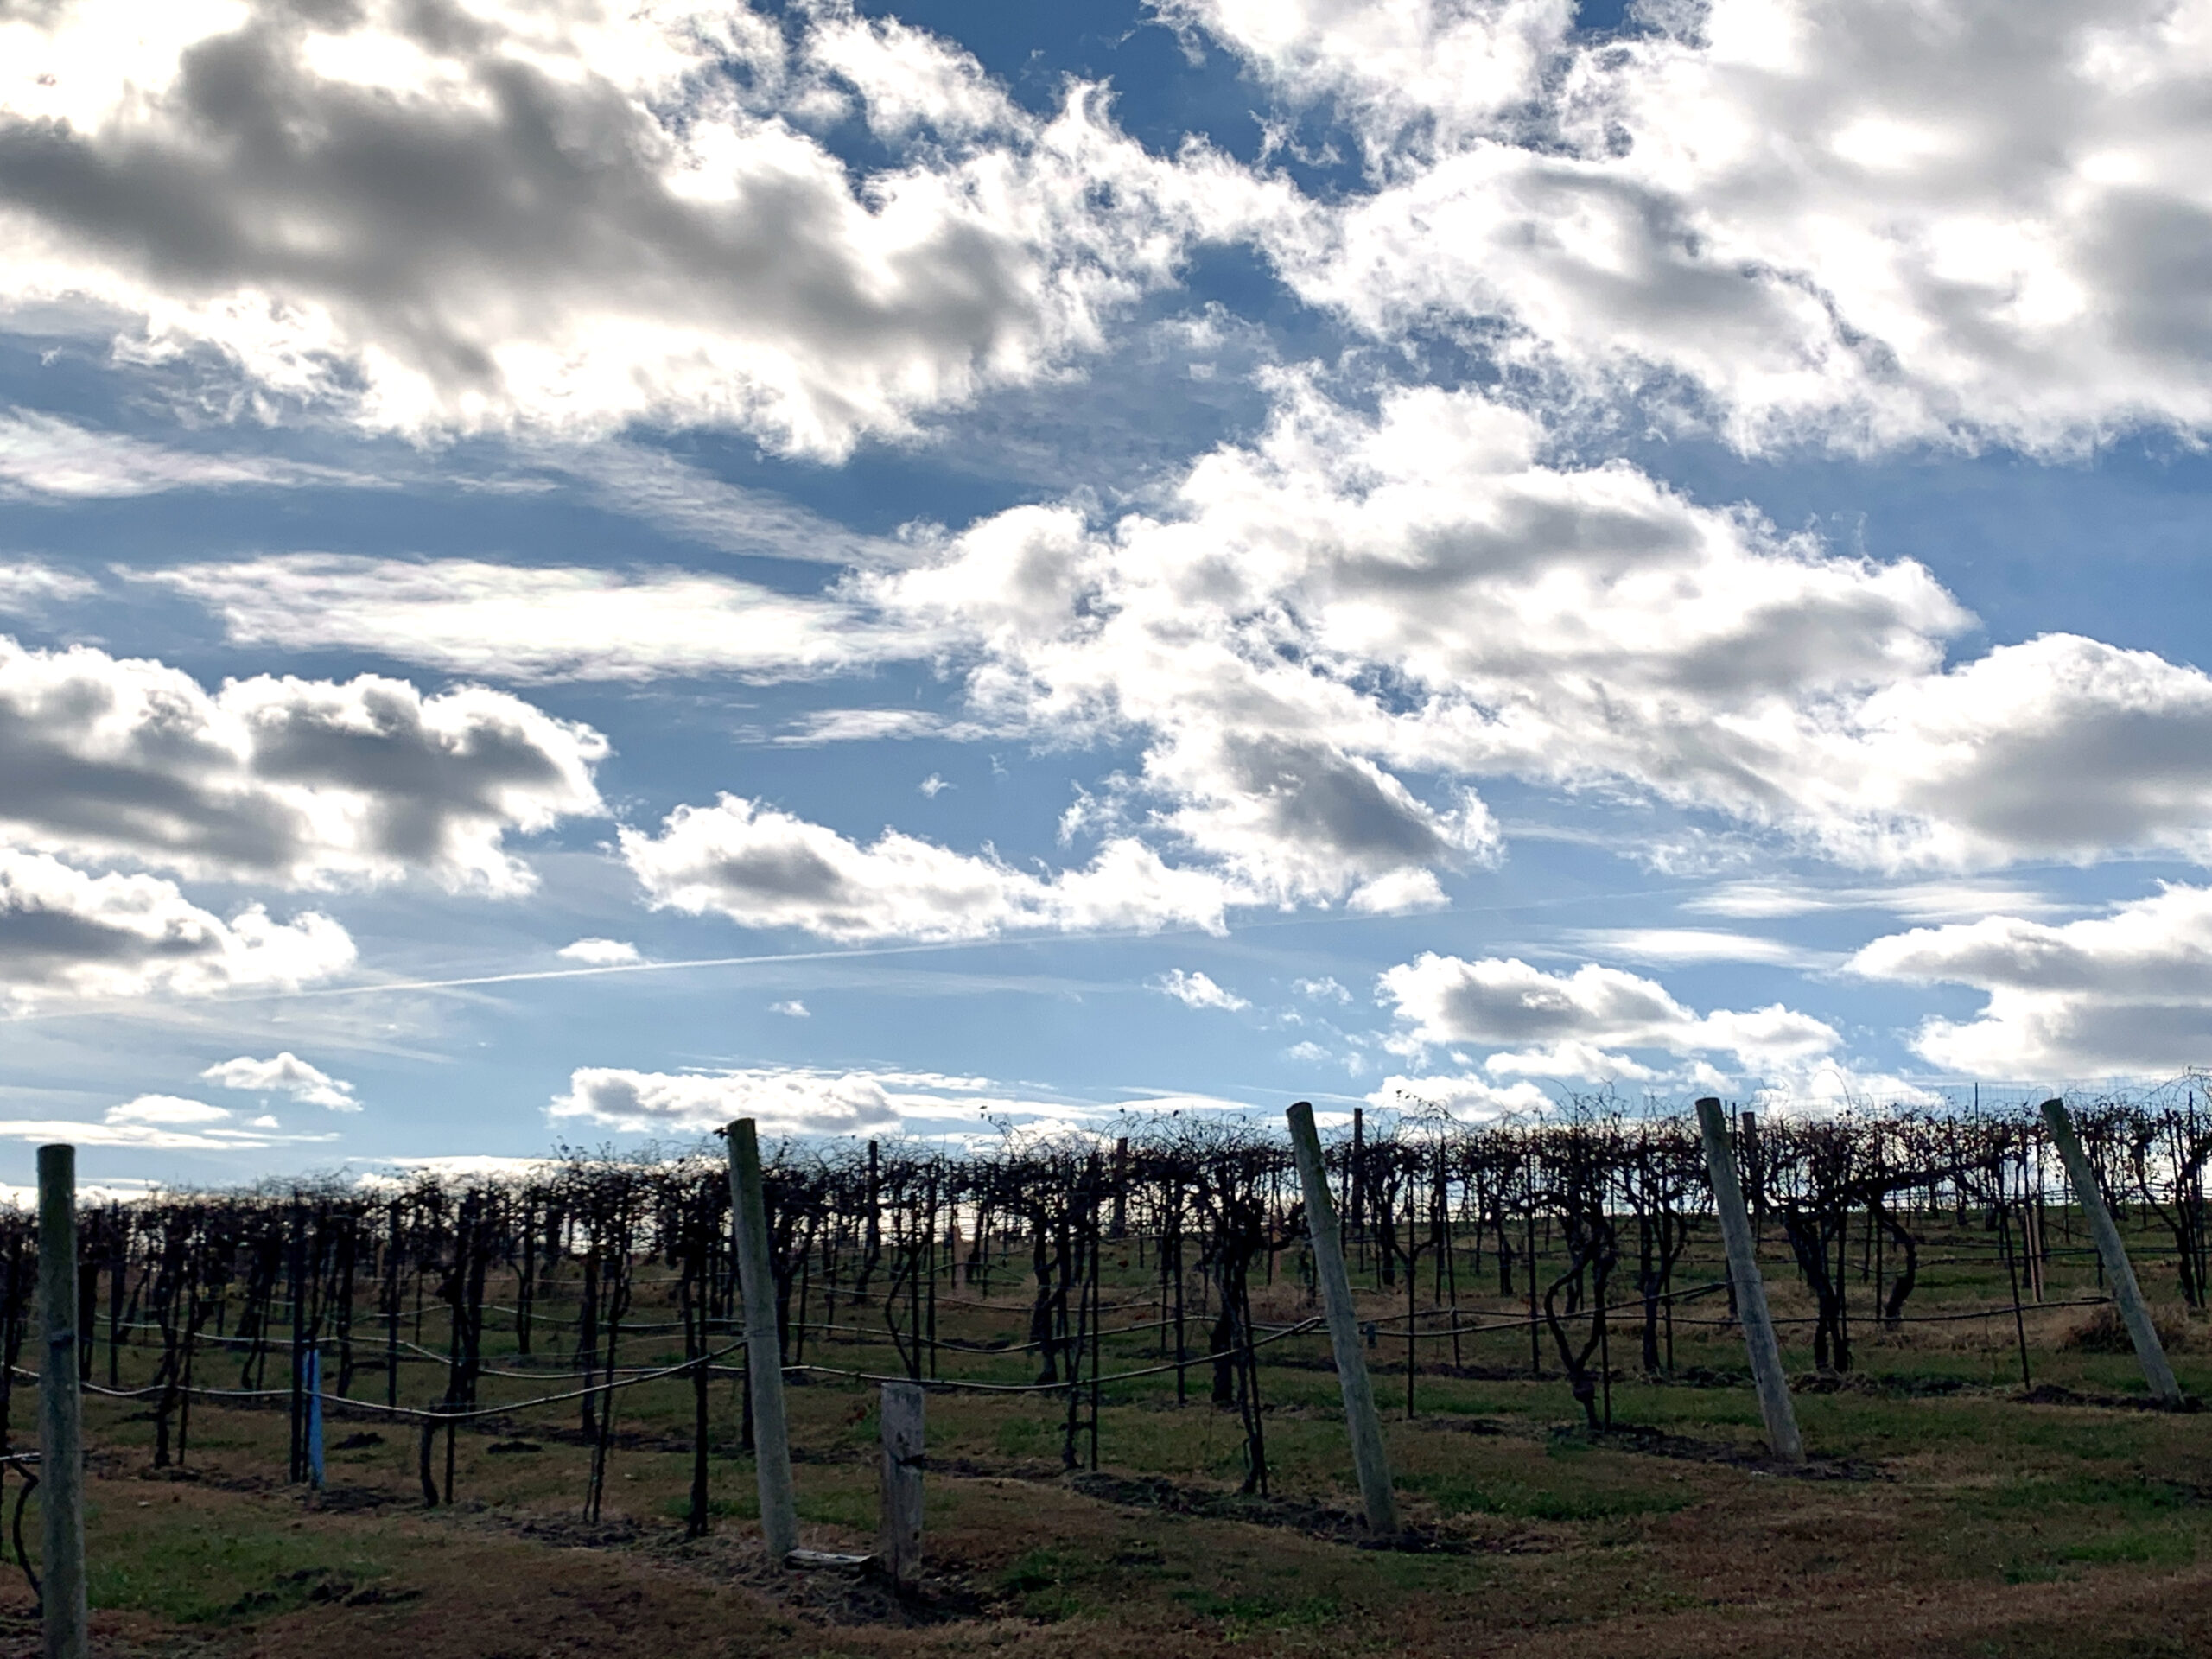 Located on 10 acres, the tasting room is open Thursday-Sunday from 12 pm-5 pm or by appointment. Marc and Pame Rowe have operated the vineyard since 2005 and depend on volunteers to help them harvest grapes from over 3,000 vines.
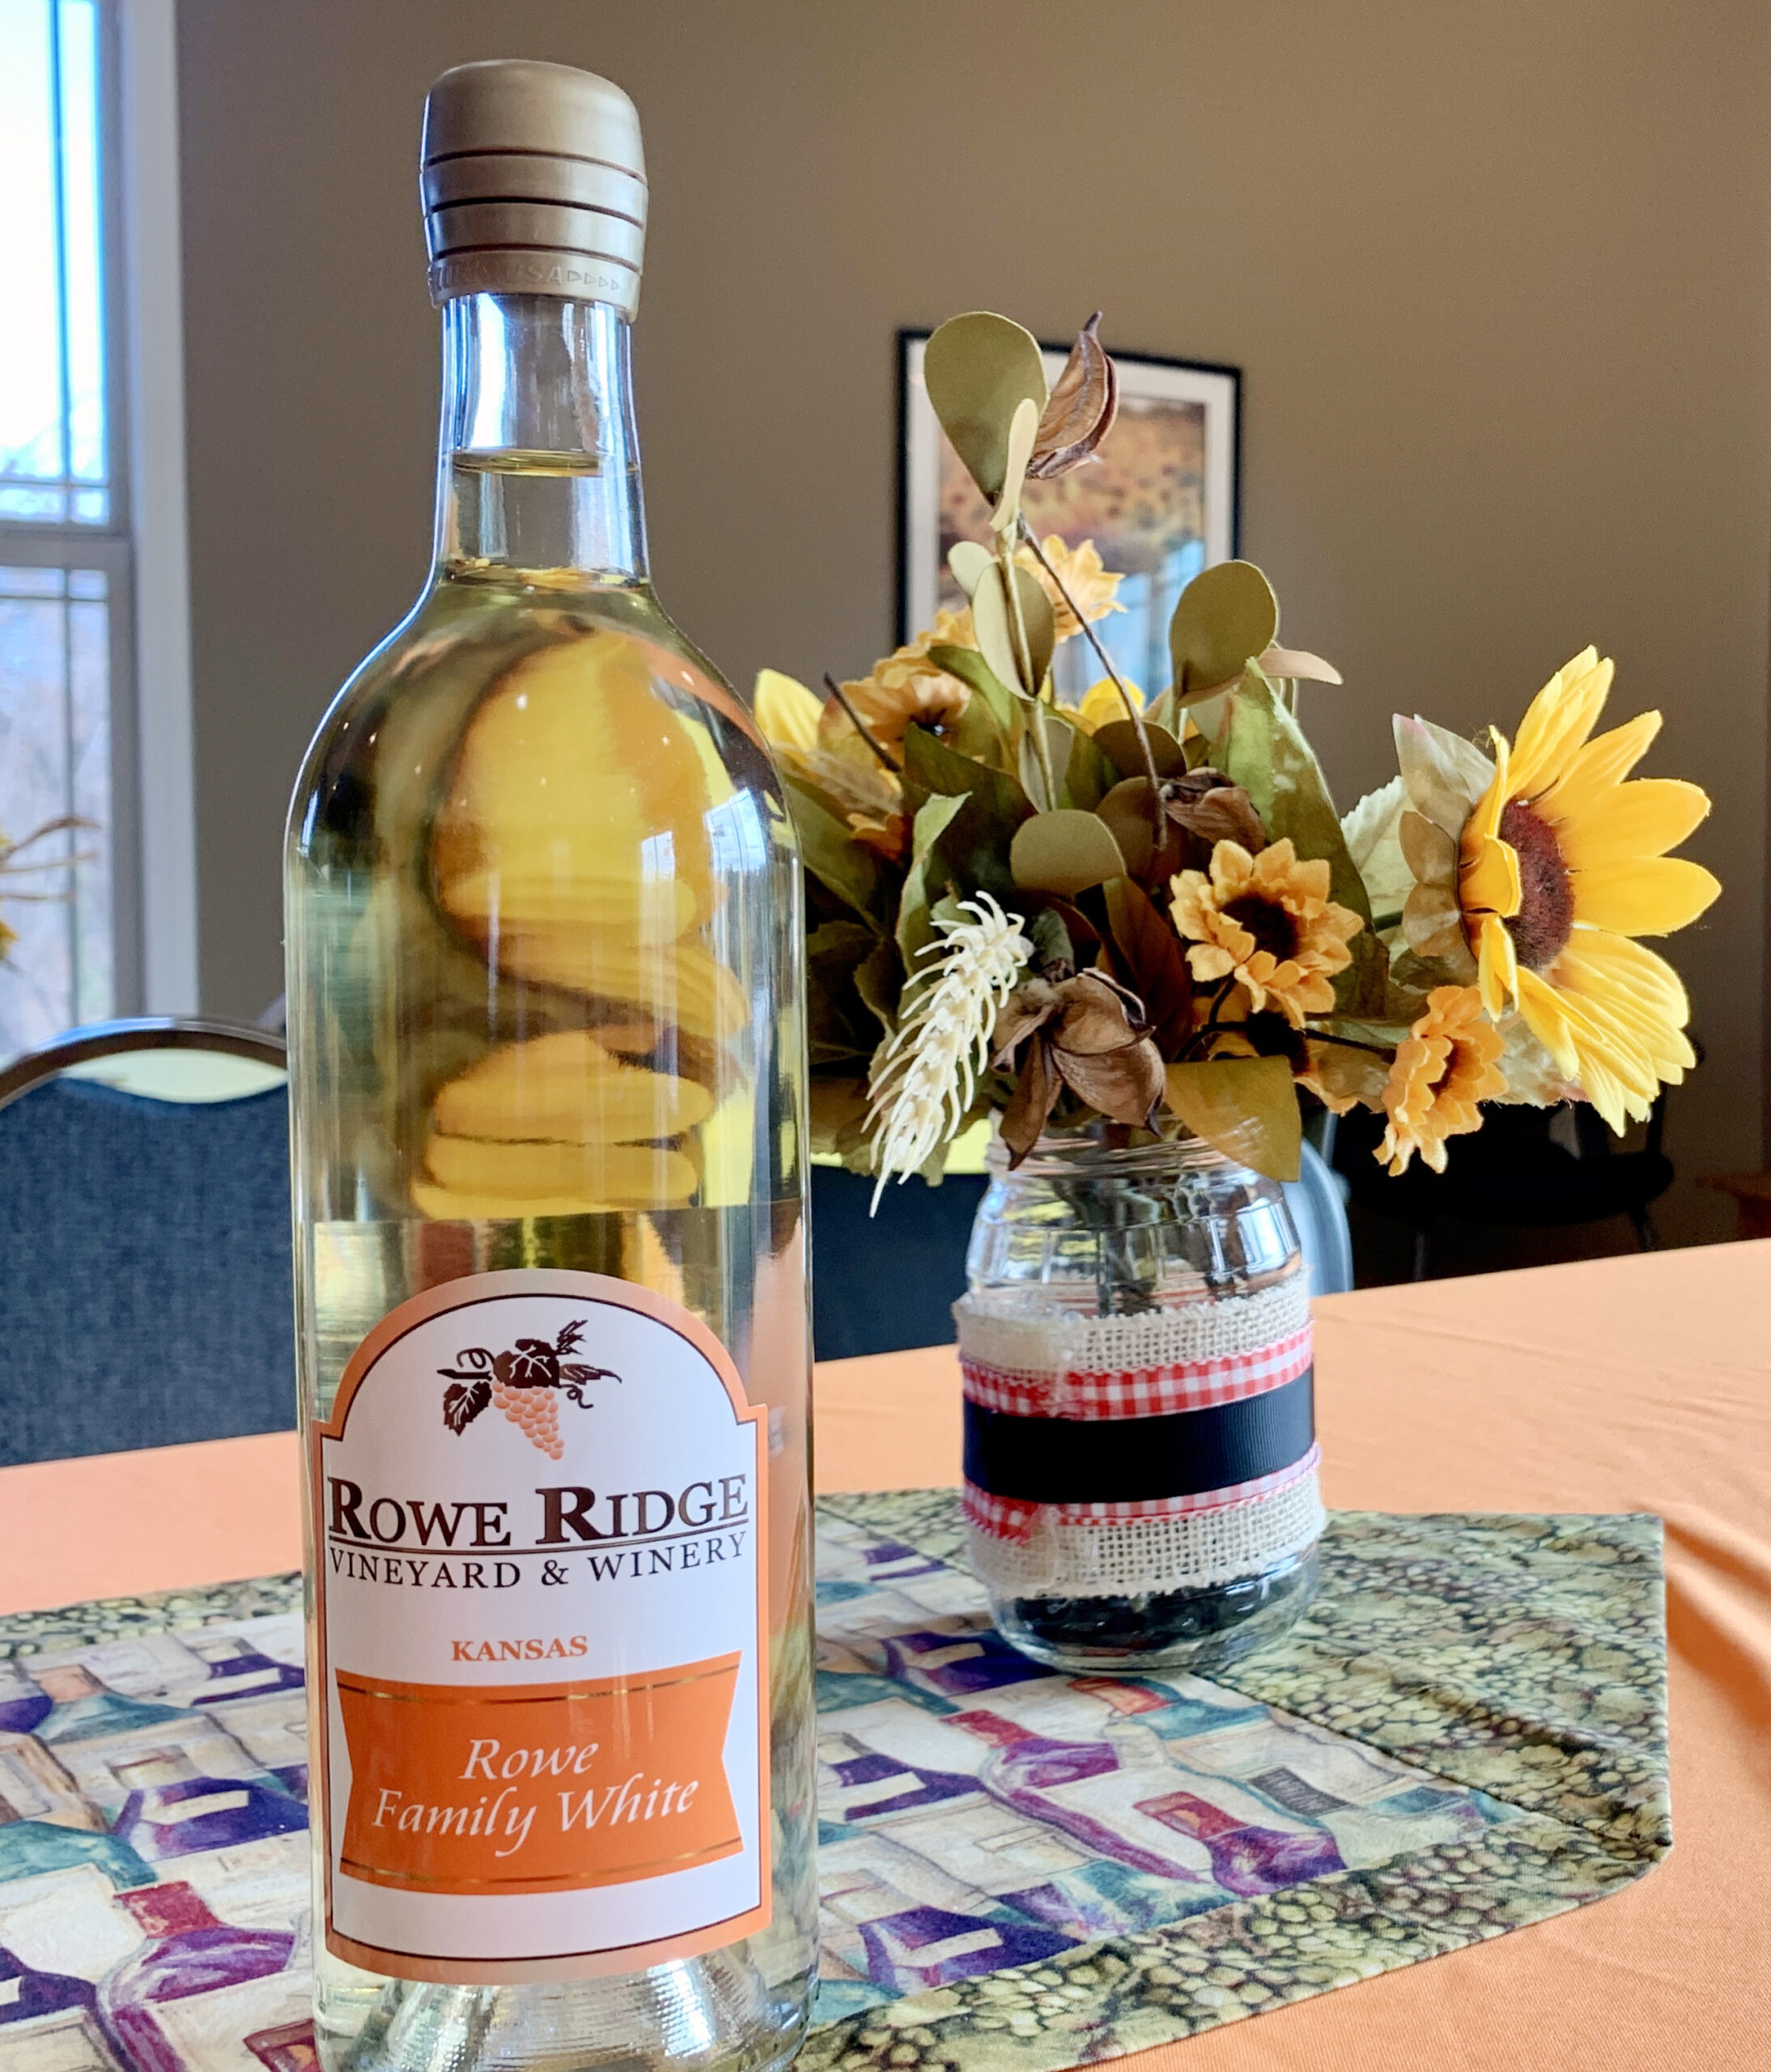 I recommend bringing someone with you to the tasting room, and each purchases a different flight so you can sample all of the wines. When in doubt, choose the dry to semi-sweet flight. Bottles range from $17-$18, and fruit wine bottles are $16. View the current list of wines available
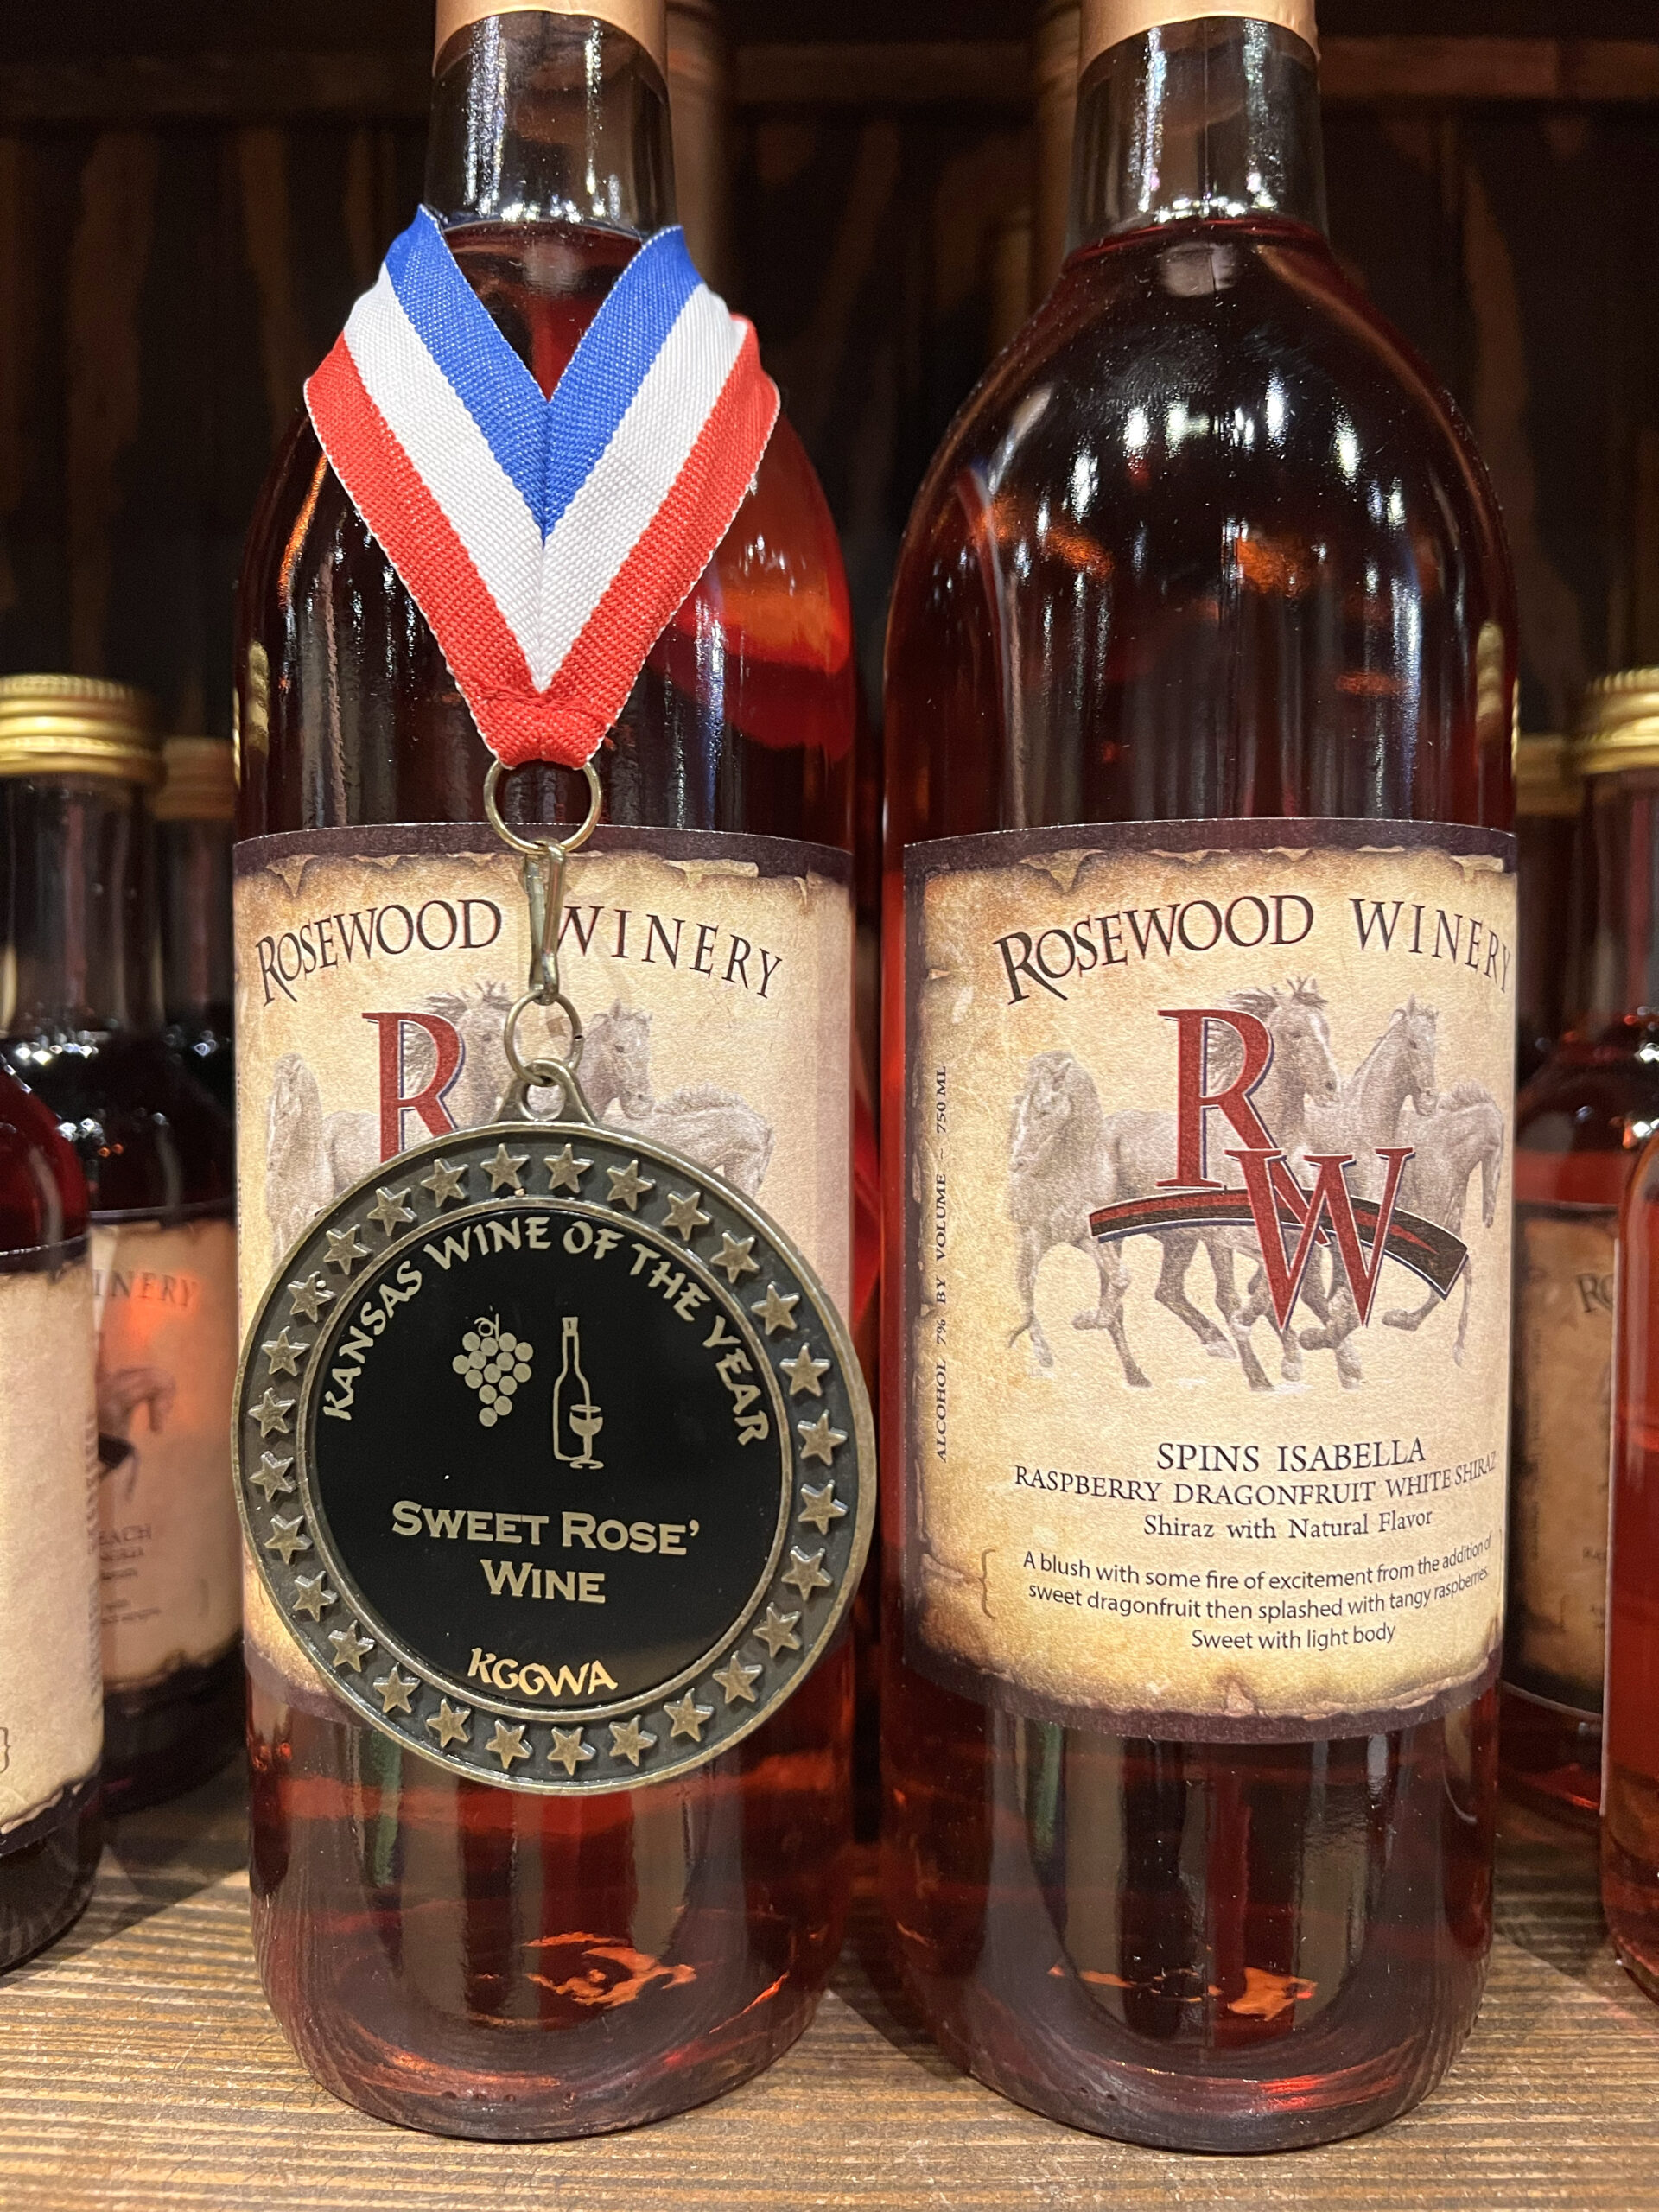
 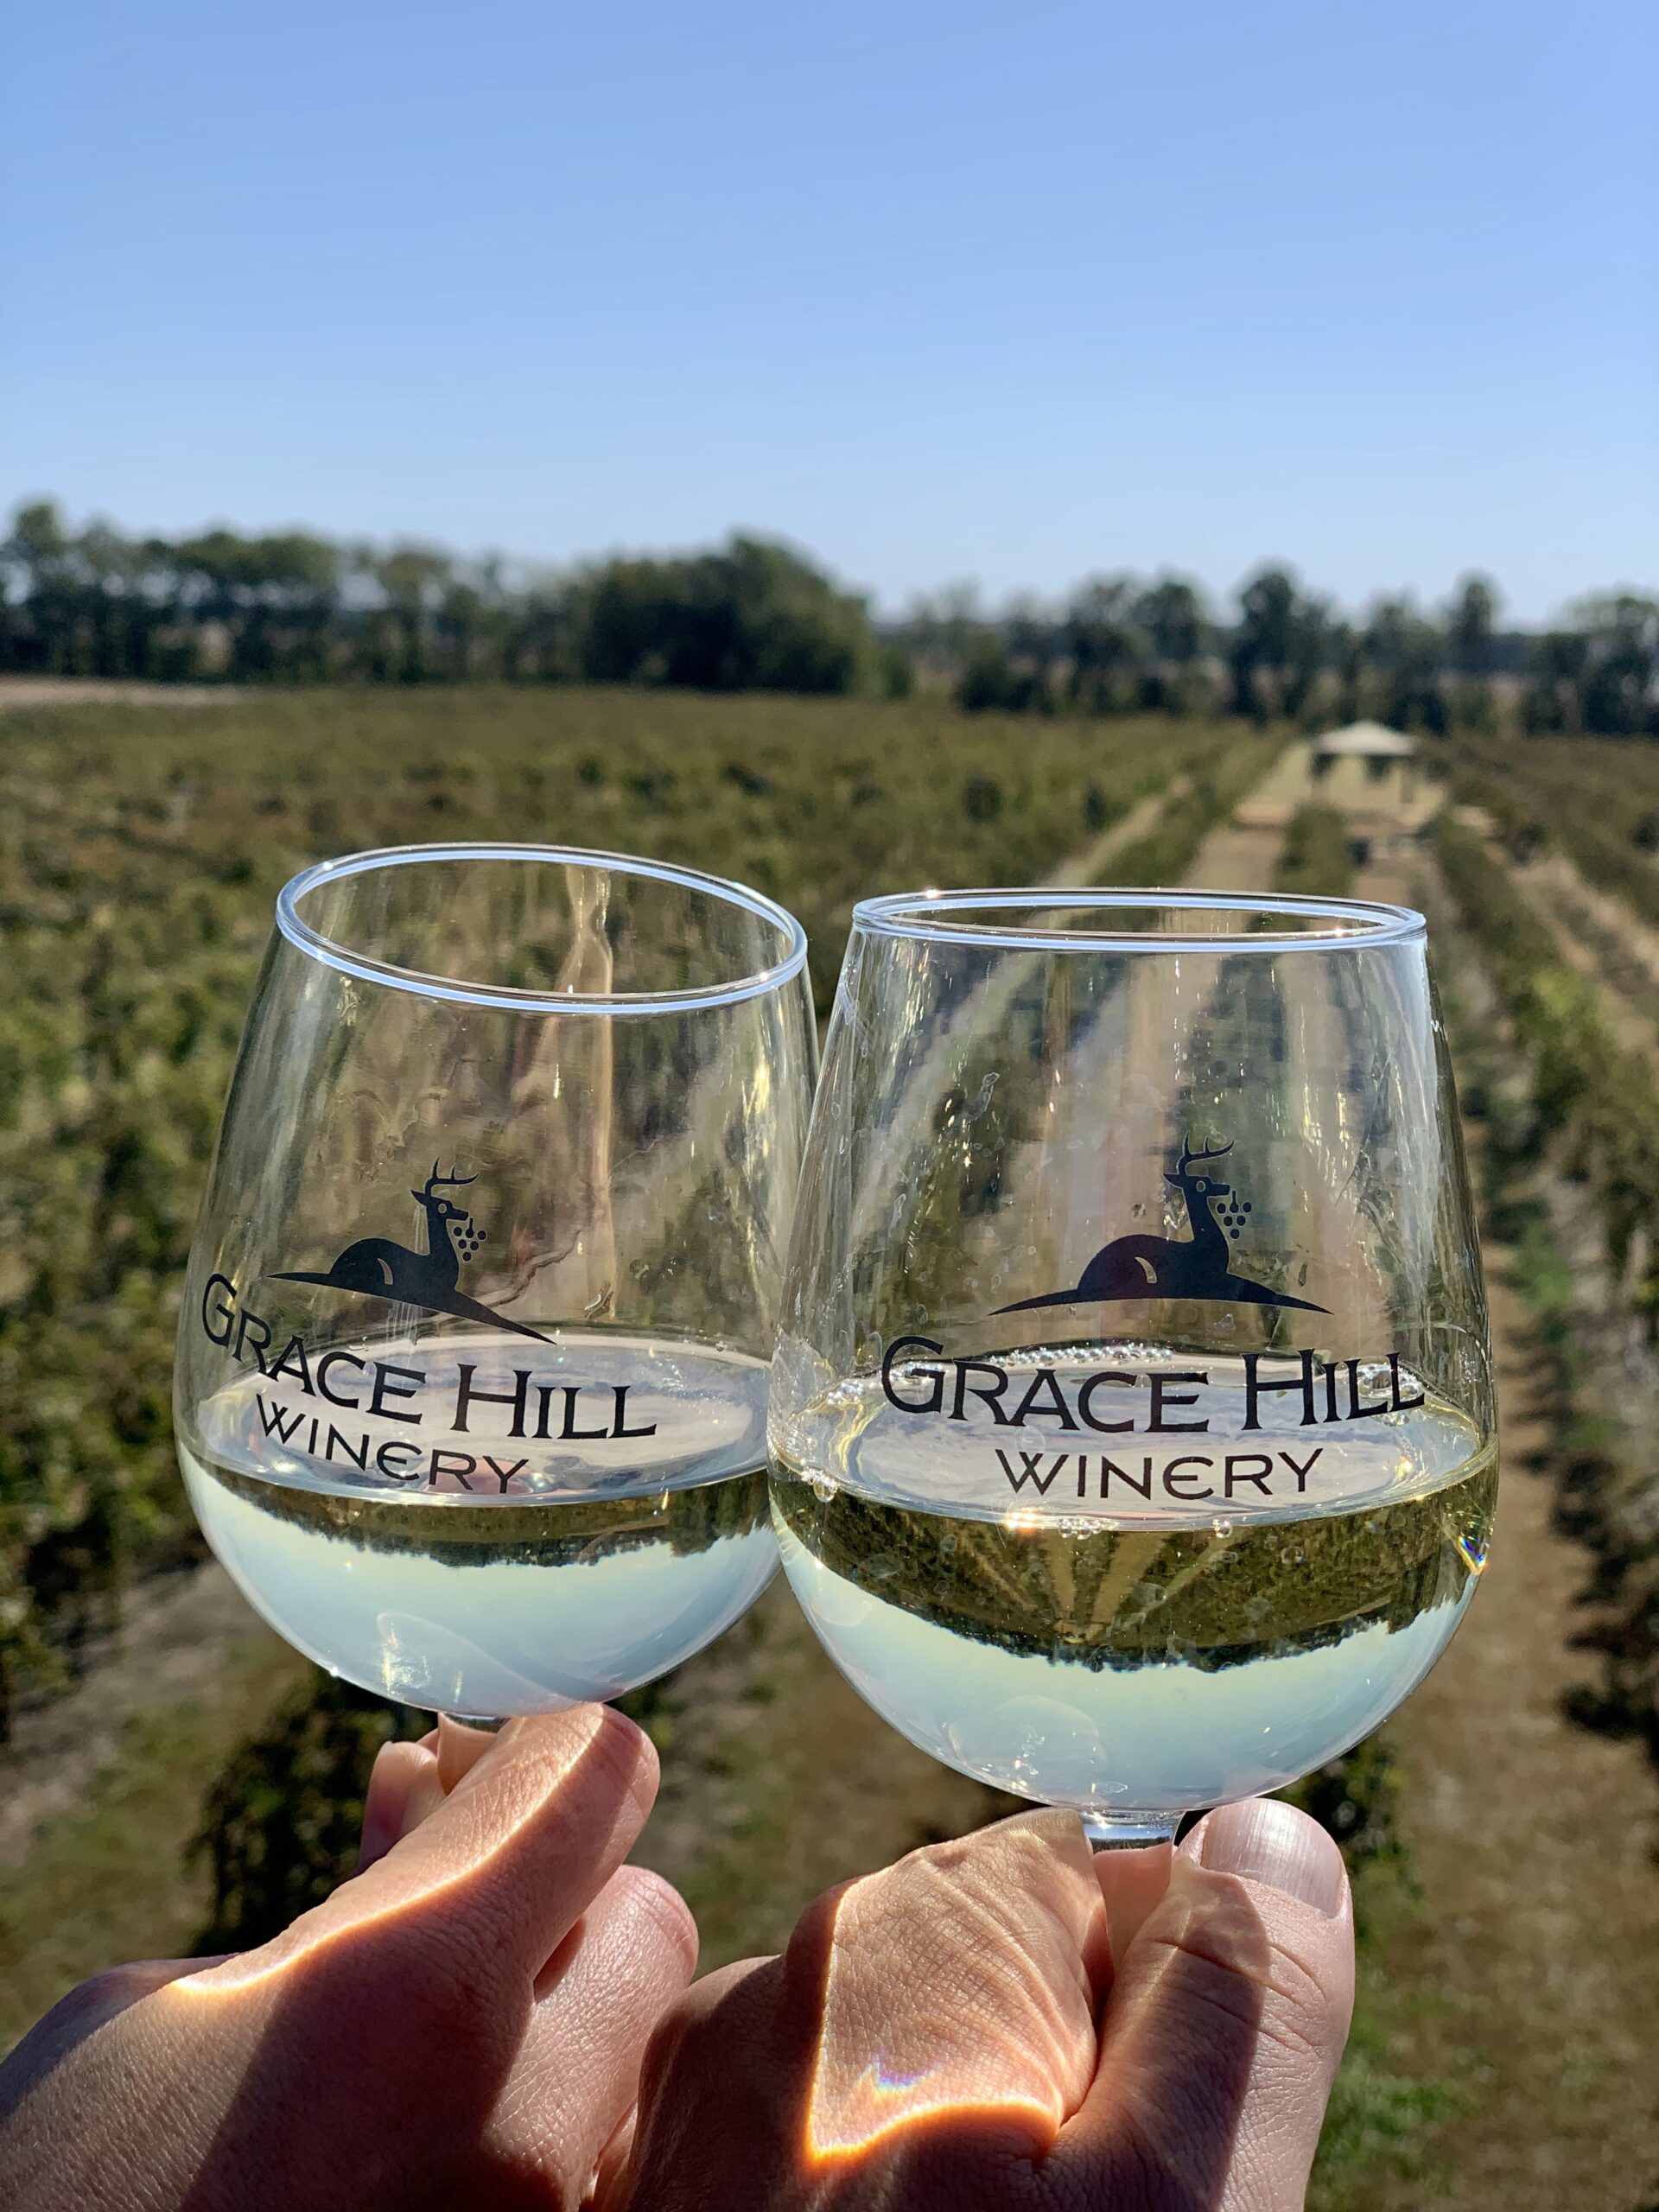 An indoor tasting room also serves about a dozen wine drinkers at a time. Bottles of wine are available for purchase. I recommend arriving when they open on the weekend to avoid waiting to be served, or you can book a tasting
 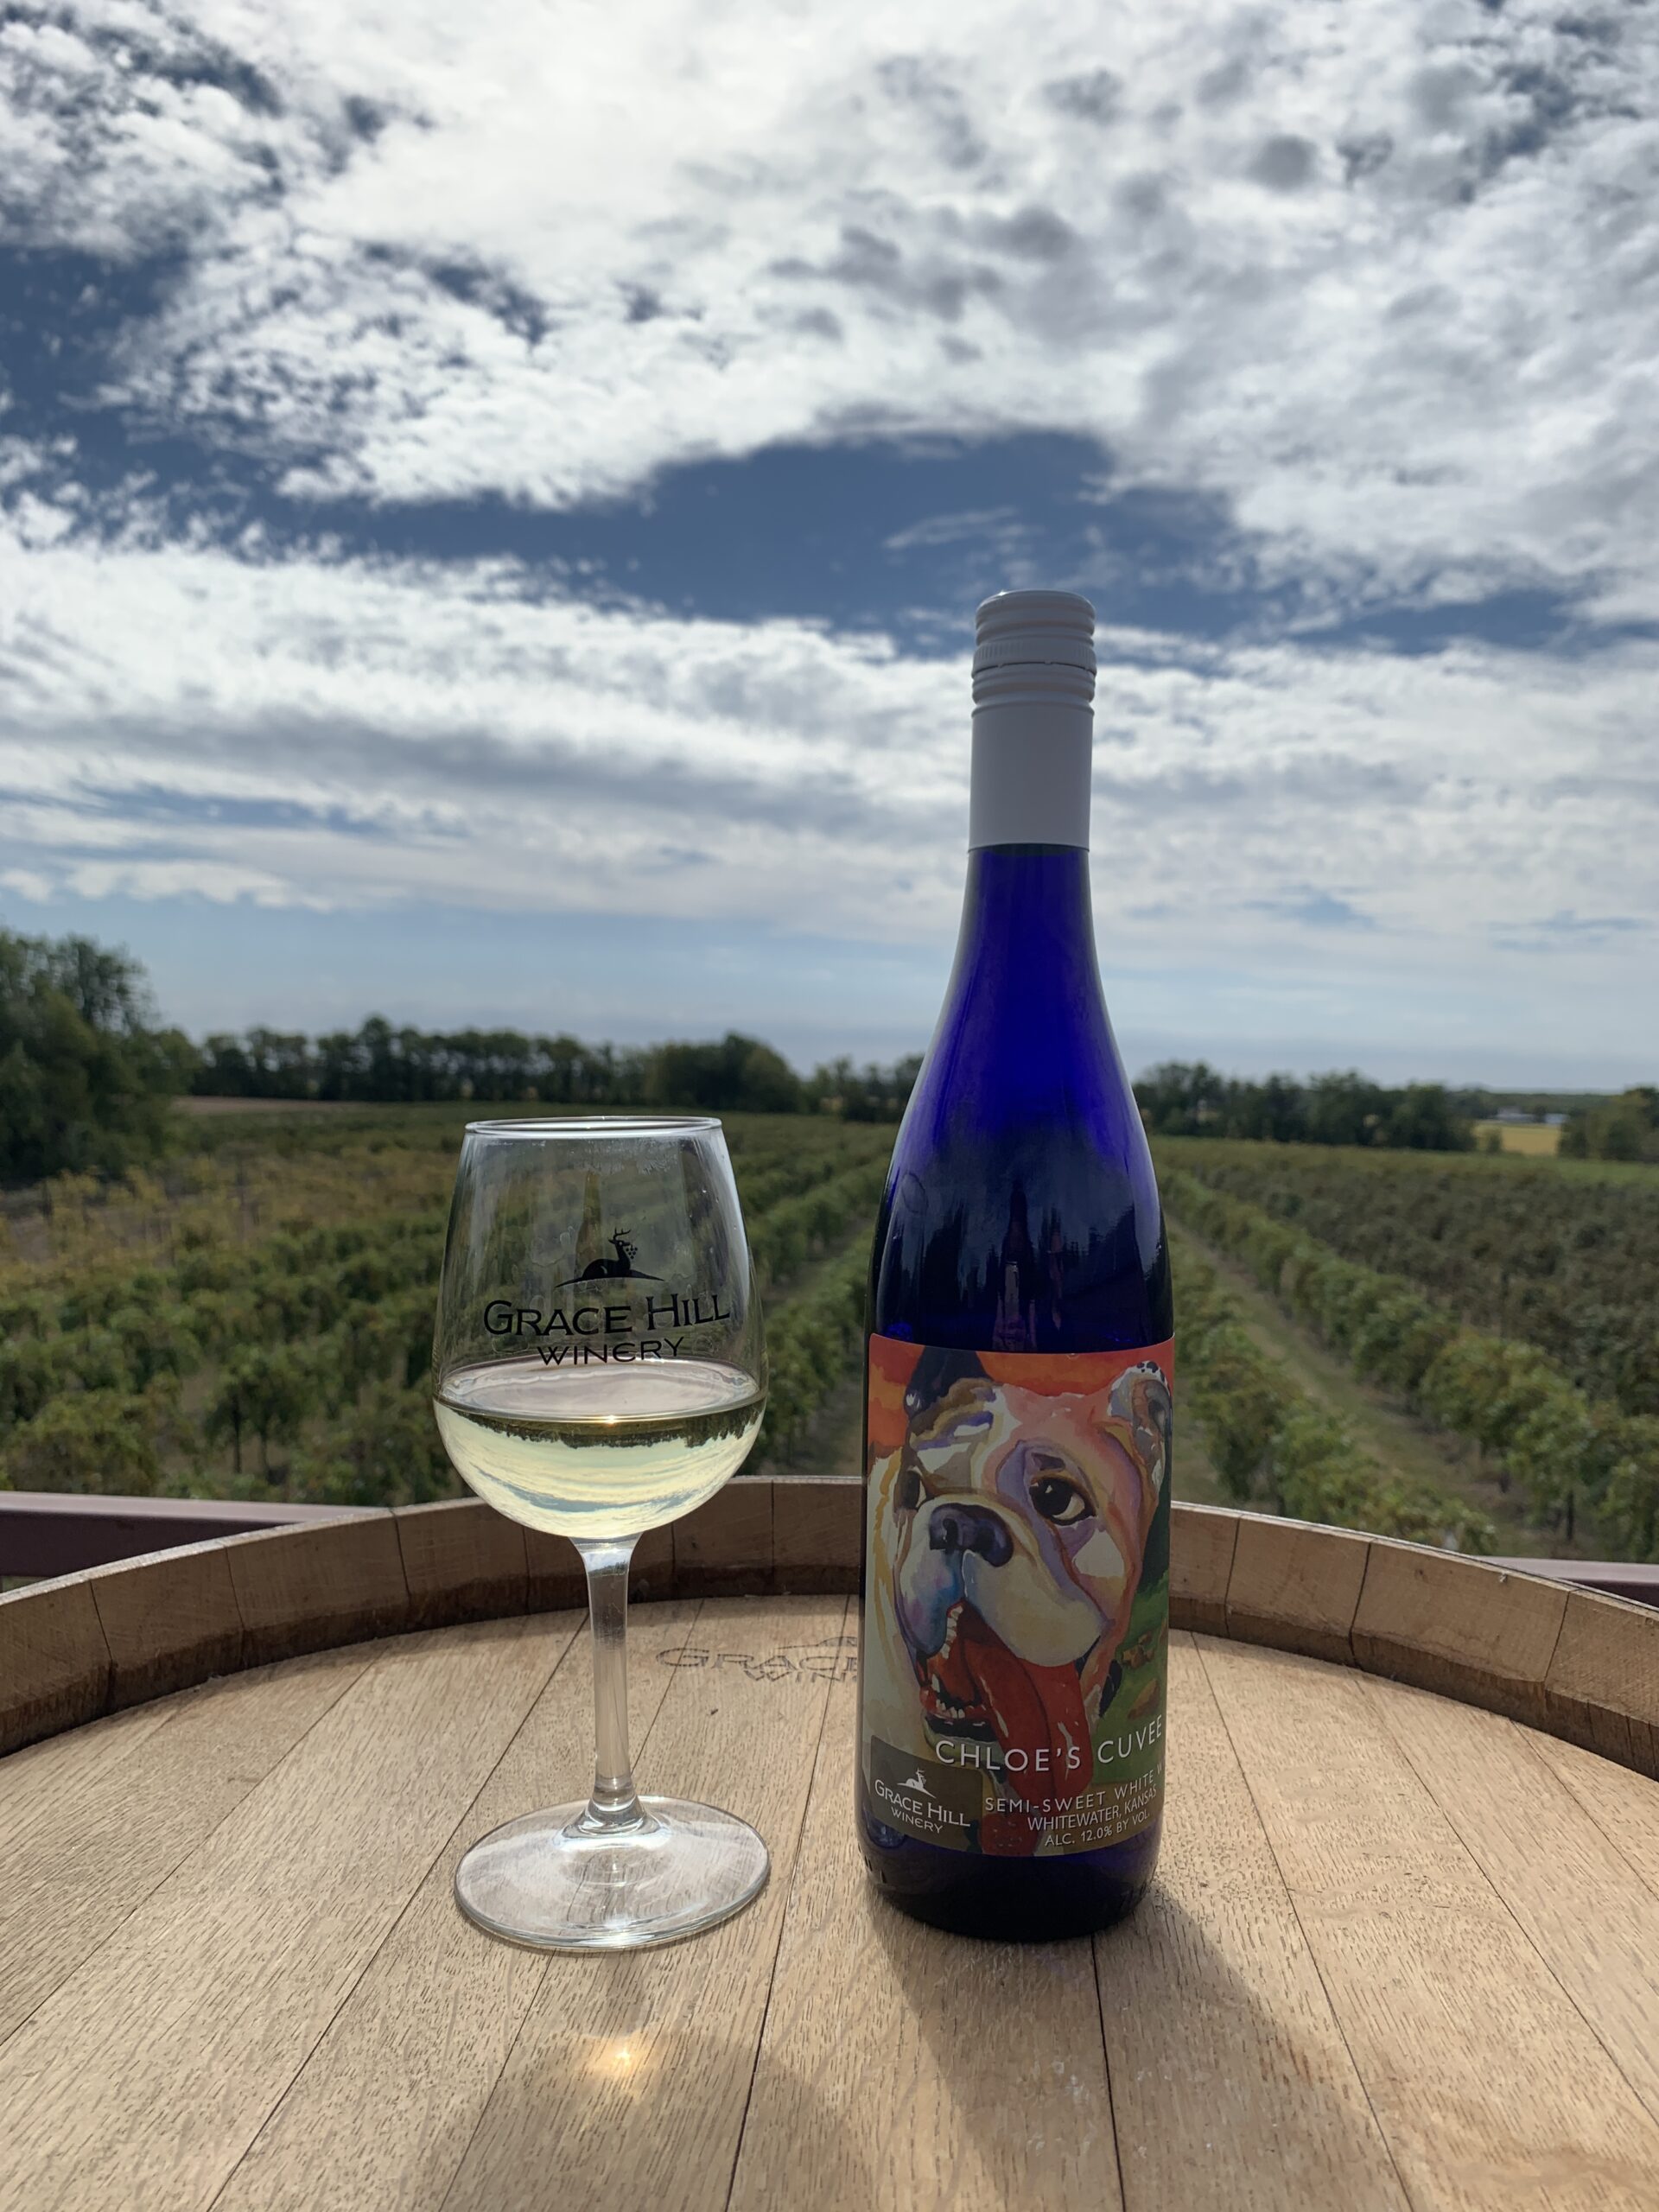 There is always a fun event planned at the winery. Check
 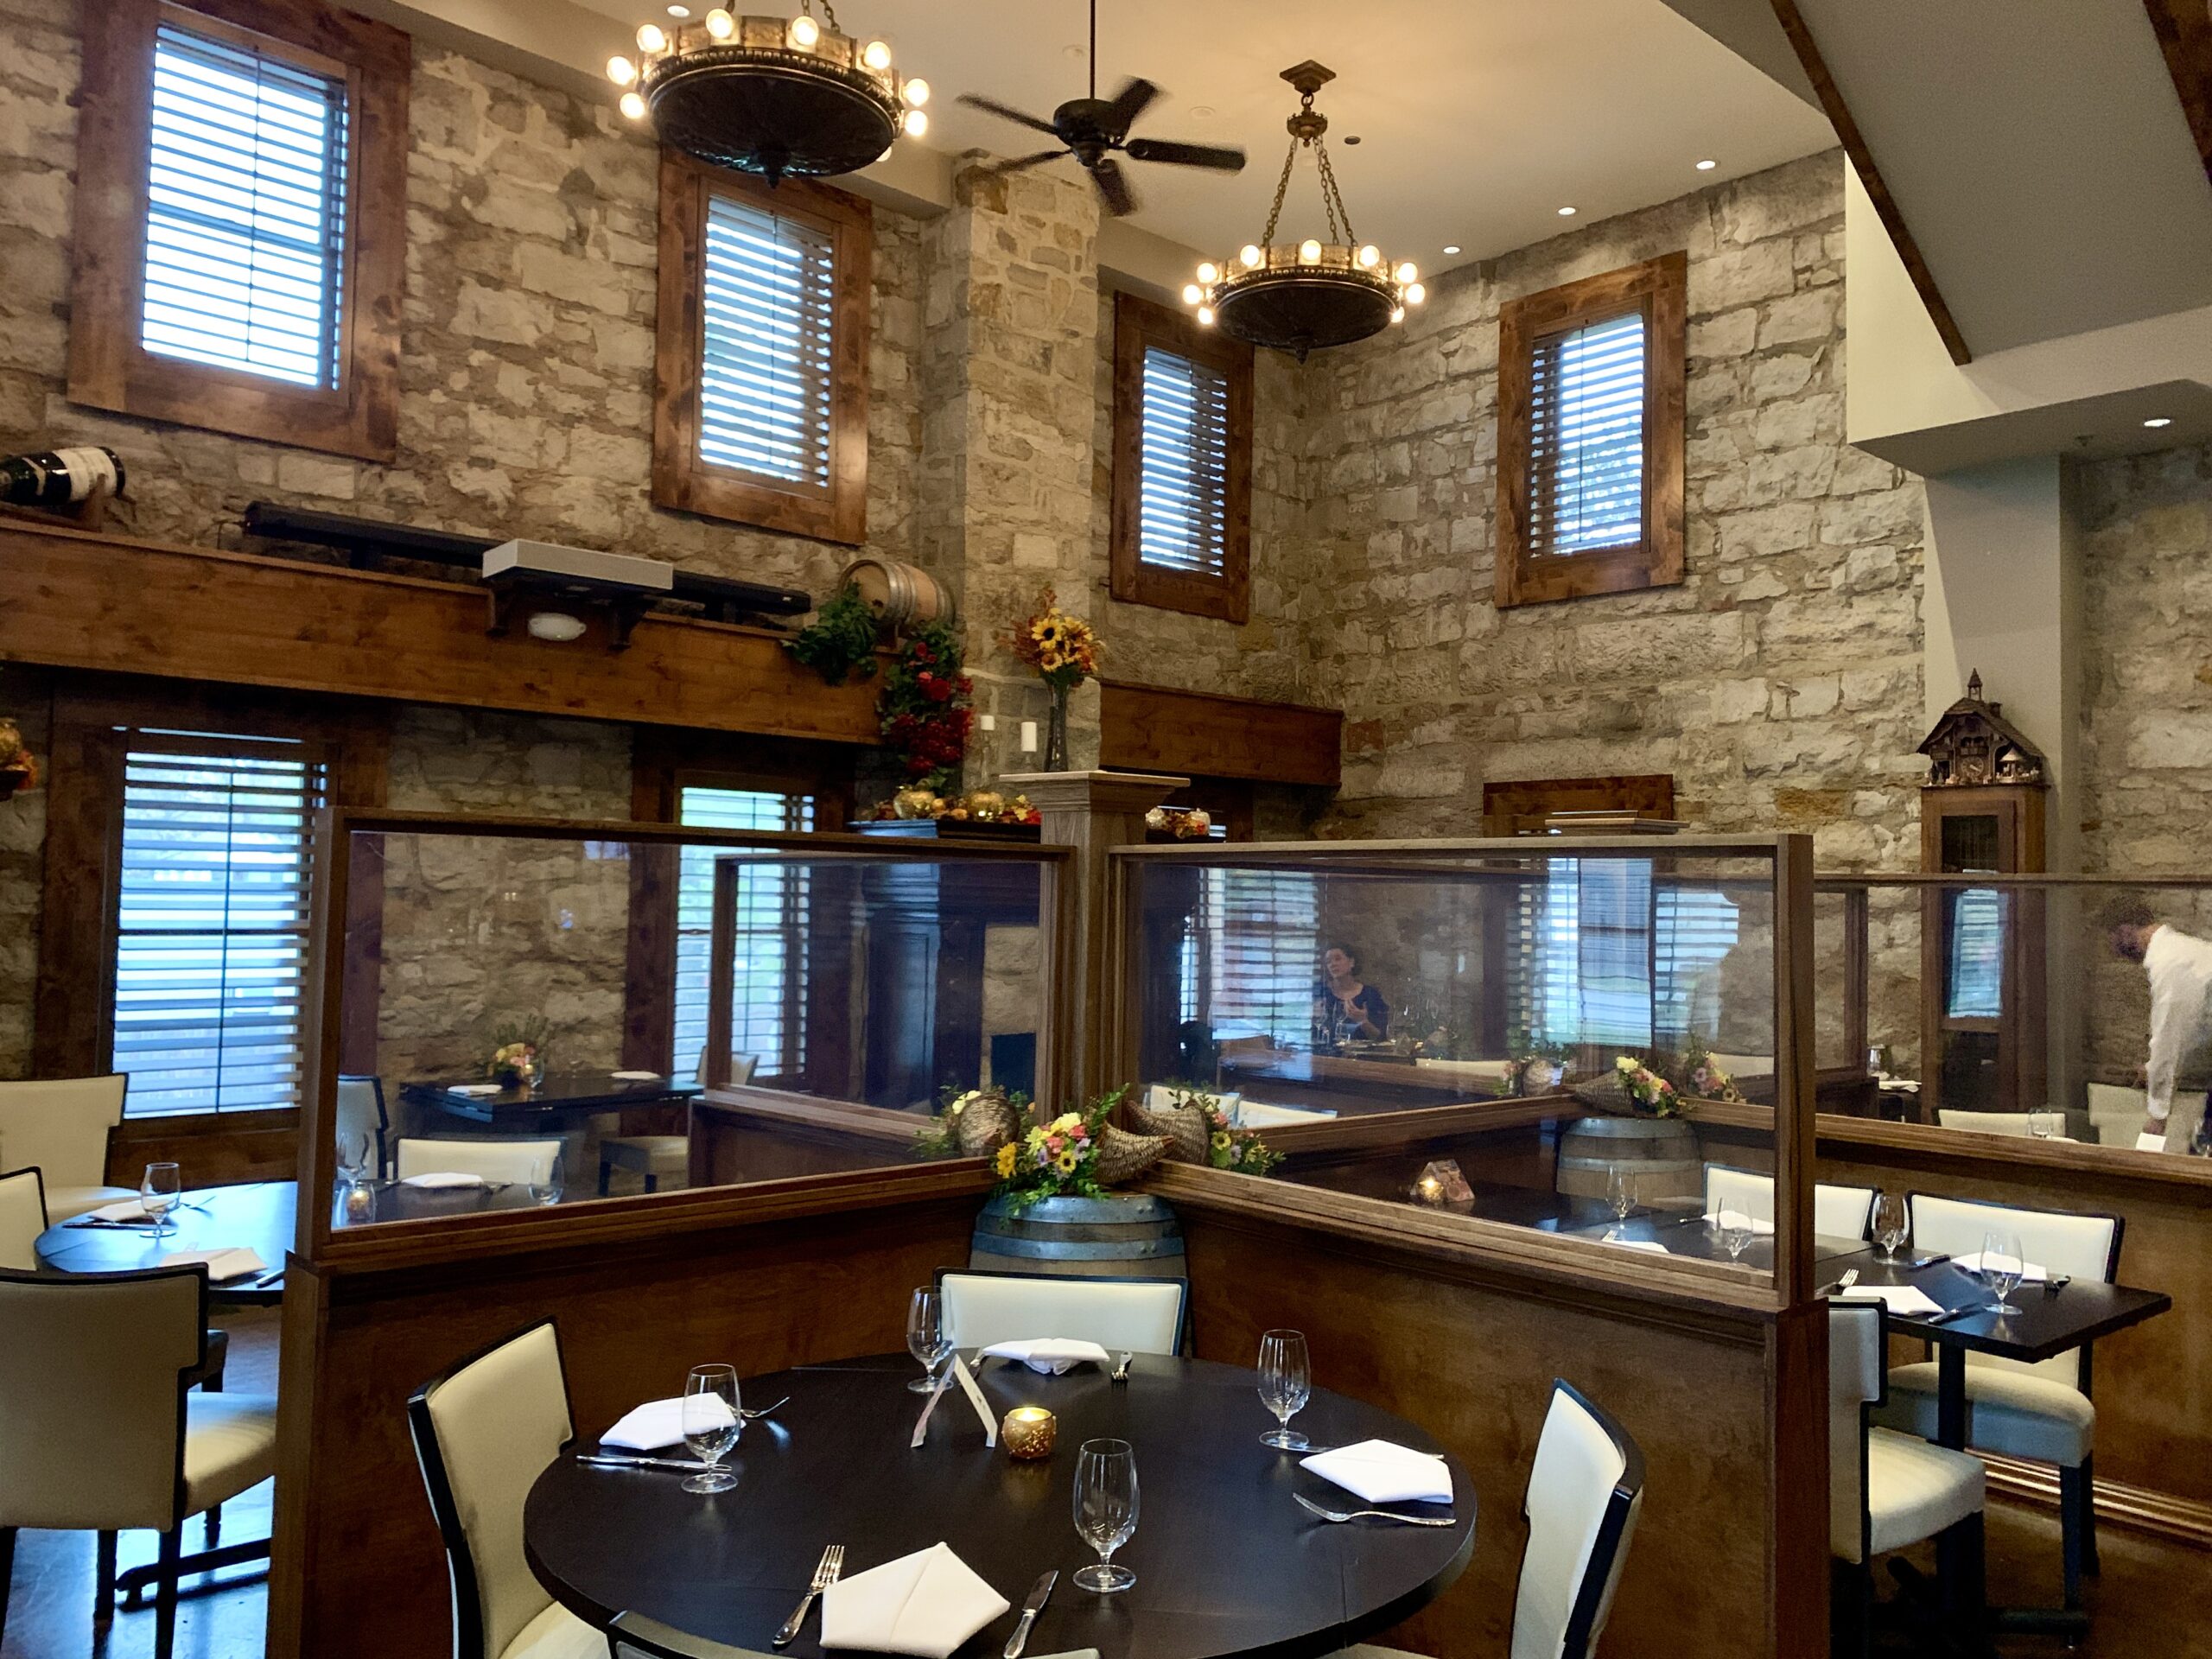 The building has been several businesses over the years but has always remained a memorable landmark on the edge of downtown Shawnee.
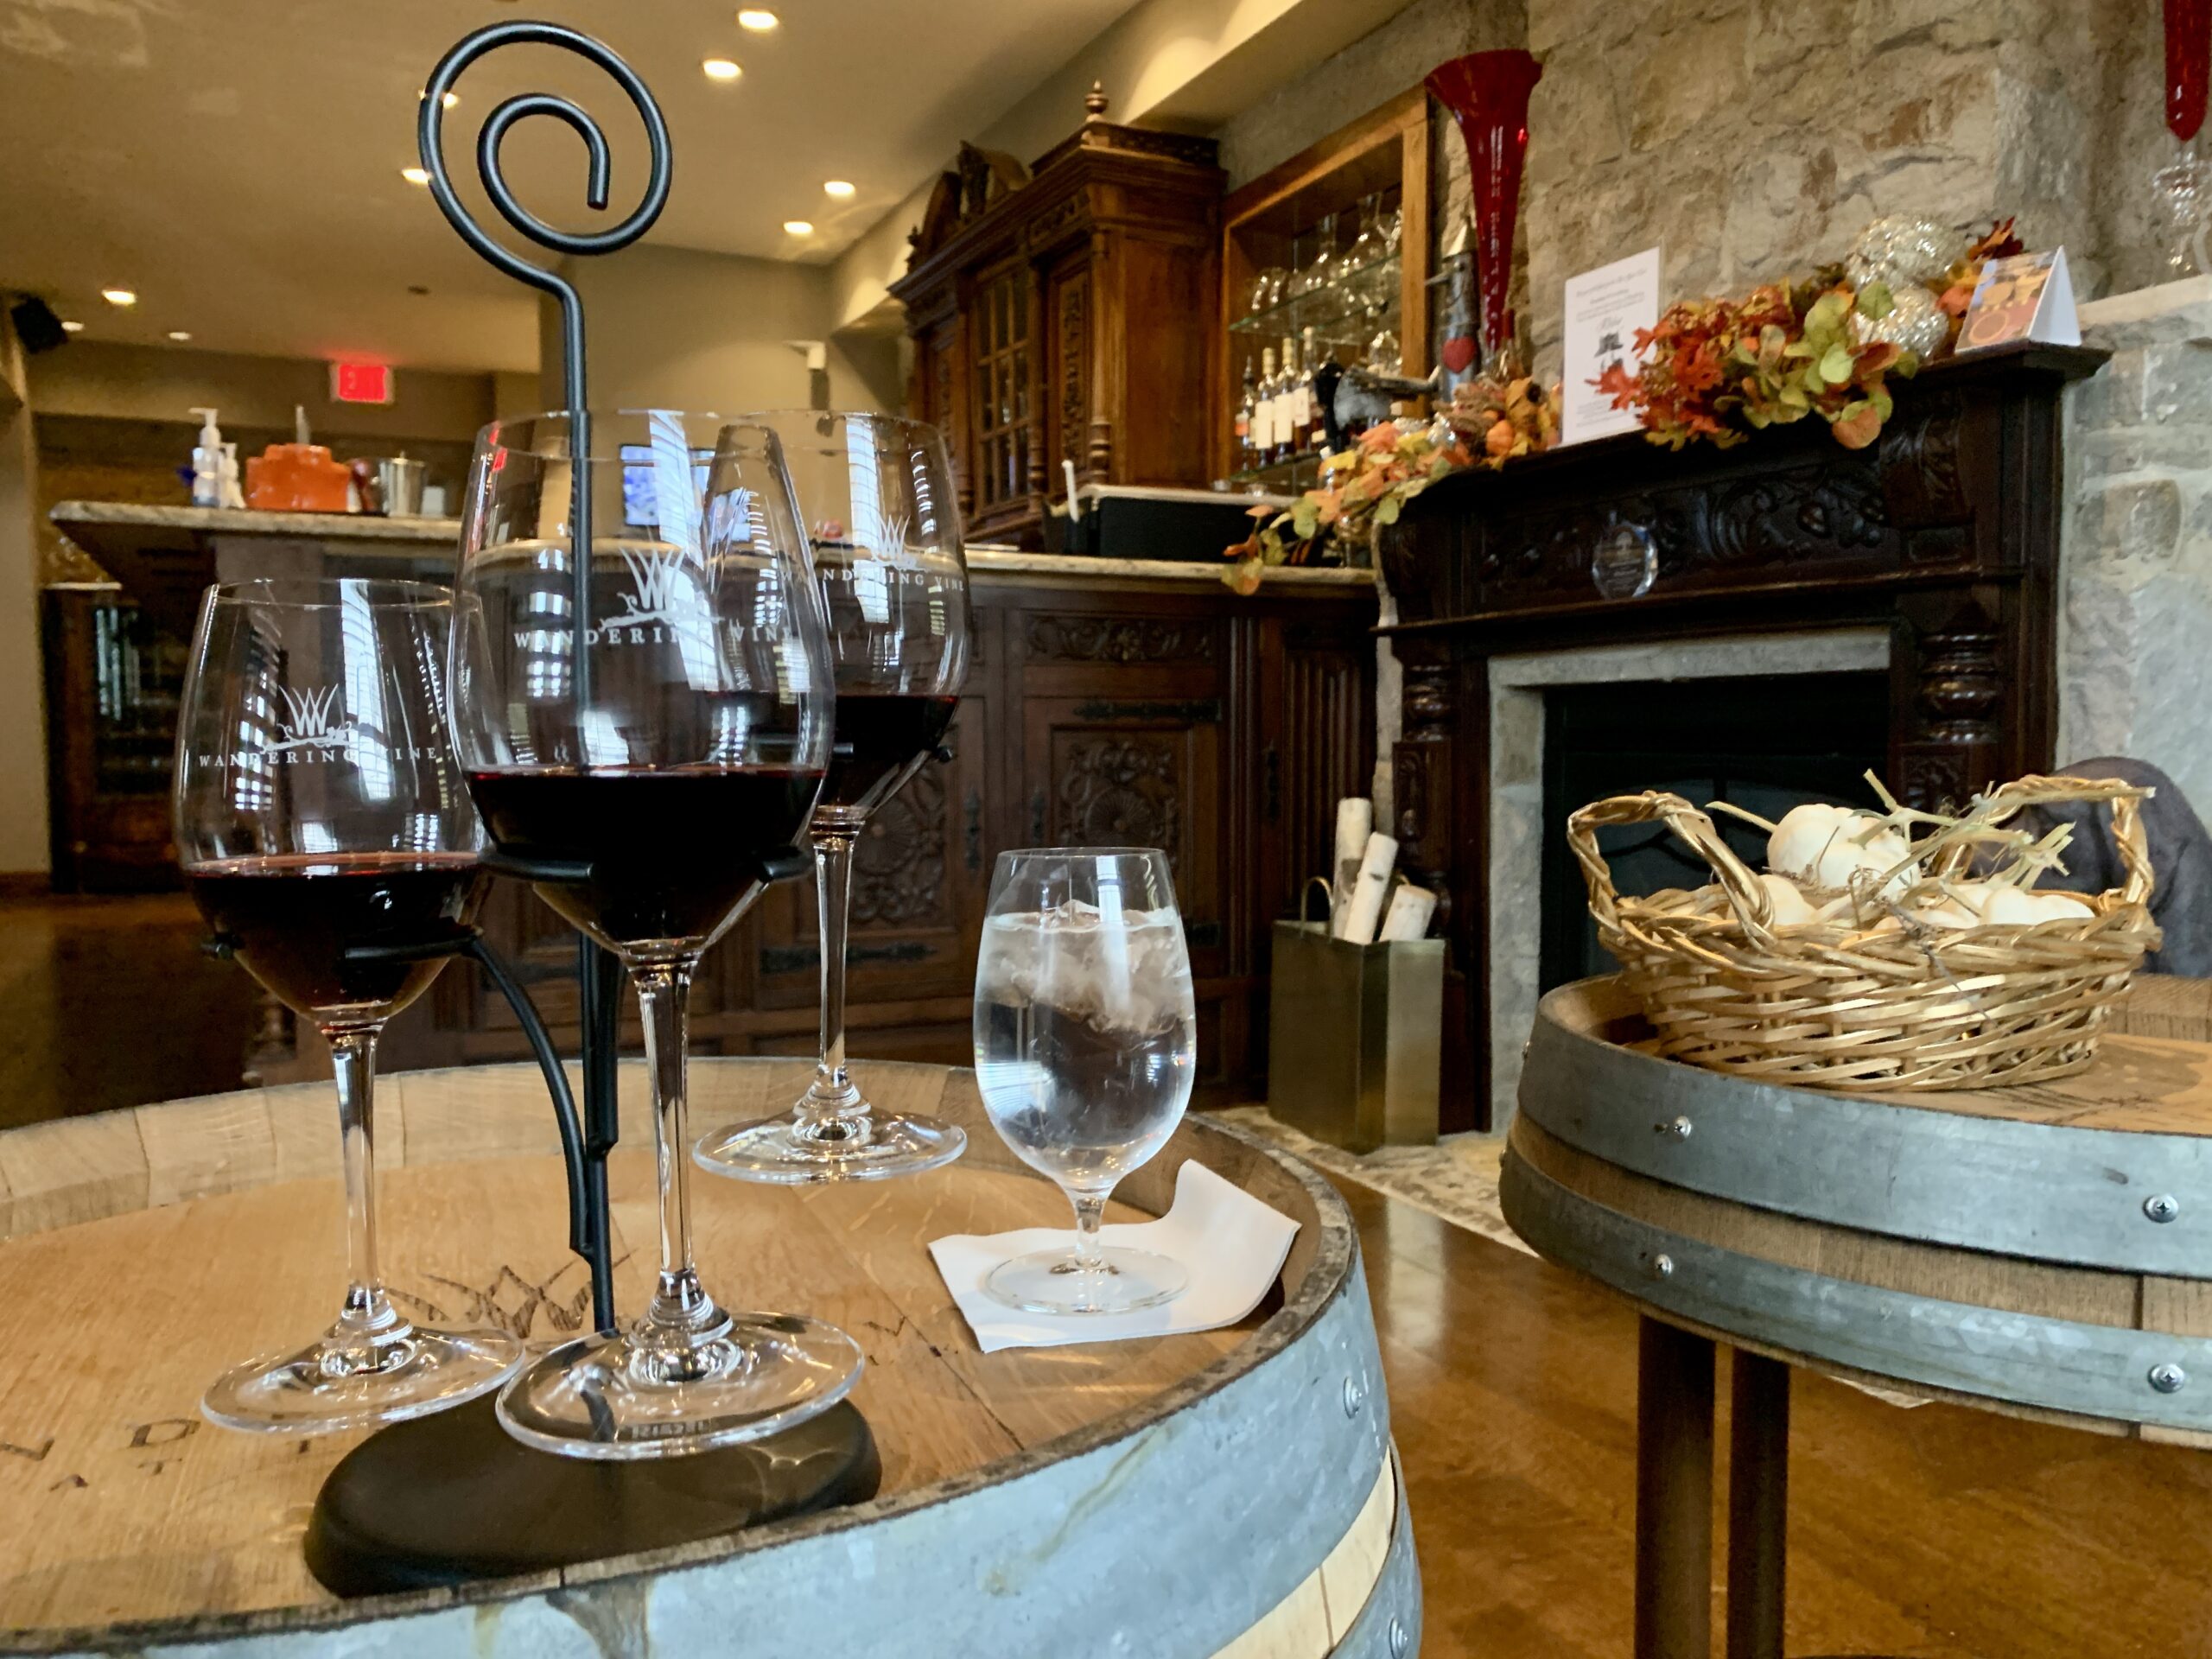 Reservations are highly recommended; however, I stopped by the castle for a wine flight during the late afternoon between meal times and was served swiftly in the bar area. I chose Reds of the World, a flight that included three pours from Portugal, Washington, and Spain ($16). Premium wine flights are $26. I loved them all.
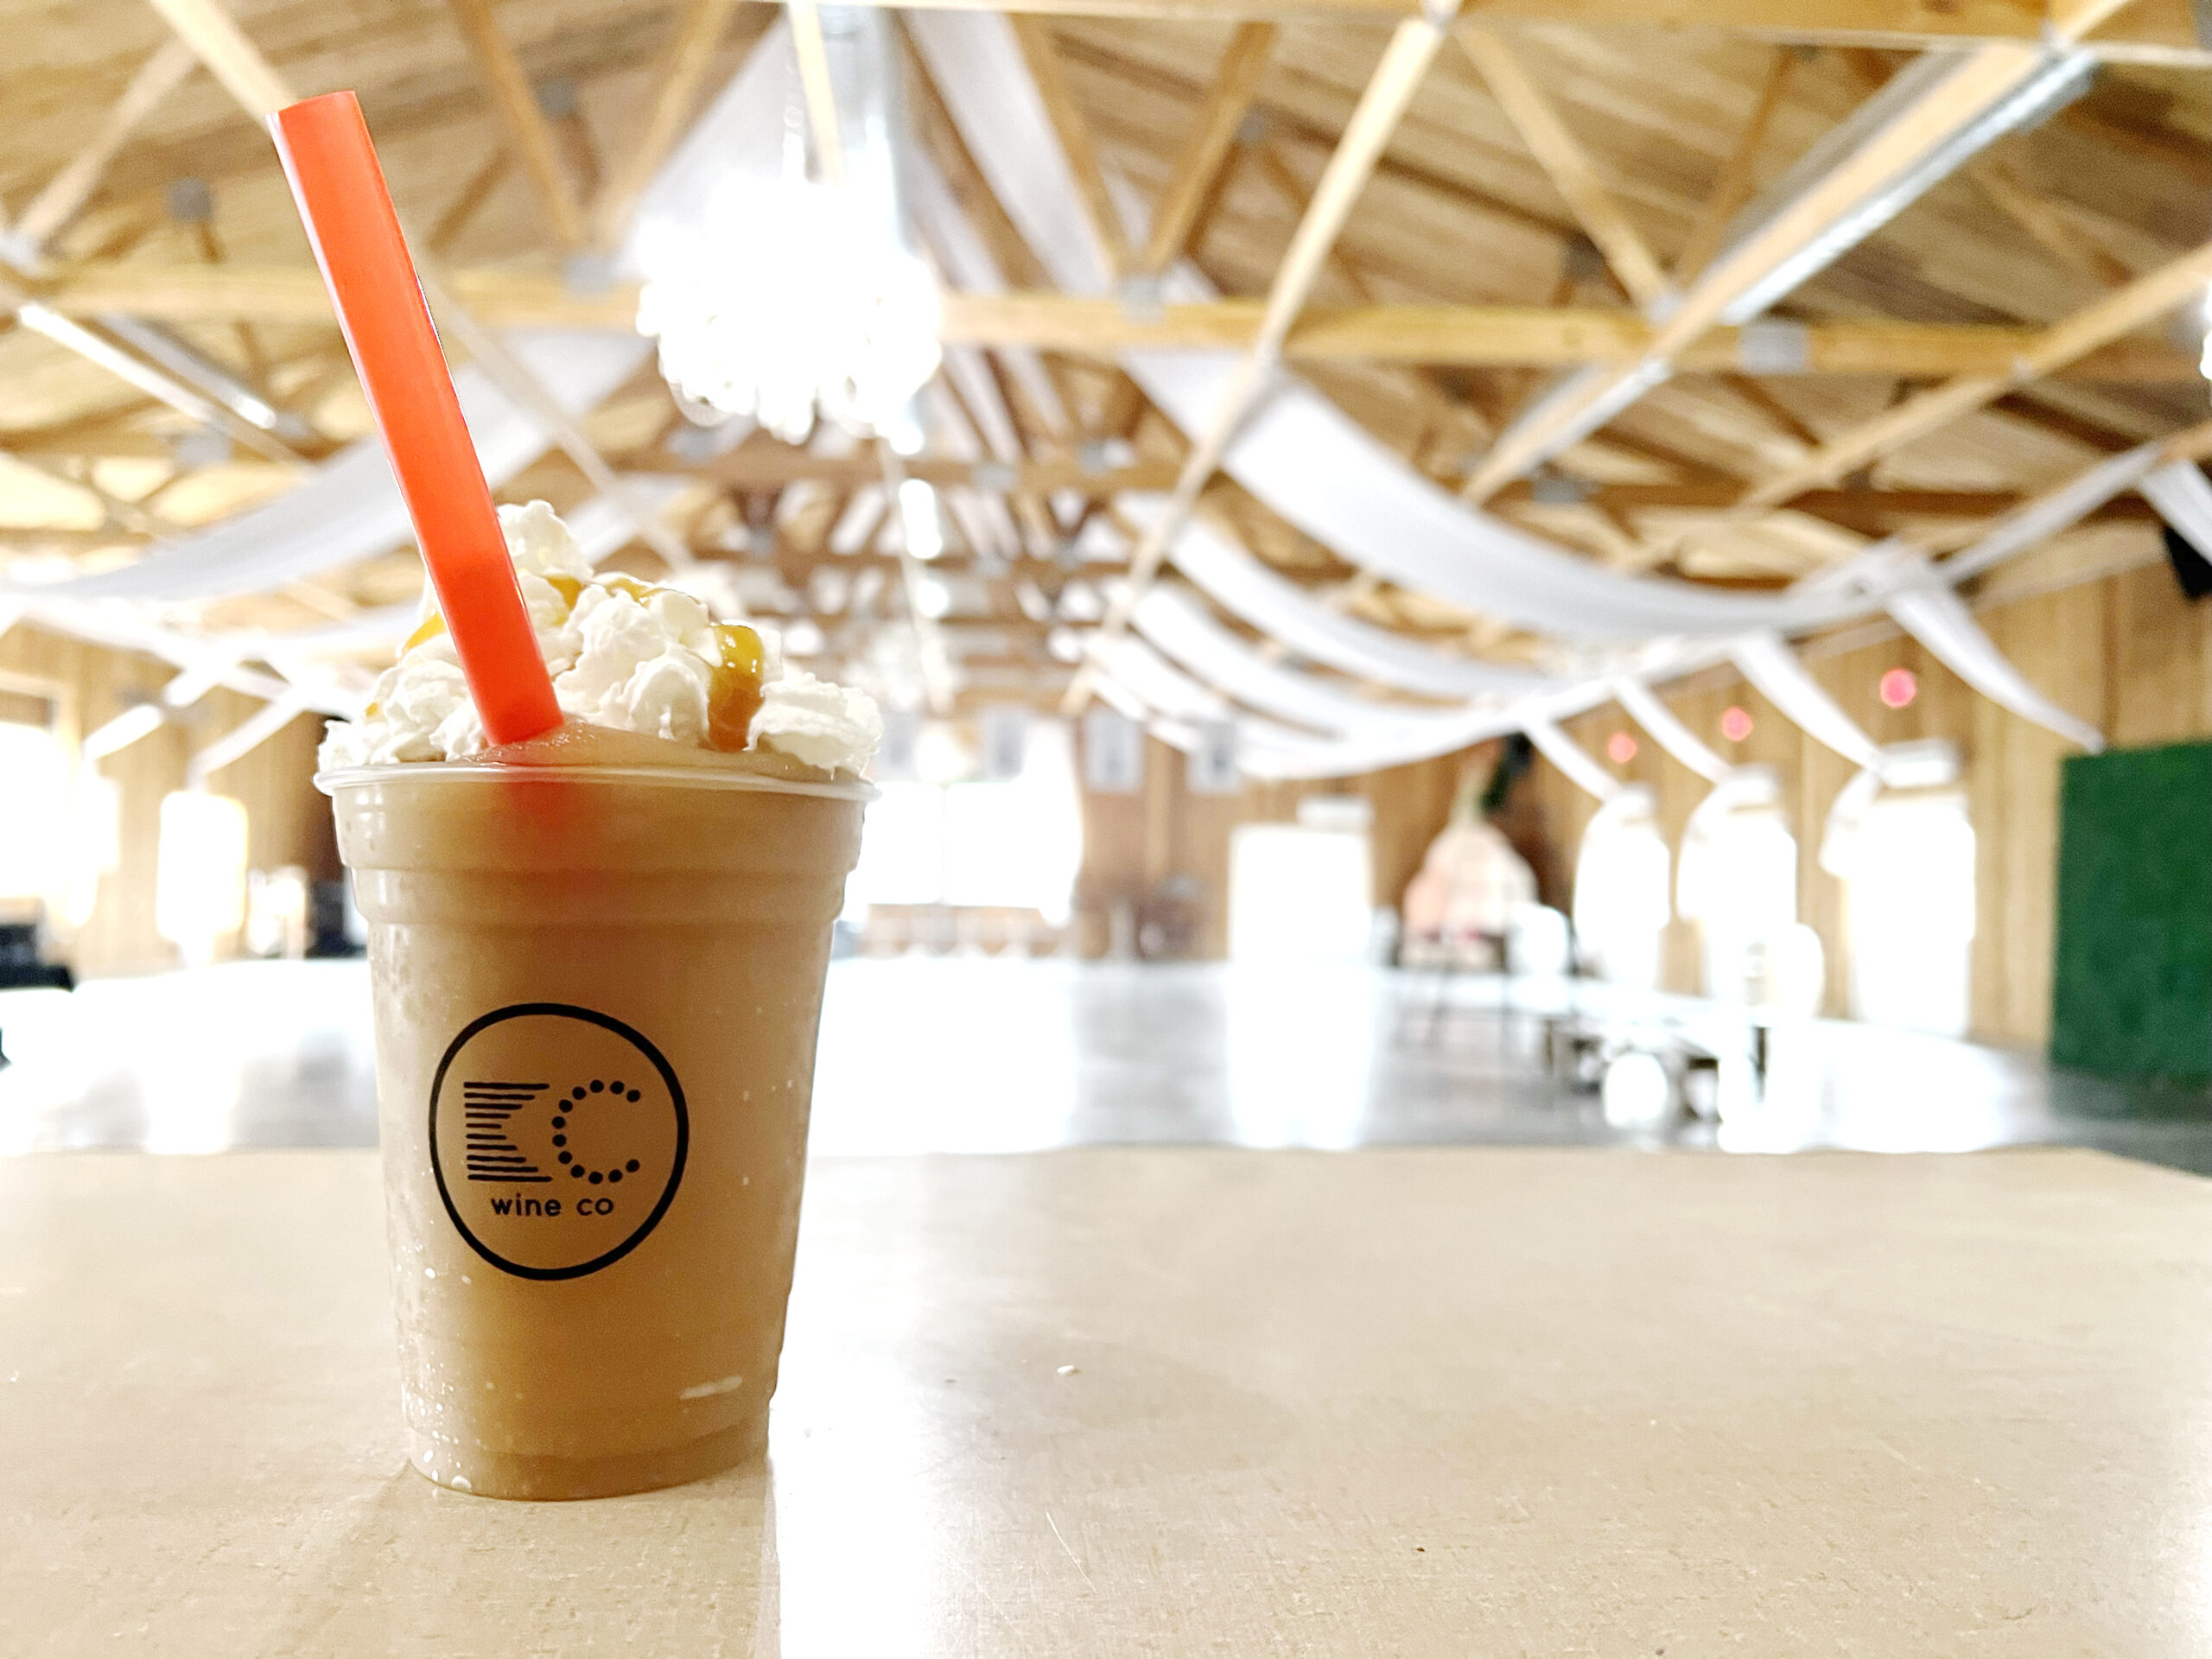 The owners wanted guests to use all of the senses while visiting. Whether you’re noting the smell of fresh cedar inside the red barn or sitting on a swing and enjoying the view with a wine glass, you’ll get the full experience.
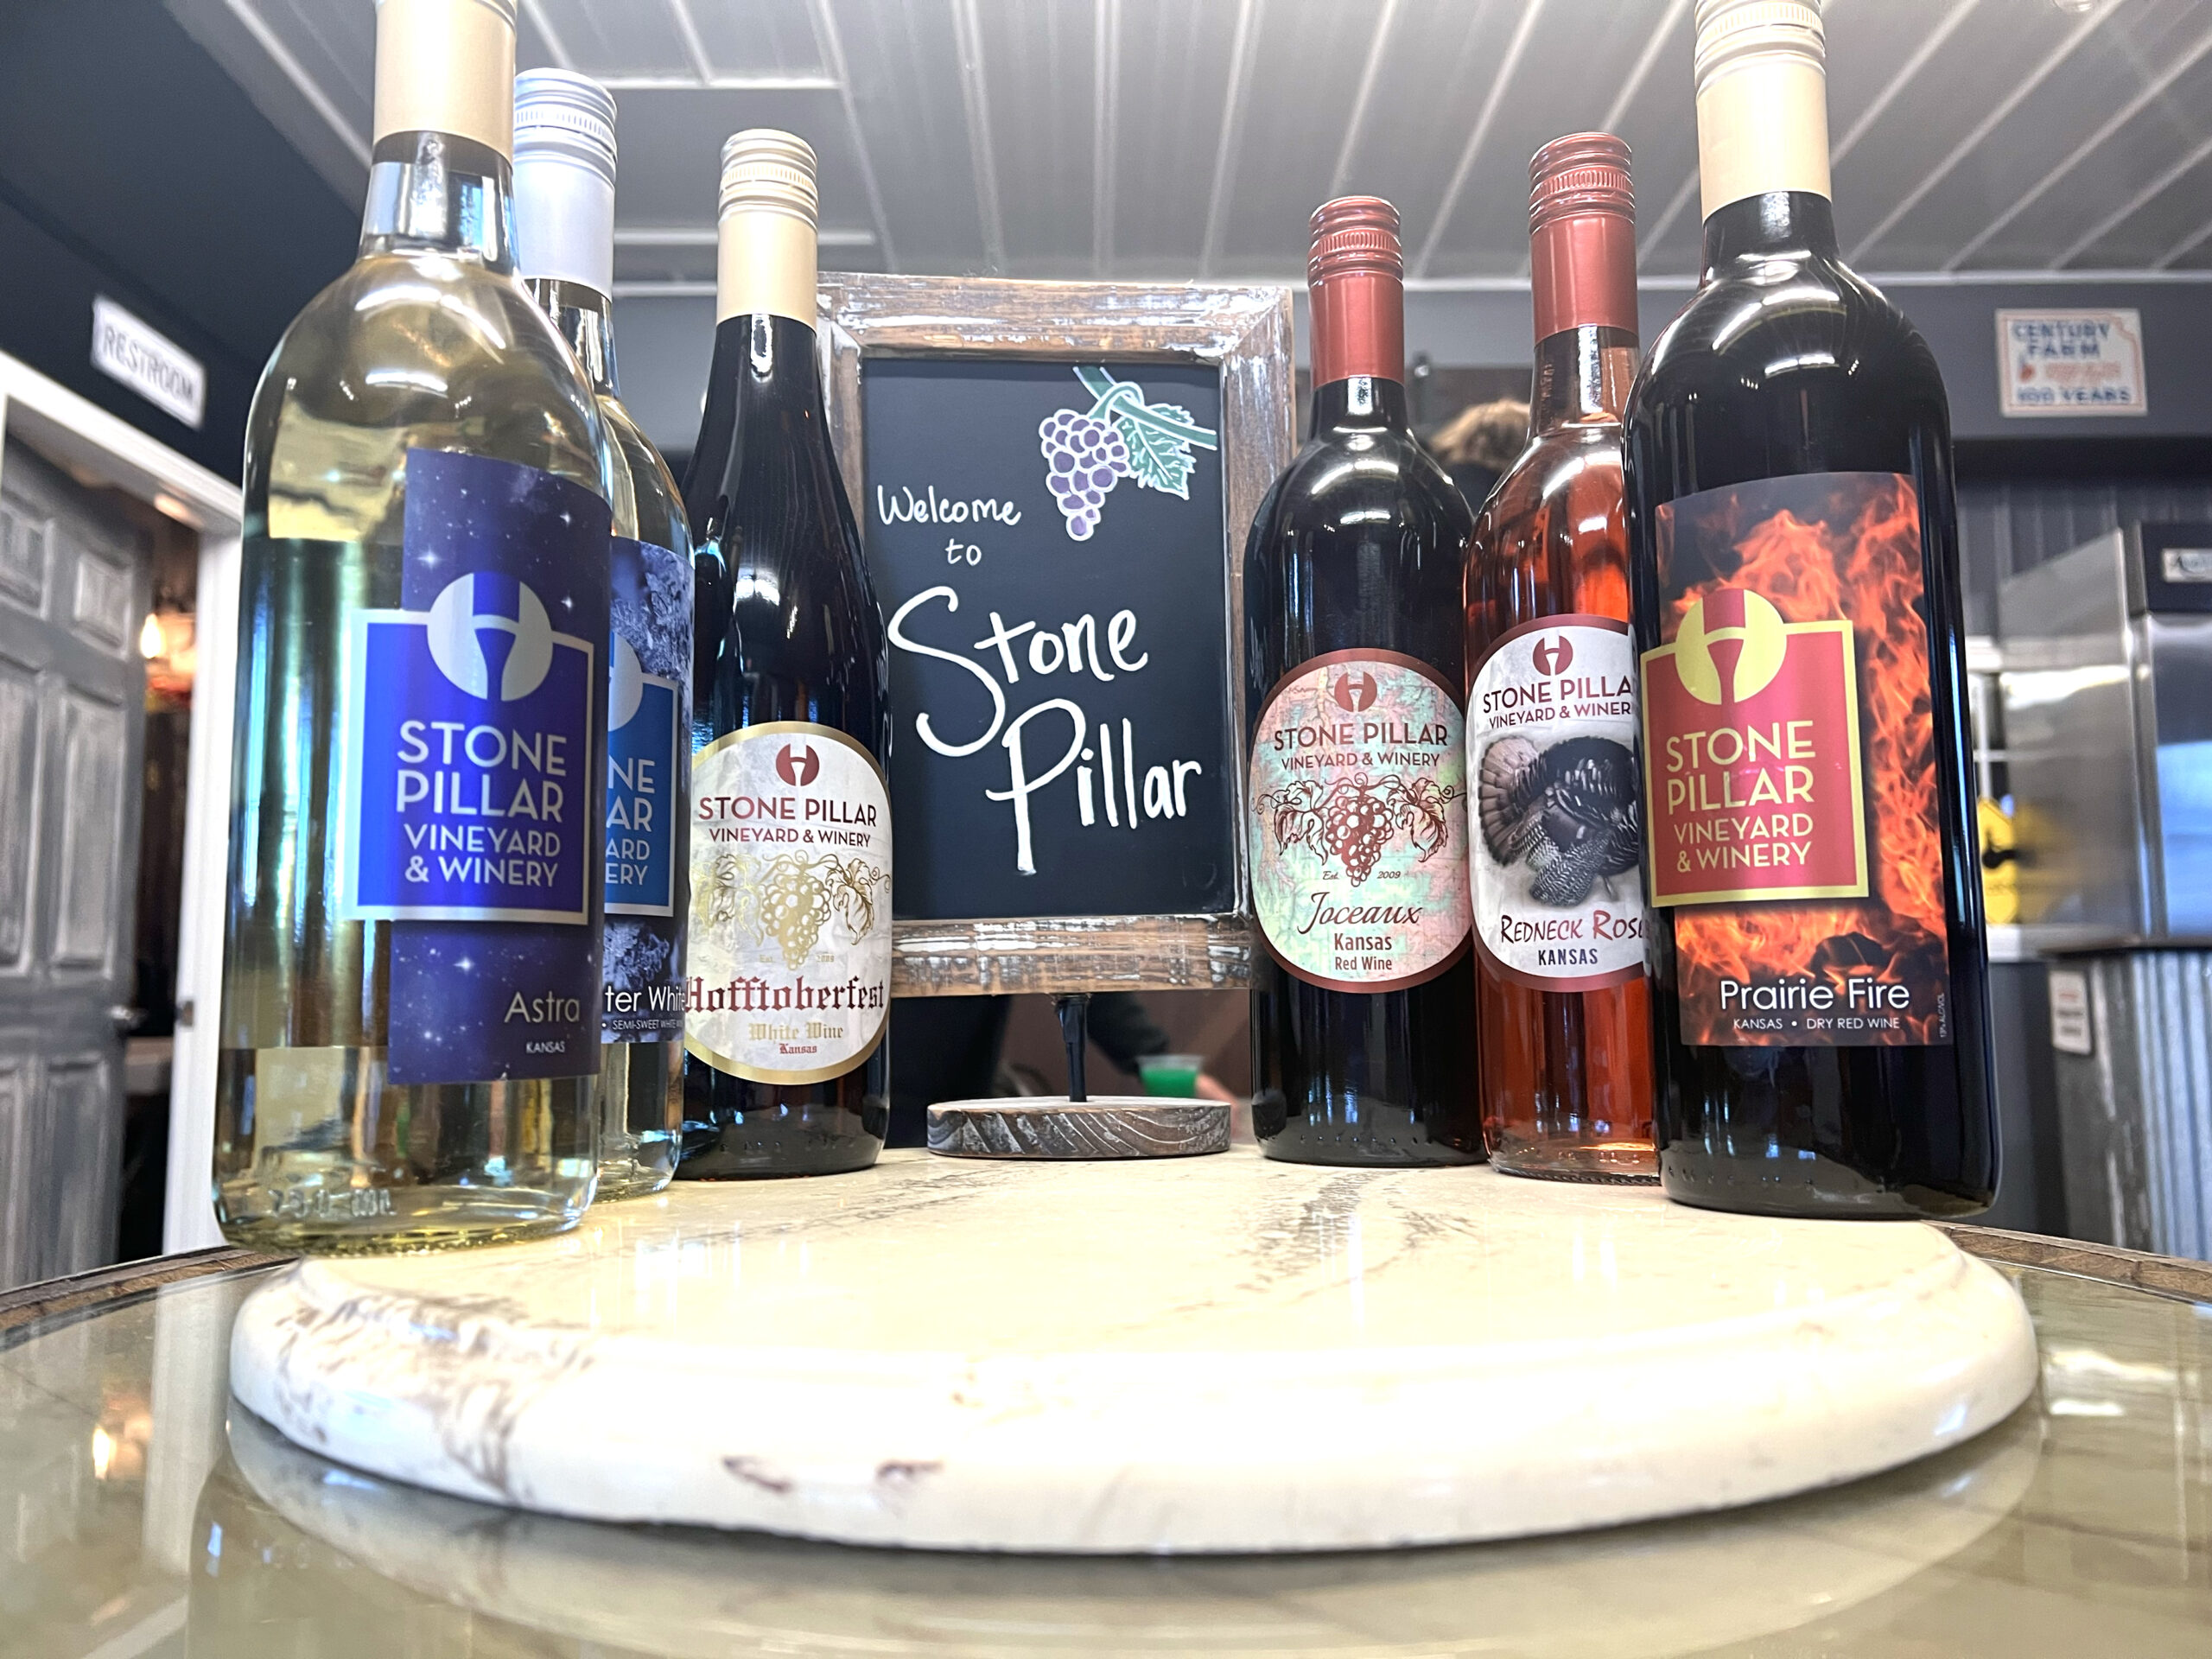
 The staff is incredibly friendly and knowledgeable about the award-winning wines. They carry two dozen wine varieties grown a short drive west of town.
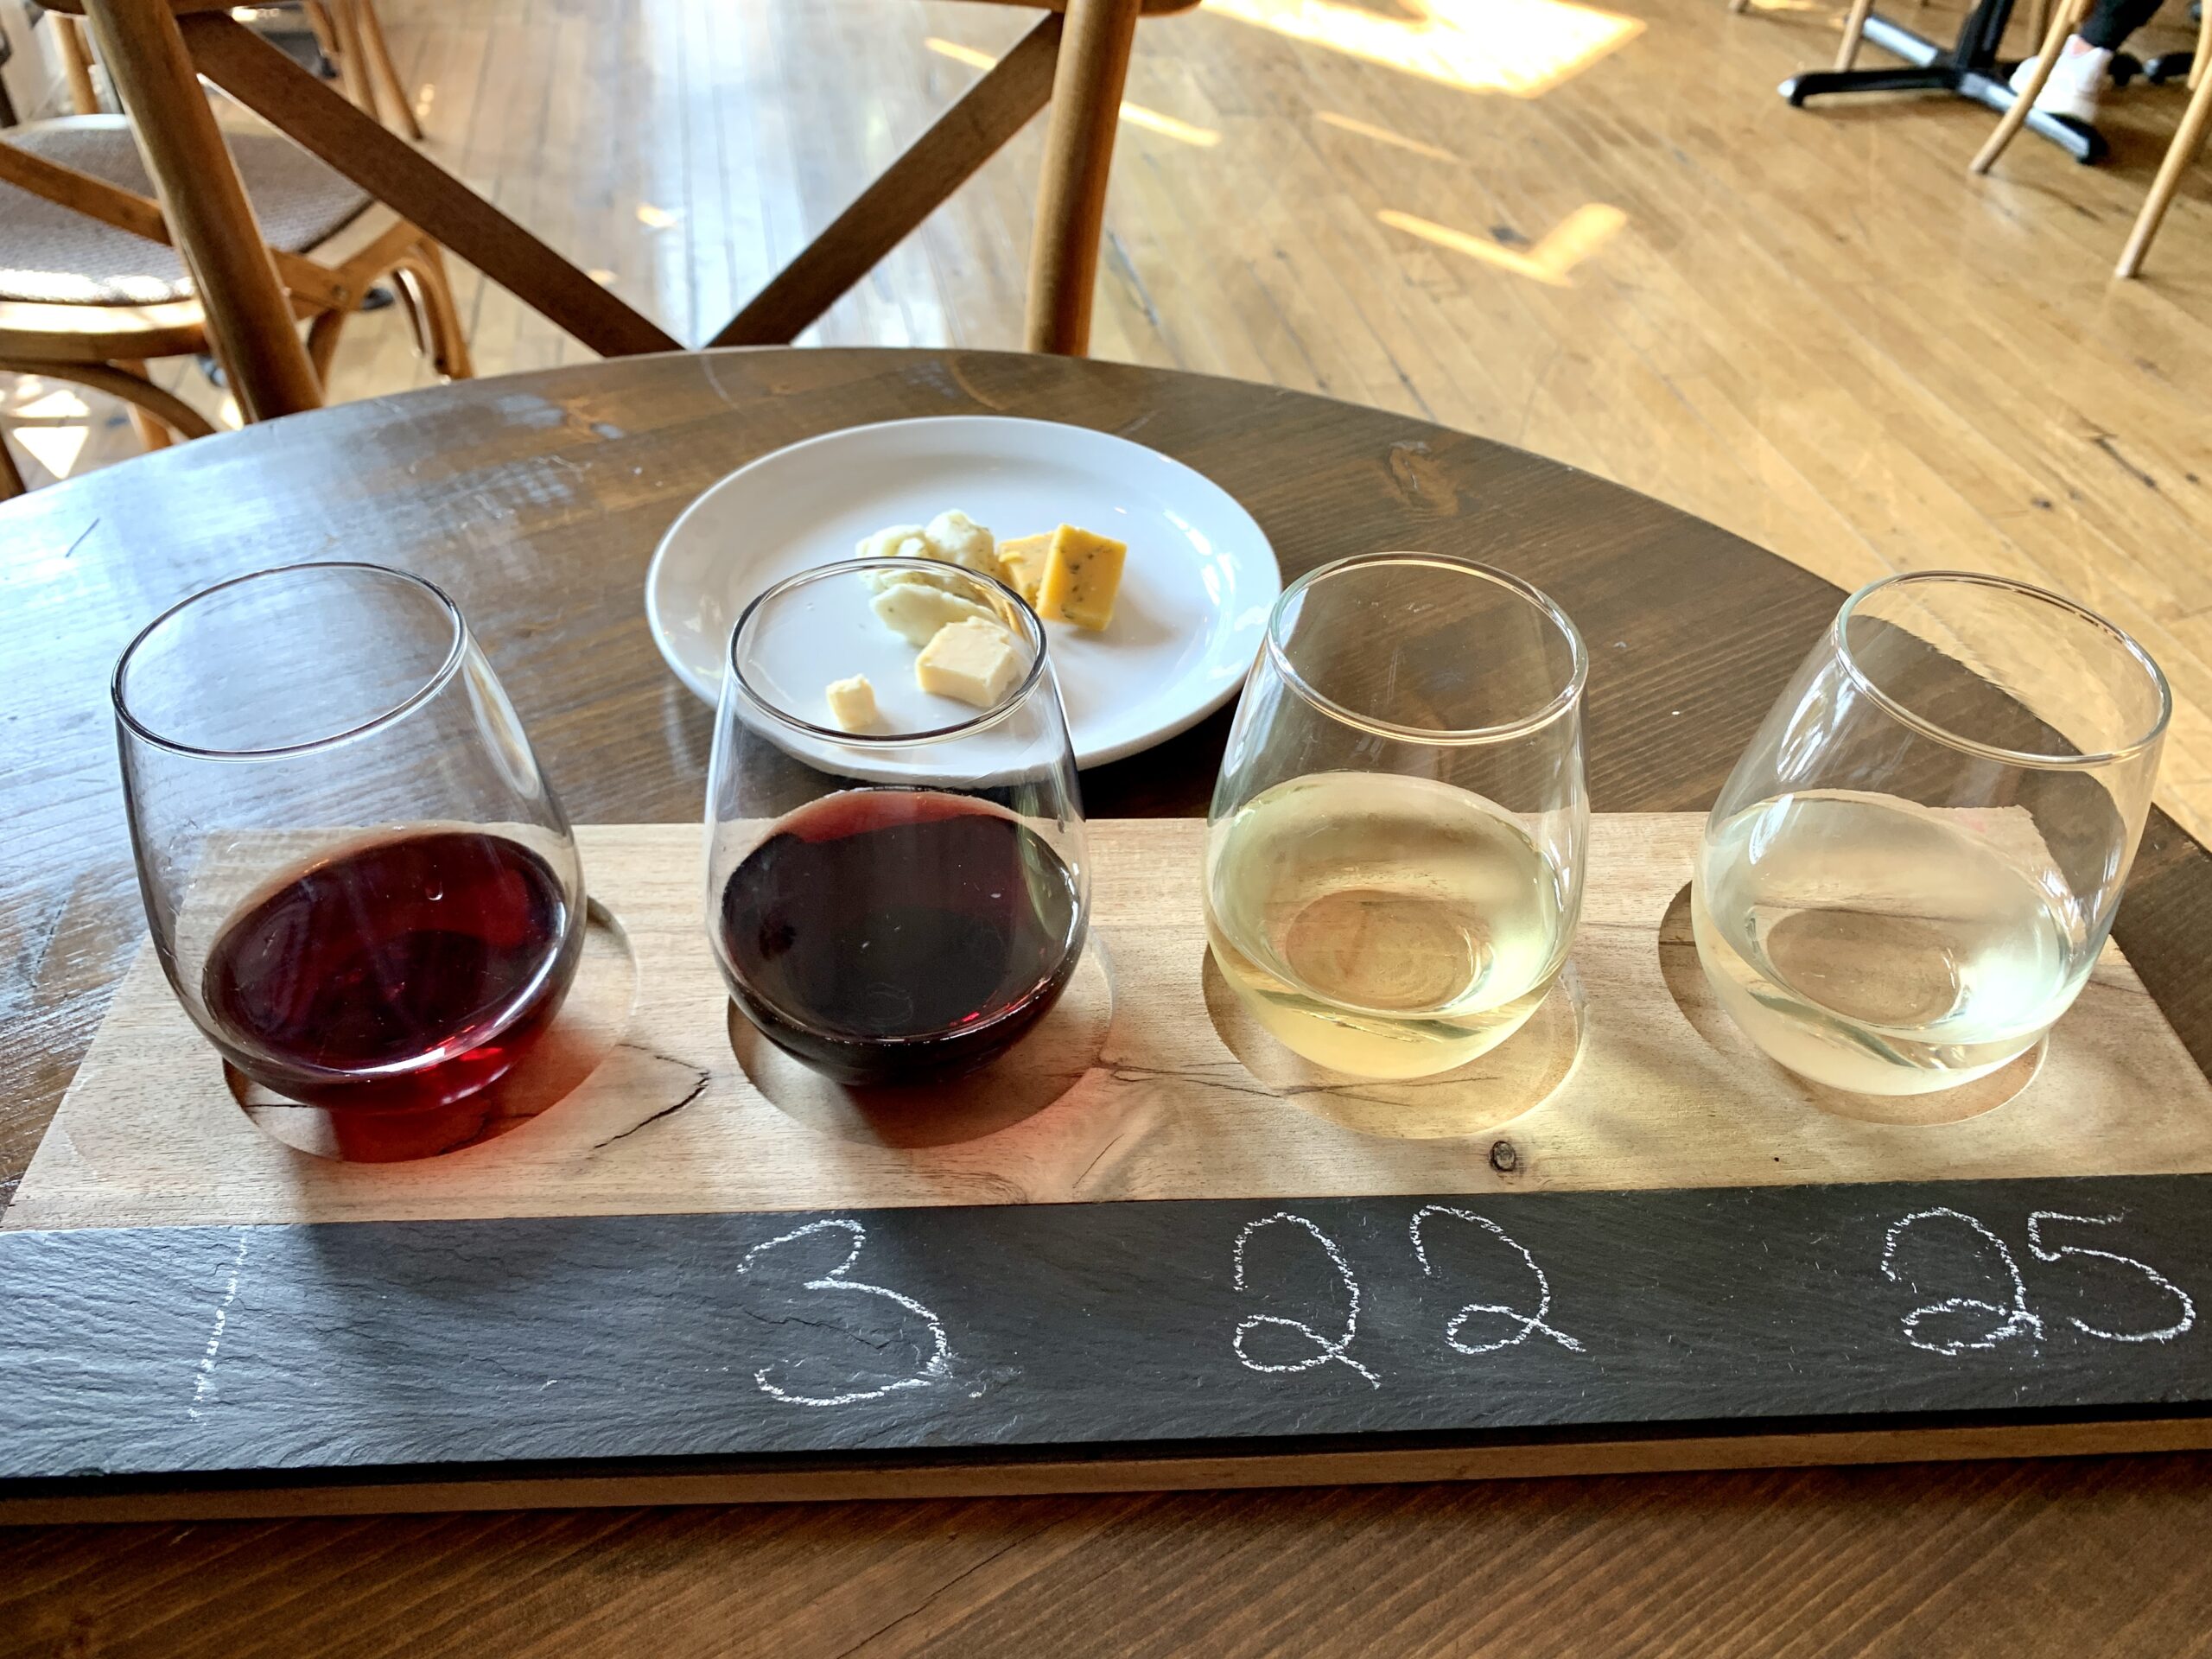
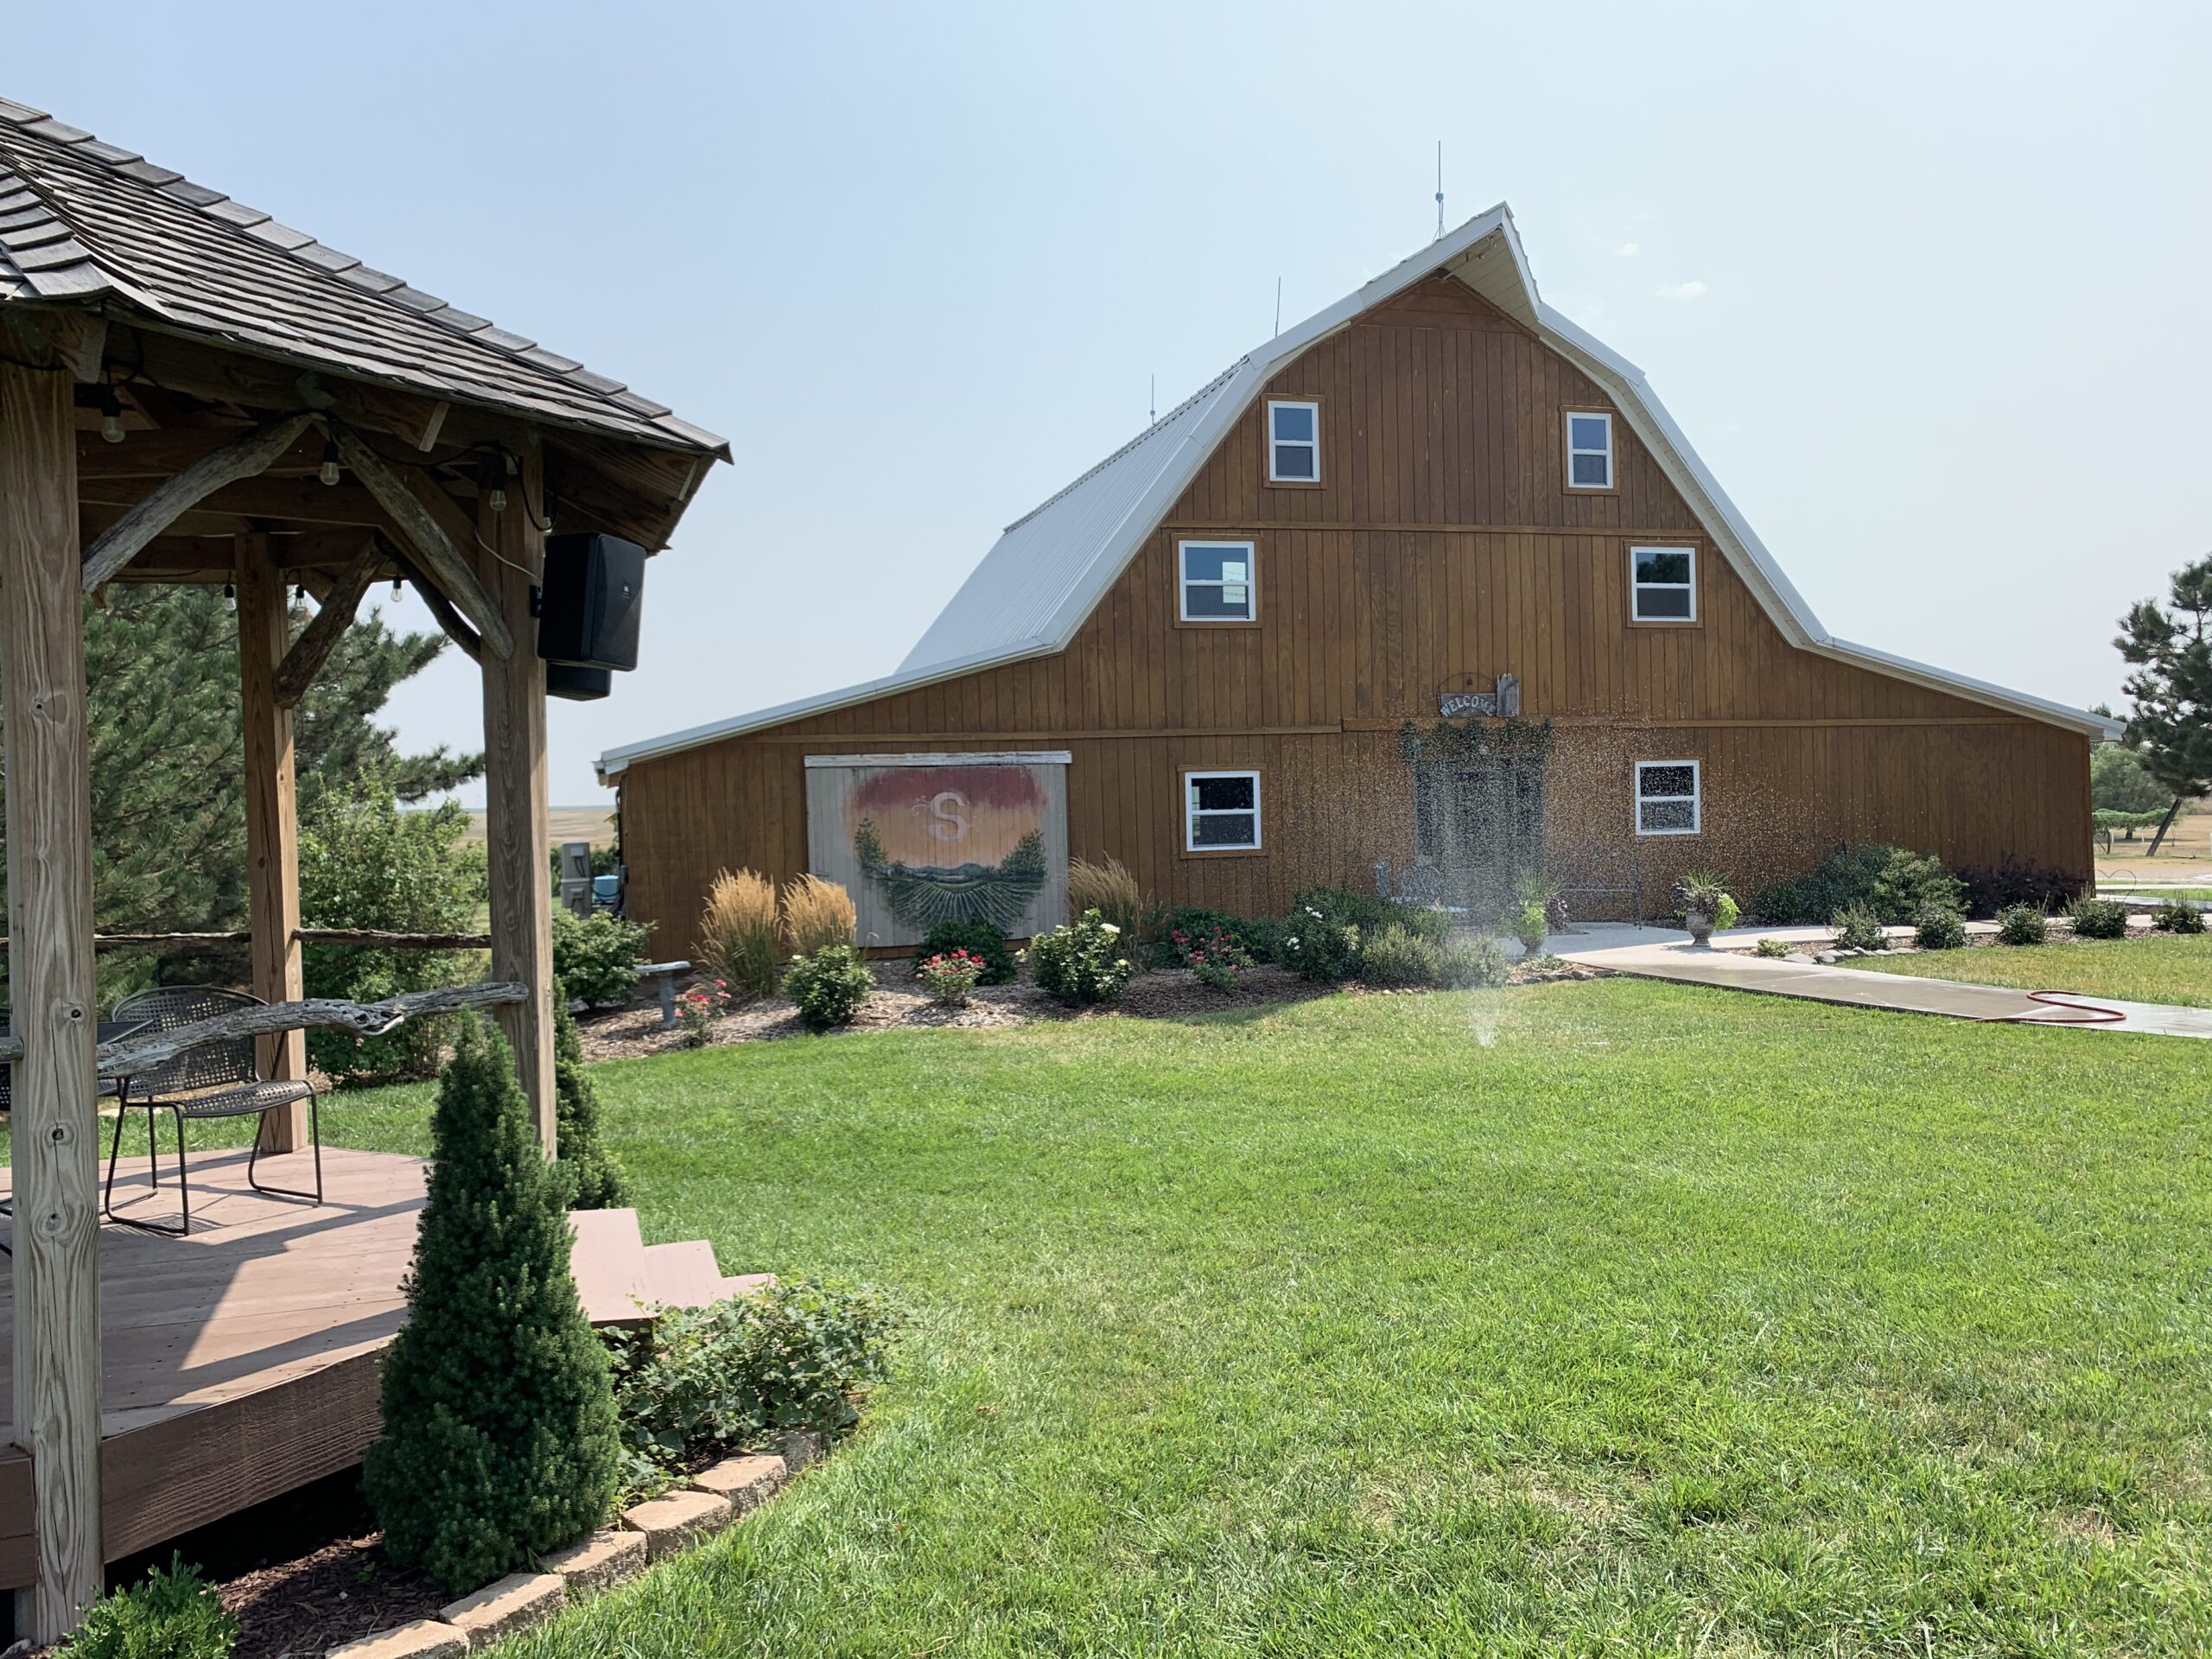 A popular venue for hosting weddings, receptions, and private parties, the barn below is available for rental. A nearby patio attached to the tasting room provides outdoor seating.
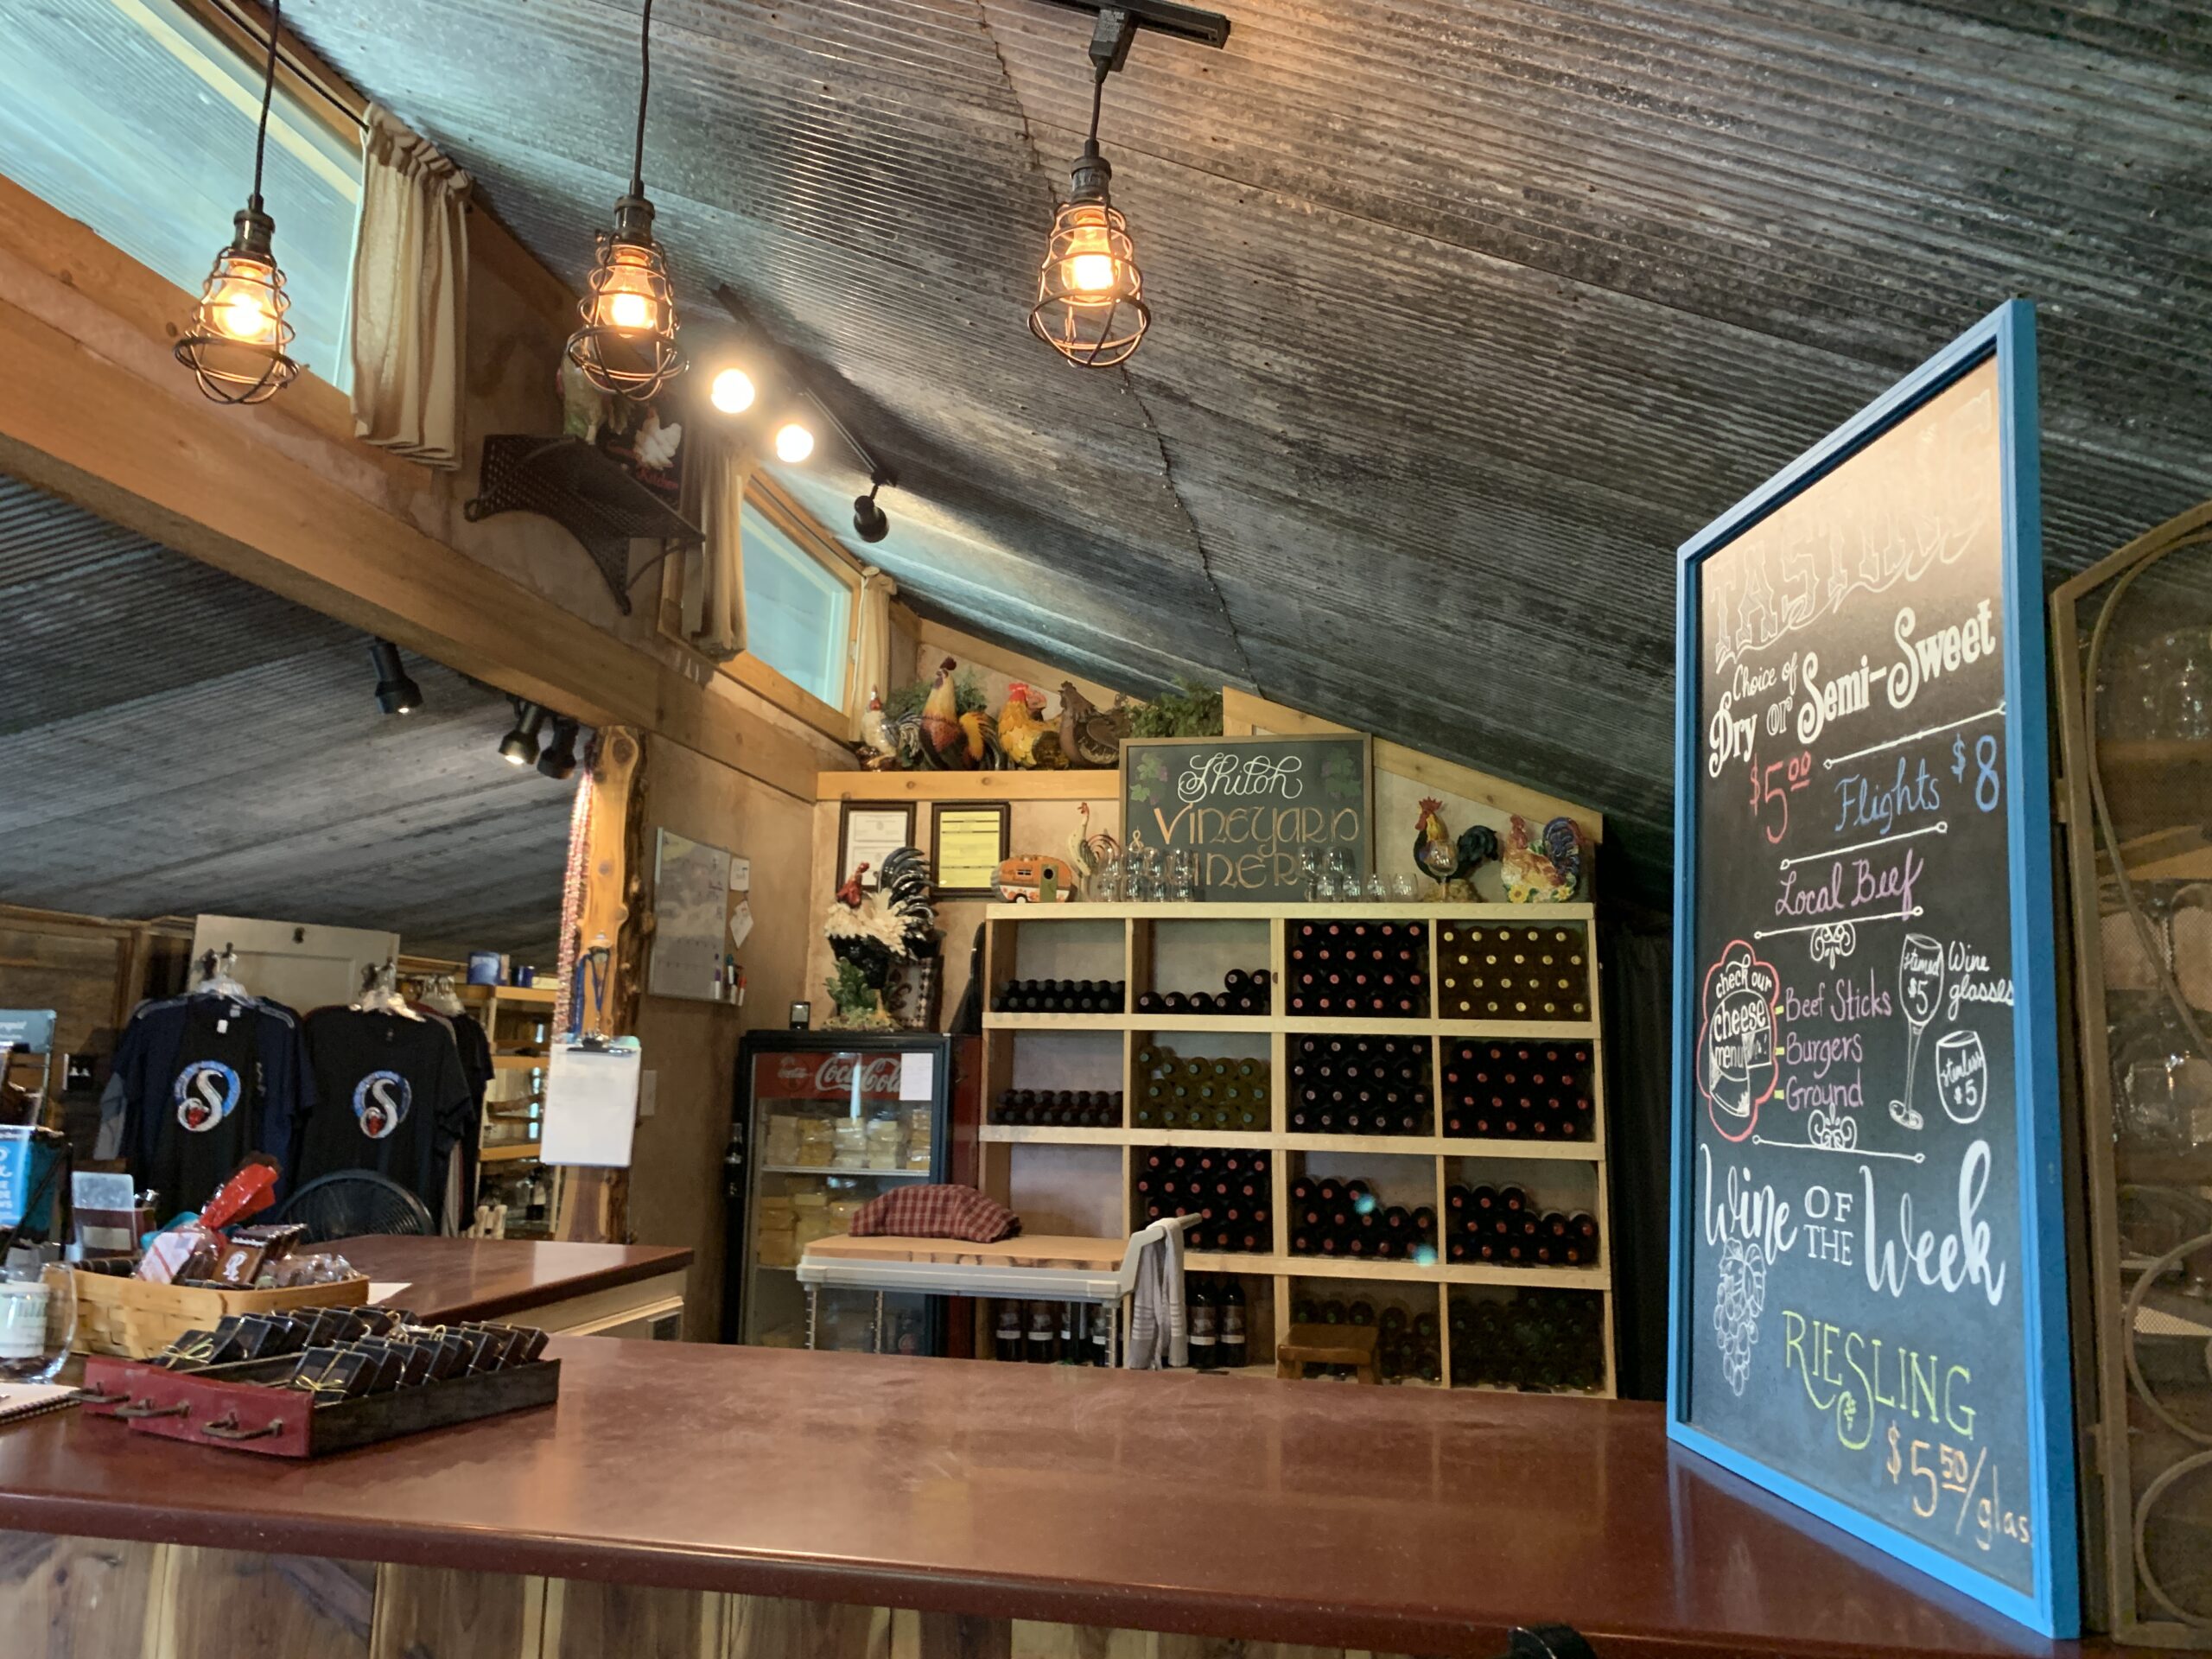 Visit the tasting room to enjoy the winery’s long list of varieties, order a wine flight or ask about the Wine of the Week. I would highly recommend asking for a guided tour to fully appreciate the winery. Visitors can schedule an informative tour by appointment.
 Can’t make it to a winery? Tune into the KNSS 98.7FM radio show,


