• Skip to primary navigation
  • Skip to main content
  • Skip to primary sidebar

A Lifestyle Blog

  • About
    • Work With Me
      • Delightful Life Media
    • Privacy Policy & Disclosures
  • Taste
    • Breakfast
    • Lunch
      • Salads
      • Sandwiches
    • Dinner
      • Grilled
      • Sides
      • Pasta
      • Rice
    • Appetizers
    • Desserts
    • Drinks
      • Cocktails
      • Non-Alcoholic
    • Snacks
  • Travel
    • United States
      • Kansas
      • Missouri
      • Nevada
      • Nebraska
      • New York
      • Oklahoma
      • Texas
      • Wisconsin
    • Mexico
  • DIY
    • Projects
  • Contact
  • Lifestyle
  • 100 Things to Do in Wichita Before You Die

homemade

How to Make Basic Barbecue Sauce

June 4, 2017 by Vanessa Leave a Comment

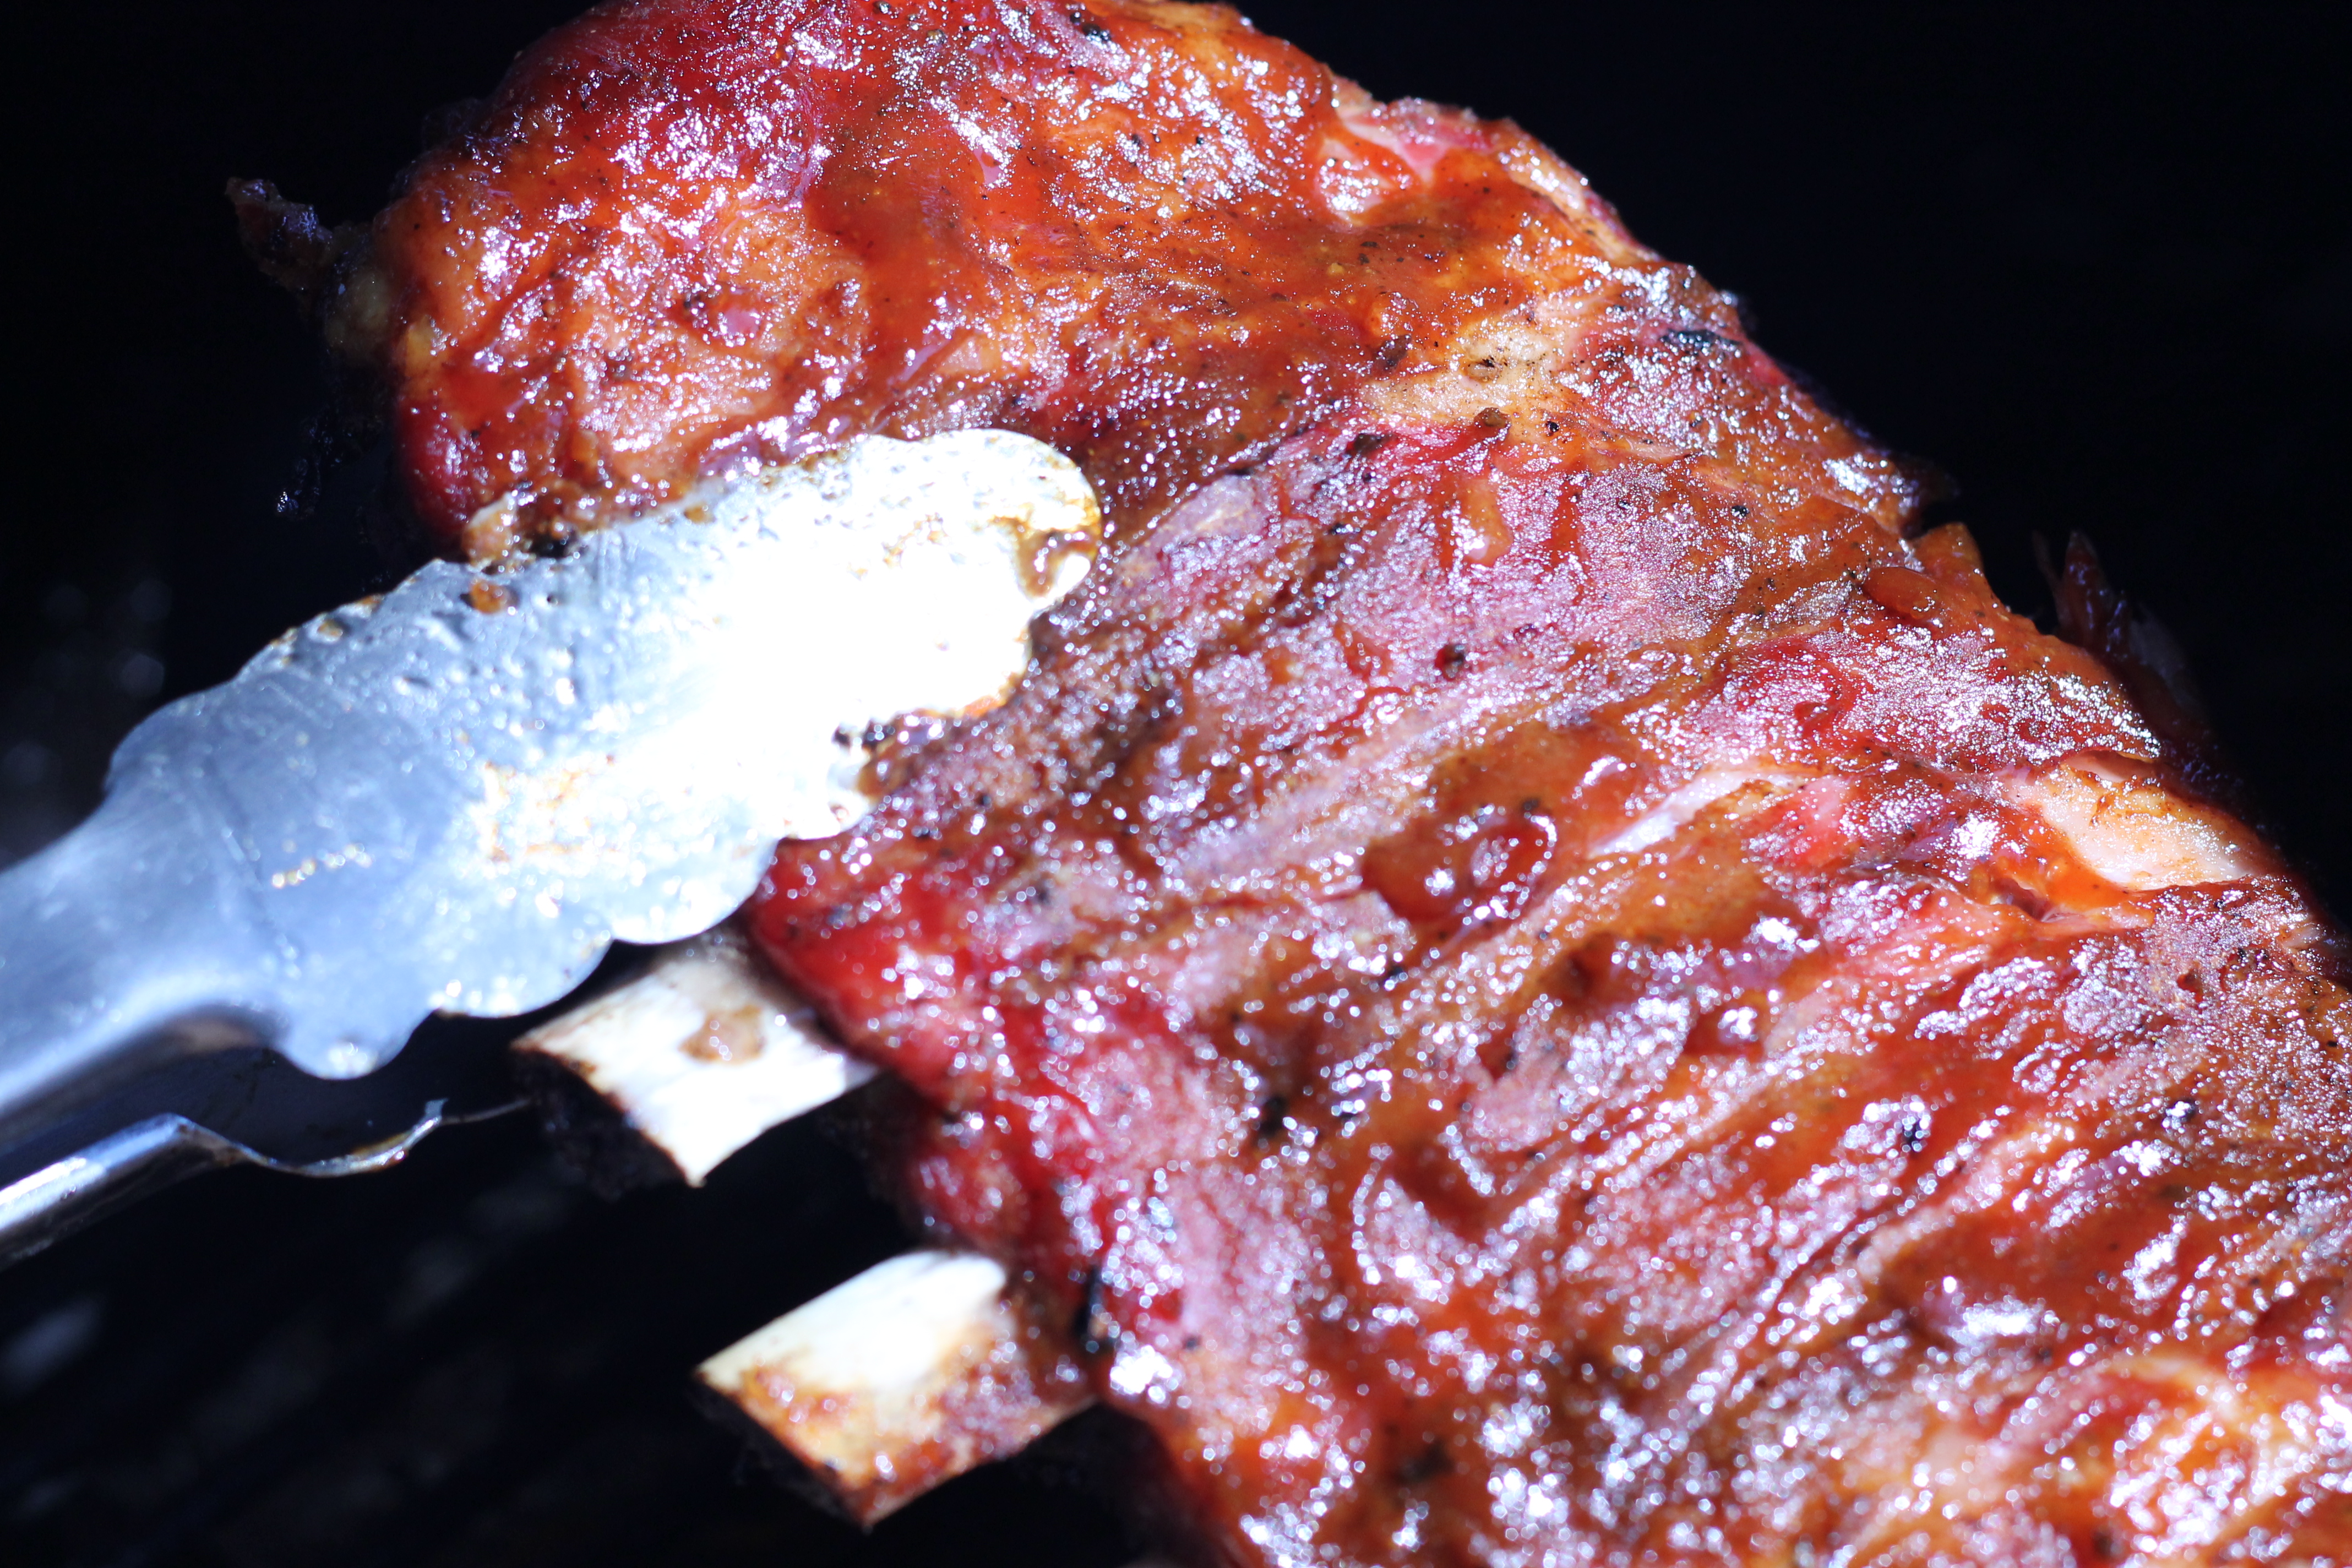
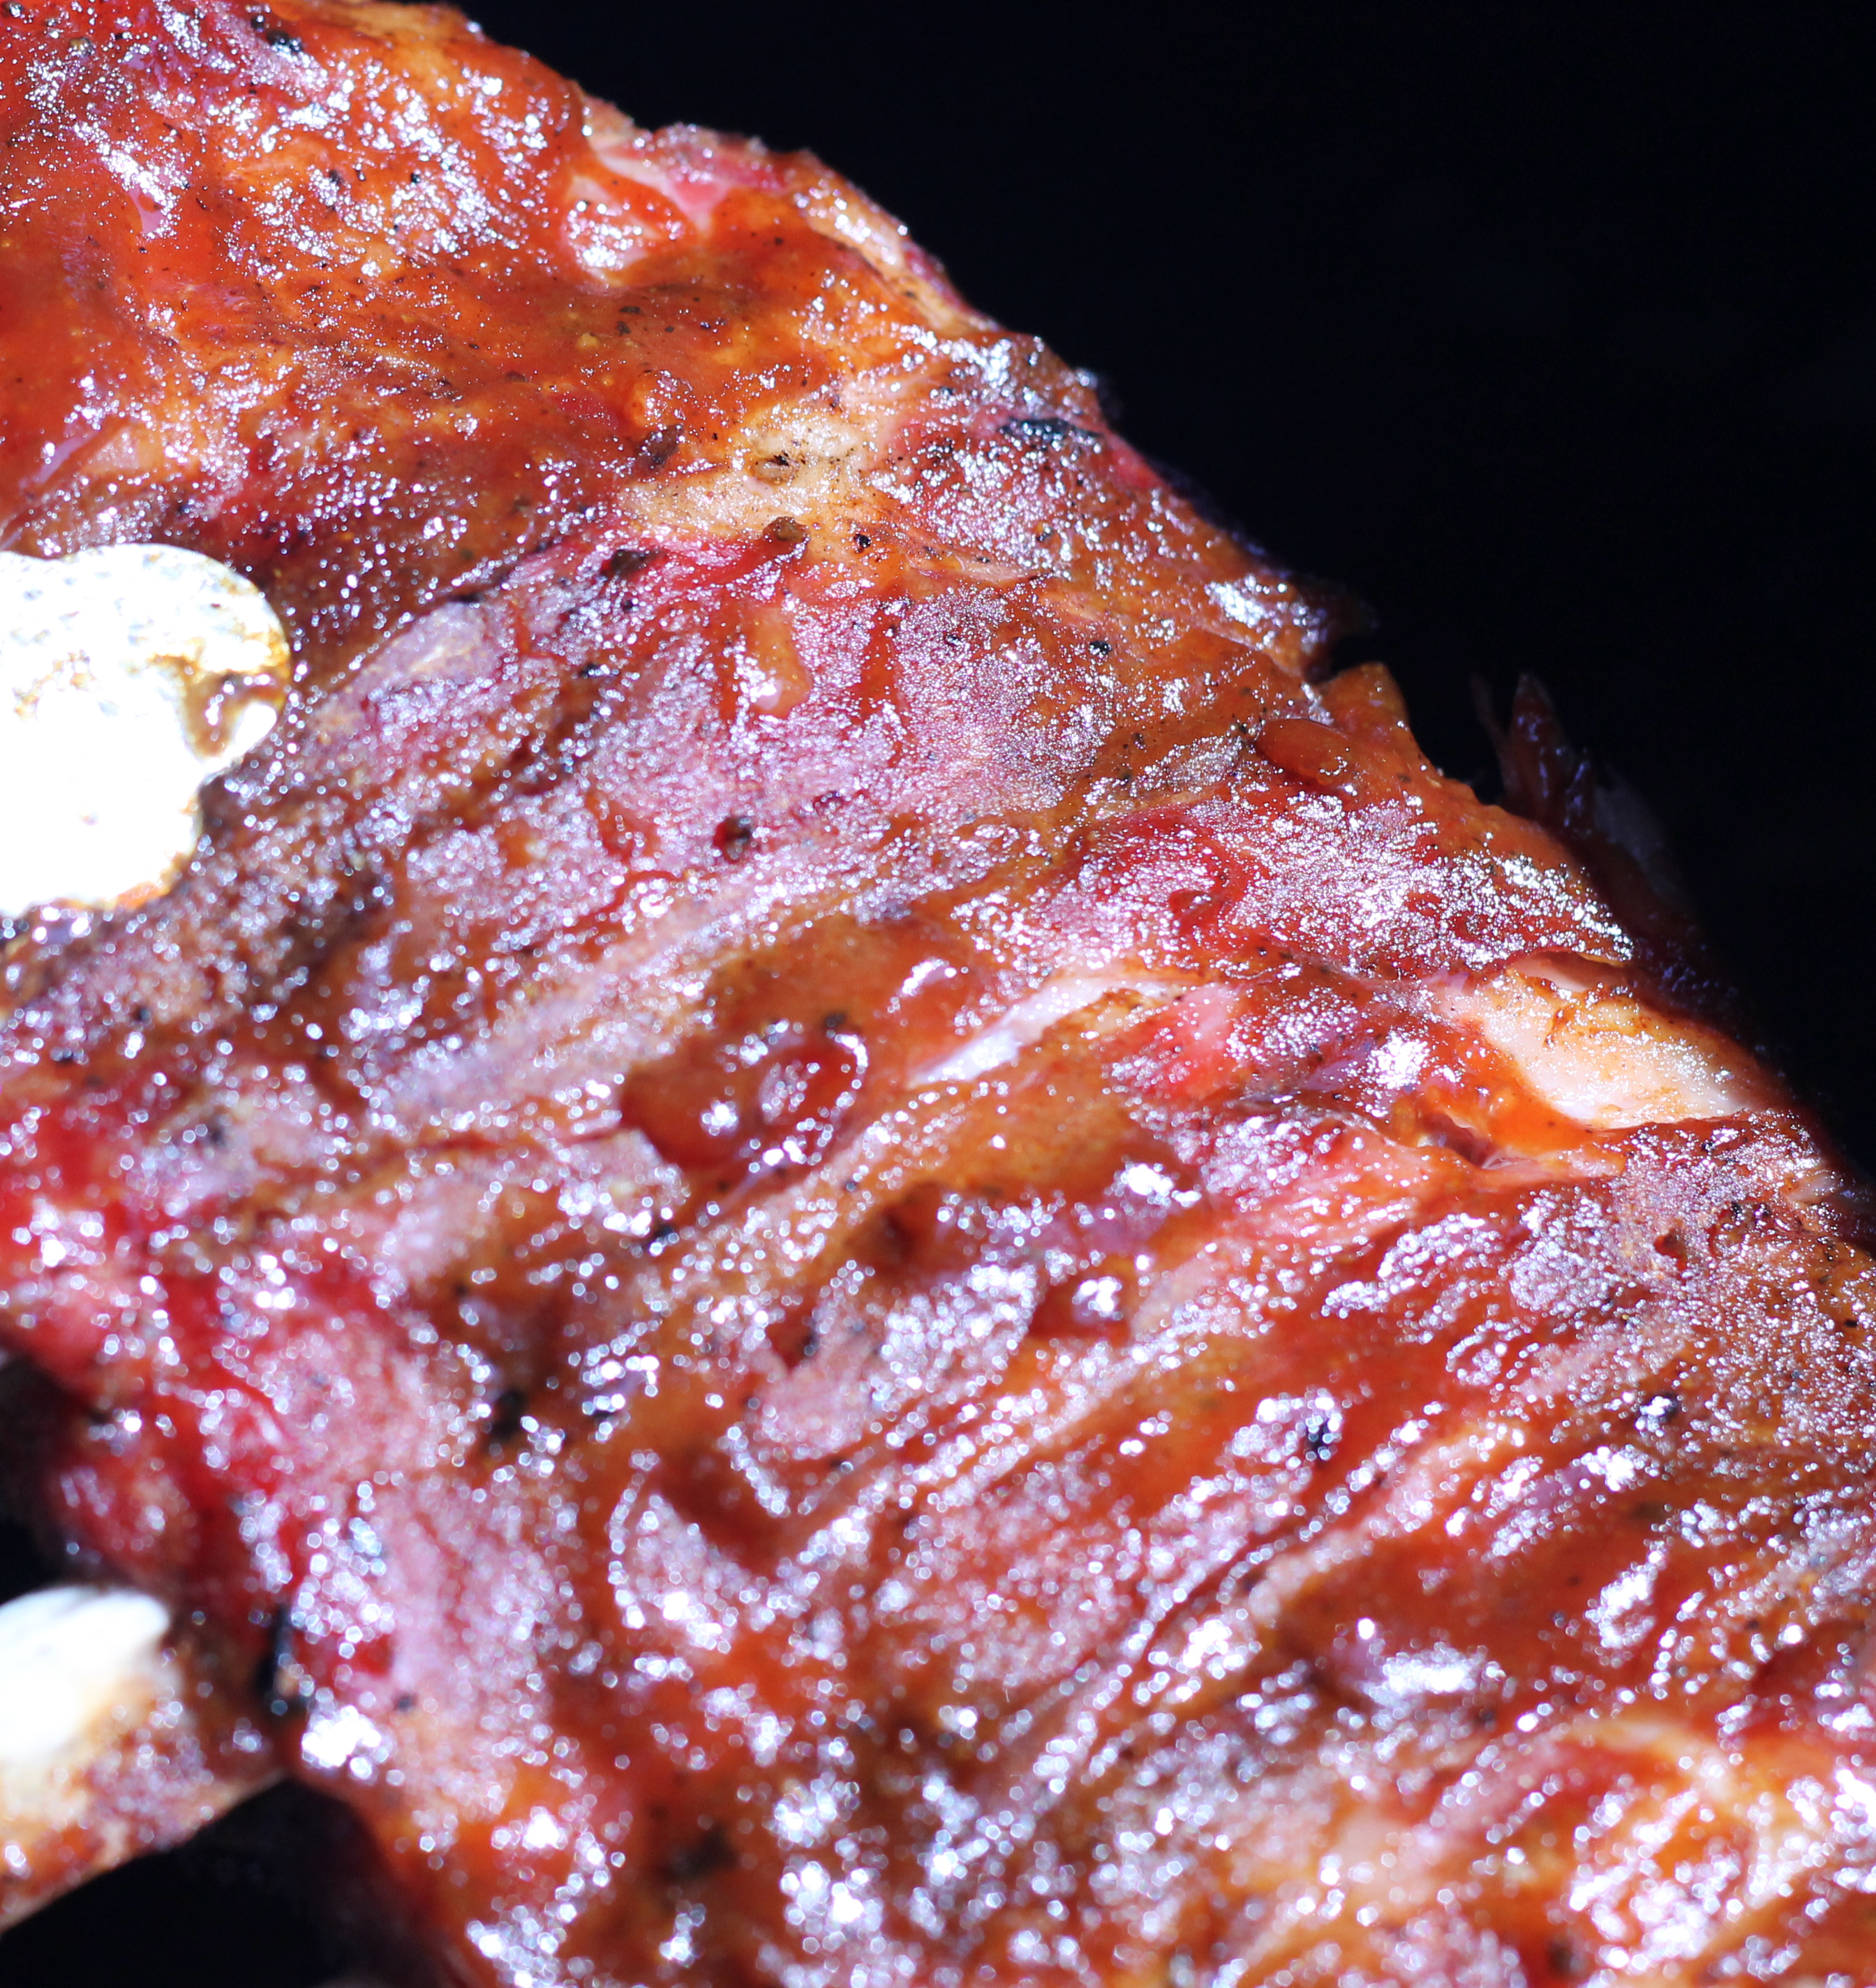
One condiment this Kansas girl is never without is barbecue sauce. Well, except that one time when the ribs were ready and yep, I was out of the liquid gold. Not one to run to the store for only one condiment, I decided to make my own sauce.

Since it’s summer I tend to use quite quite a bit more barbecue sauce on burgers, ribs, and even inside lettuce wraps. So, in case you’re like me, here’s How to Make Basic Barbecue Sauce when the bottle stuff just won’t do or you’re out of it. This recipe is ketchup based and is more of a Kansas City barbecue sauce.

Barbecue is a staple food group when you live in Kansas. We smoked this rack of ribs on our Traeger Tailgater low and slow adding barbecue sauce at the end of cooking.

Once you’ve combined all of the barbecue sauce ingredients using a whisk in a saucepan, turn the pan to low heat and simmer for about 15 minutes. Be sure to stir often. Remove the pan from the burner and allow to cool before pouring the barbecue sauce into a Bell jar and sealing it. Your sauce will keep for about two weeks in the refrigerator.

While there are many kinds of barbecue sauce varieties from Carolina style vinegar based to Kansas City style tomato based, I prefer the later on everything from smoked pulled pork and ribs to cheddar cheeseburgers. I’ve also included the links to a few of my recipes that use can this sauce. You might enjoy: Grilled Blooming Onion with Barbecue Sauce , Barbecue Chicken Spring Rolls, and Ultimate Summer Hot Dog Toppings List. 

Making your own sauce is incredibly simple and takes very little time. Give it a try! Do you have a summer grill recipe that you love to sauce up? Share it in the comments section below.

onedelightfullife.com

3 cups

How to Make Basic Barbecue Sauce

This Kansas City style barbecue sauce is easy to make and better tasting than the bottled variety.

10 minPrep Time

15 minCook Time

25 minTotal Time

Save RecipeSave Recipe
Print Recipe
My Recipes My Lists My Calendar

Ingredients

  • 2 c. ketchup
  • 3 T. dark brown sugar
  • 3 T. cider vinegar
  • 2 T worcestershire
  • 2 tsp salt
  • 1/2 tsp onion powder
  • 1 tsp garlic powder
  • 1/2 tsp black pepper

Instructions

  1. Combine all ingredients in a small saucepan.
  2. Stir the ingredients well on a low simmer until fully incorporated.
  3. Simmer for about 15 minutes stirring often.
  4. Remove from heat and allow to cool.
  5. Pour sauce into glass jar and seal with a lid.
  6. Refrigerate jarred sauce.

Notes

You can also use smoked paprika instead of regular paprika. Want a more Memphis style sauce, add more vinegar and molasses for sweetener.

7.8.1.2
75
https://onedelightfullife.com/how-to-make-basic-barbecue-sauce/
onedelightfullife.com

Nutrition

Calories

111 cal

Carbs

27 g
Click Here For Full Nutrition, Exchanges, and My Plate Info
ESHA Logo

Filed Under: Taste Tagged With: barbecue, basic, bbq, blooming onion, brown sugar, Carolina, cheeseburger, chicken, condiment, garlic powder, hamburger, homemade, hot dog, Kansas City style, ketchup, marinade, onion powder, paprika, pepper, pork, ribs, salt, sauce, spring rolls, topping, vinegar, worcestershire, yellow mustard

How to Rust Proof a Wrought Iron Raised Dog Dish Stand

May 23, 2017 by Vanessa 1 Comment

We are the products of a society that simply throws things away and replaces them when they break or don’t suit our tastes anymore.

Think: when is the last time you bought a duplicate of something you already owned?

Maybe it’s because I was raised in a do-it-yourself household, but I’m the type of person who first considers if they can fix or renovate something before buying it new, again. Plus, I feel accomplished knowing that I created or “re-created” something with my hands!

It seems like the idea of renovation is more popular than ever thanks to HGTV shows like Fixer Upper, Rehab Addict, and Home Town. What’s old is new again! Well, I decided to roll up my sleeves and refurbish our dog’s wrought iron raised dog dish stand after a couple years of neglect left it incredibly rusted and looking sad.

Before

Perhaps you don’t have a raised dog bowl stand, but I bet you also have a rusted metal plant stand or outdoor lantern that is beginning to look a bit sad too. No fear! In a few easy steps you can bring that tired piece of metal artwork back to it’s glory. Let’s get started.

Summon up that can-do spirit because we’re about to take this rusted piece of junk back to its original beauty. What is that gross white stuff anyway?

Because our 10 year-old dog Sasha laps her water wildly when she drinks, this wrought iron dog dish stand has suffered from quite a bit of rust. She has the longest tongue I’ve ever seen on a dog!

The first step to fixing this rust problem is to remove as much of it as possible using a metal brush.

A small metal brush like this one works well for curved metal projects because it allows you to get into the small grooves of metal to free loose pieces of rust.

After breaking loose every bit of rush from all sides of the stand, you can use a soft bristled brush or rag to clean up its surface.

After brushing the rust pieces loose from the metal stand, you can position it on top of old cardboard boxes or newspaper to prepare your space to cover it with Rust Stop indoor/outdoor spray paint.

Using smooth continuous strokes, spray all sides of the metal stand. Allow it to dry, turn it upside down, and spray the bottom sides of it as well. If you have to paint more than one coat, expect several hours of drying time.

This spray in particular is awesome to use because it not only prevents future rust but also paints your metal items just as great as any other brand of spray paint. TIP: After completely spraying your projects with canned spray paint, turn the can upside and spray it just a little bit more to keep the nozzle from clogging.

After

Looks like Sasha just got herself a refurbished metal dog dish that looks awesome. Of course, she didn’t even notice but I did!

Looks at this beauty!

What new potential do you see in your old metal pieces now? In a few DIY steps and a little effort, your old stuff can look new again.

Are you as obsessed with your dog as I am? You might also appreciate my post for Homemade Bacon Cheddar Dog Biscuits and Frozen Yogurt Pupcakes or check out my Facebook page for dog lovers to read more posts about dog care.

Filed Under: DIY Tagged With: dish, DIY, do it yourself, dog, dog biscuits, dog food, dog water, Fixer Upper, food dish, frozen yogurt pupcakes, HGTV, Home Town, homemade, paint, paint brush, pup, puppy, refurbish, Rehab Addict, restoration, restore, rust, rust proof, spray paint, stand, steel brush, upcycle, wrought iron

Homemade Buttermilk Ranch Dressing

May 10, 2017 by Vanessa Leave a Comment

If I say the word “buttermilk,” the word “diet” doesn’t usually follow it. Am I right? Well, when you’re making Atkins Diet recipes in your home, it turns out that buttermilk is A-OK acceptable and it is delicious too. The only thing better than buttermilk is Homemade Buttermilk Ranch Dressing.

We’ve tried making homemade ranch using Hidden Valley Ranch’s powdered packet with buttermilk, but that was a rookie mistake. If you want to elevate your favorite condiment to restaurant quality dressing, you have to use only fresh ingredients. No cutting corners! Chop the herbs, buy the buttermilk. It’s so delicious I promise your kids will eat their vegetables faster if they can drizzle this homemade dressing on them. Heck. I don’t have kids and I’m eating it on everything.

Store your ranch dressing in an airtight mason jar. The recipe below will nearly fill it.

All of the culinary credit for this dressing recipe goes to Pioneer Woman. I’ve rediscovered her. Yes, I fell hard for her when she first graced Food Network, but then I became accustomed to watching a couple other chefs on the regular. Well, I’m back. I can thank my local library for that. When I need a break from the cubicle matrix that is my workspace, I head to a nearby library on my lunch break and rediscover my love for cookbooks. I usually leave barely balancing a tower of hard cover books with food covers.

The first step to making homemade ranch is to make a garlic paste with fresh cloves of garlic and kosher. You will definitely need to use some elbow grease when firmly crushing it. Now this is my kind of “exercise.”

After making a garlic paste, you’ll want to rinse and start chopping the fresh herbs. I used frilly parsley instead of flat leaf parsley. I’m all about making a substitute withe similar ingredients. When I was younger I would completely scrap making a recipe just because I was missing one ingredient. Once you make the garlic paste, add it to a large bowl and add the remaining ingredients. Stir well.

Lately, I’ve been geeking out over my container herb pots on the front porch. Fresh is best. I didn’t have as much fresh dill as I would’ve liked for this recipe so I added dried dill that I picked up from The Spice Merchant.

The Pioneer Woman’s recipe for Homemade Buttermilk Dressing calls for an optional dash or two of hot sauce, which I recommend. Just realize that the traditional bright white ranch you’re used will take on more of a tinge of orange and take on a zesty taste.

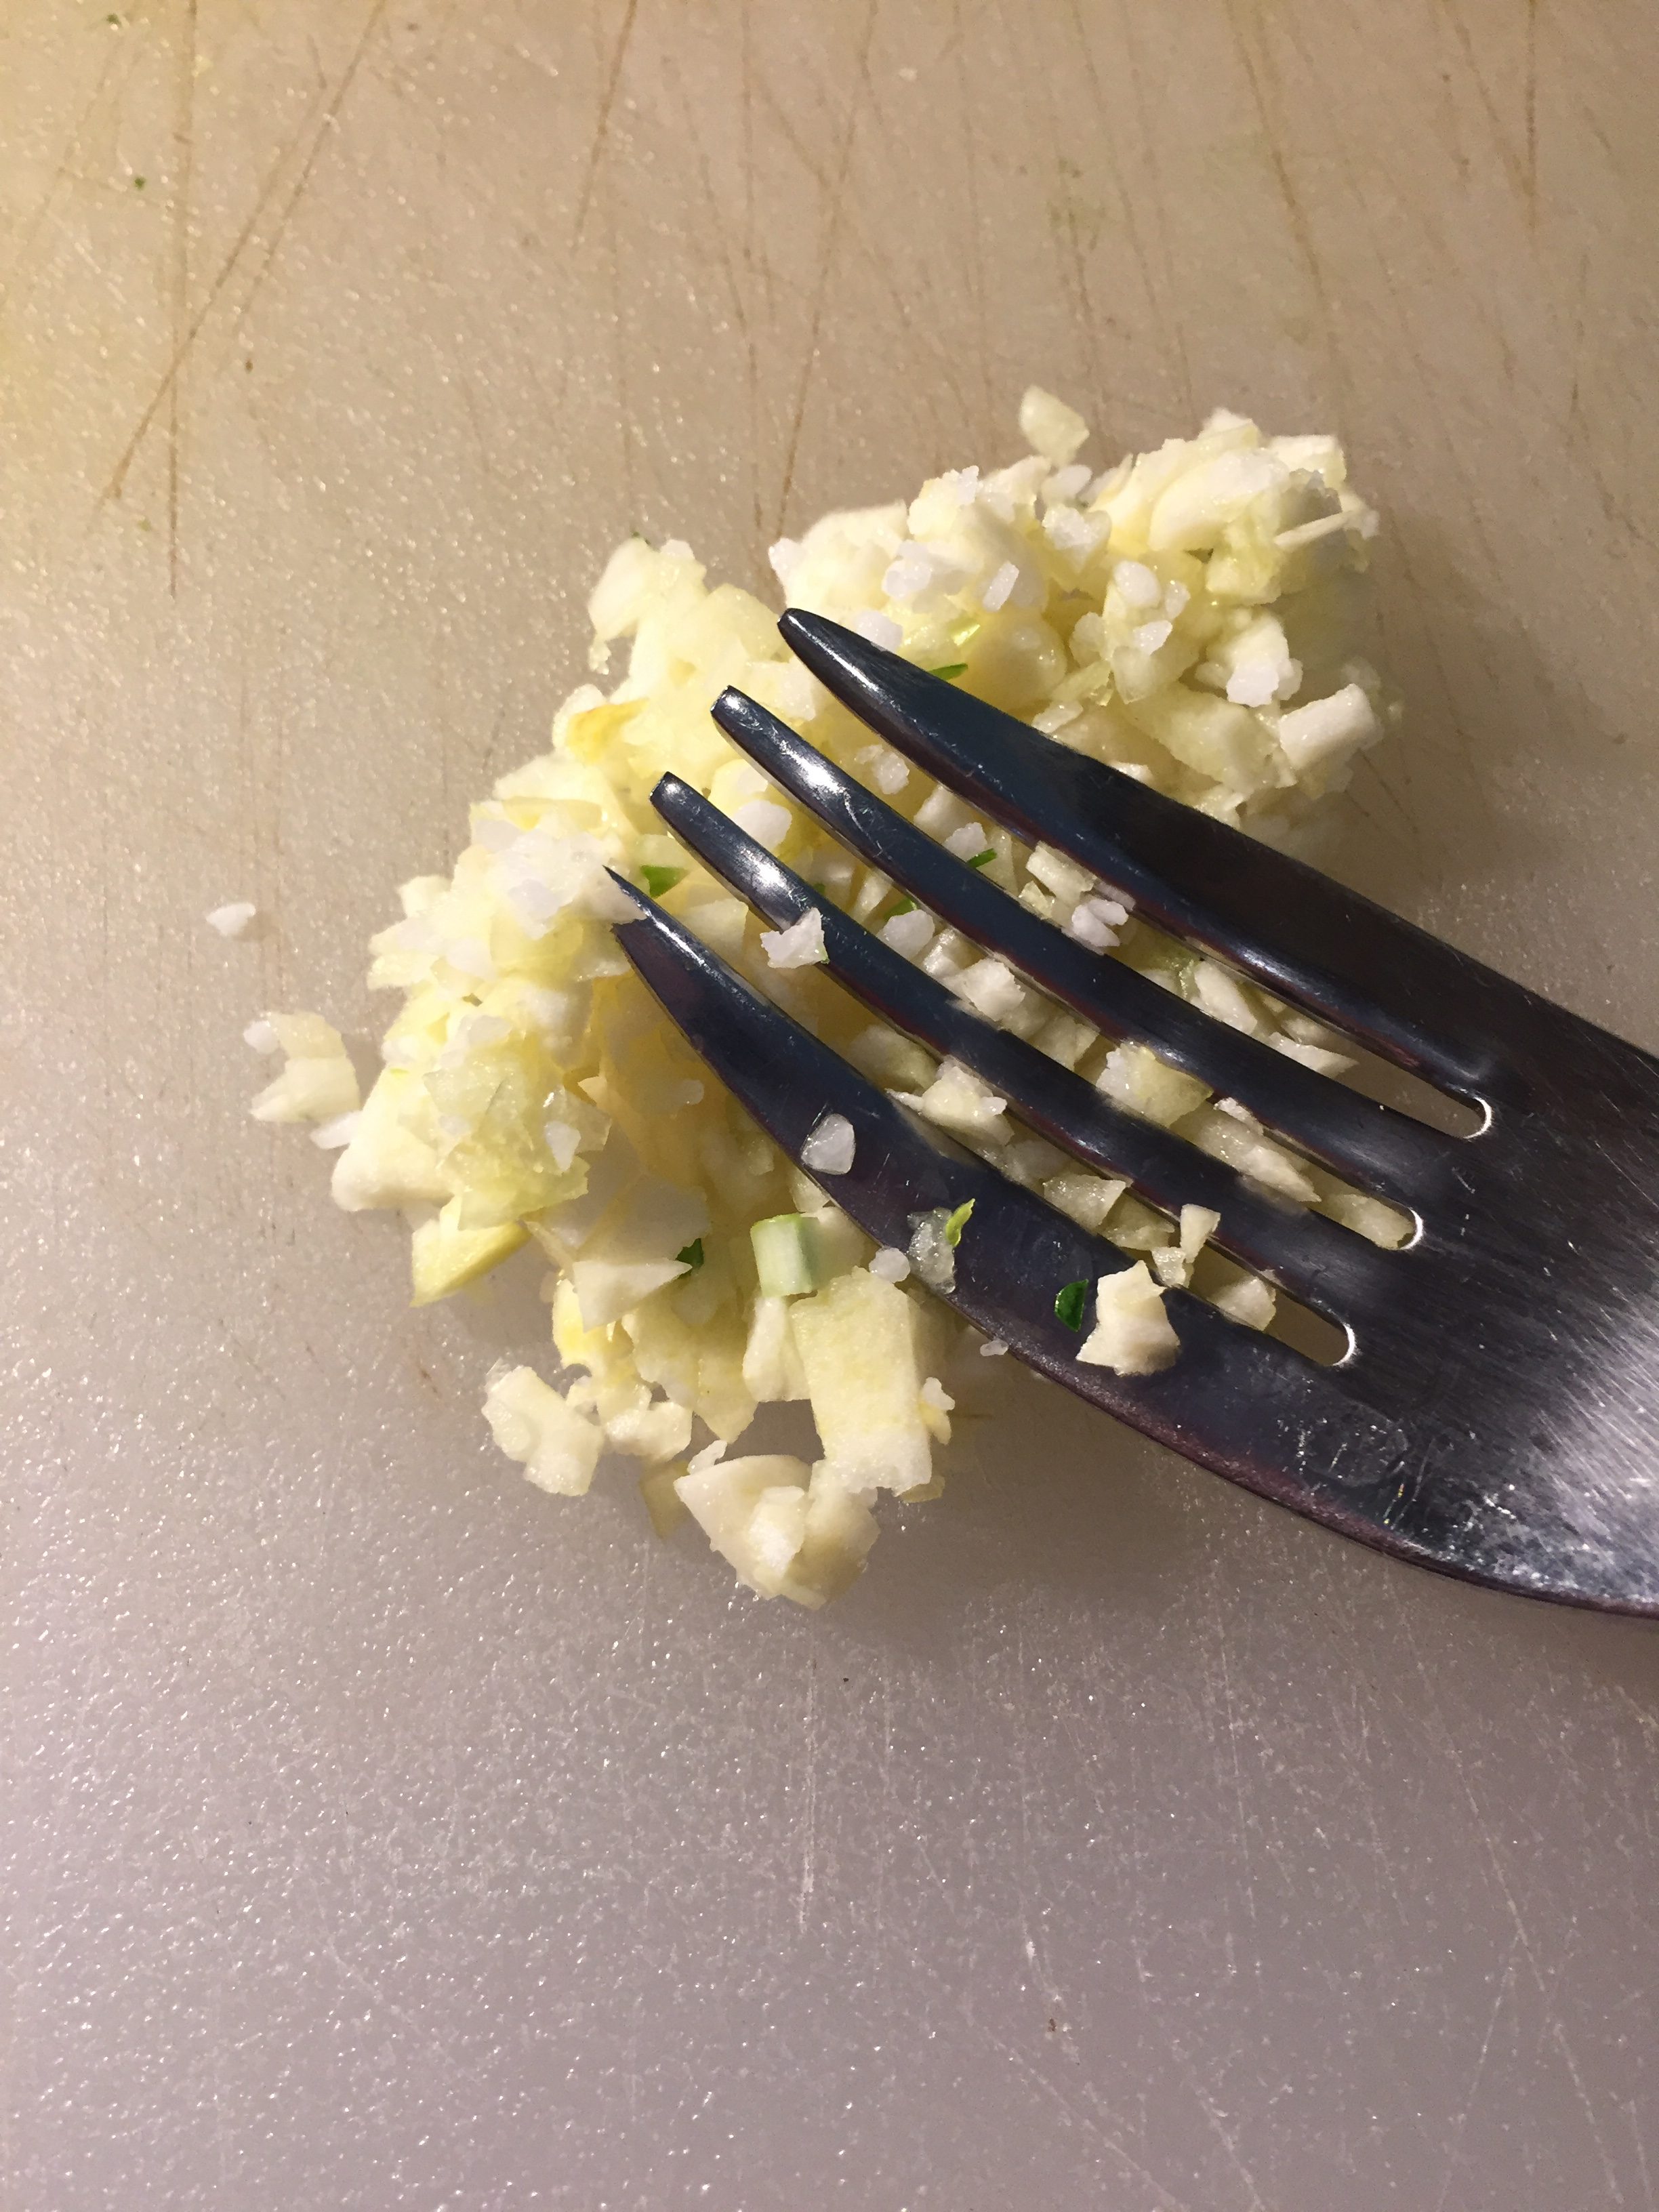
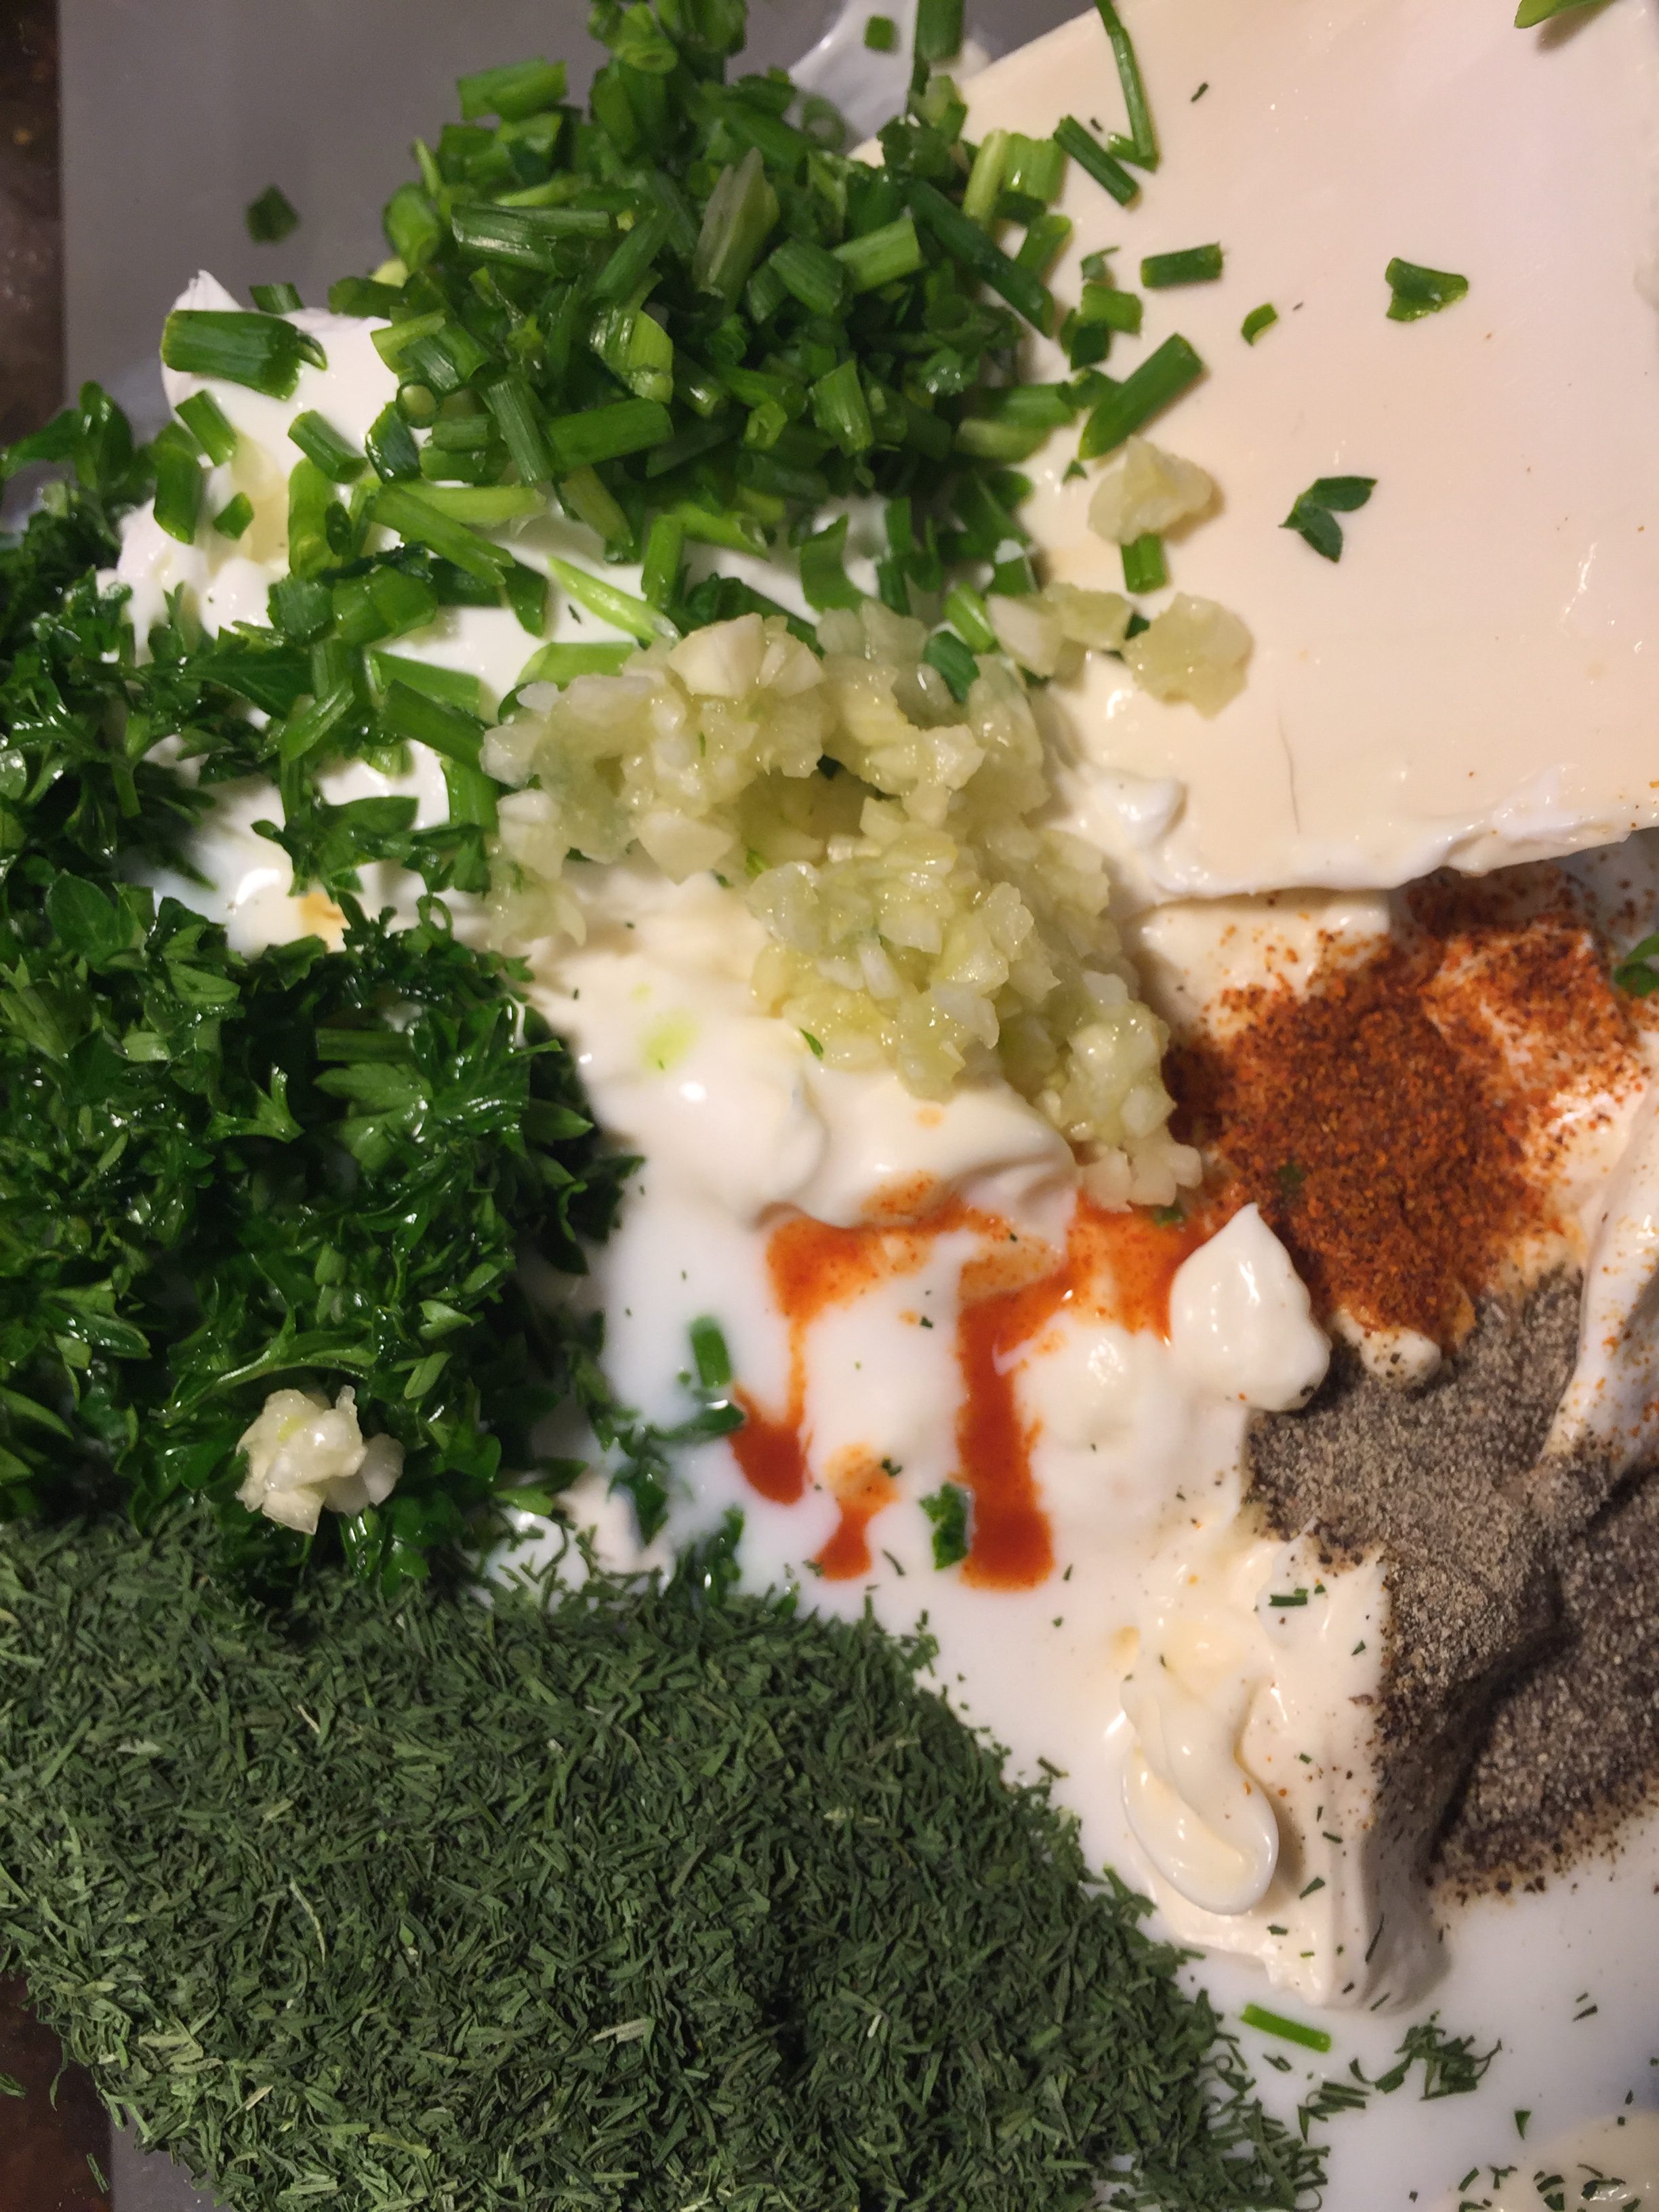
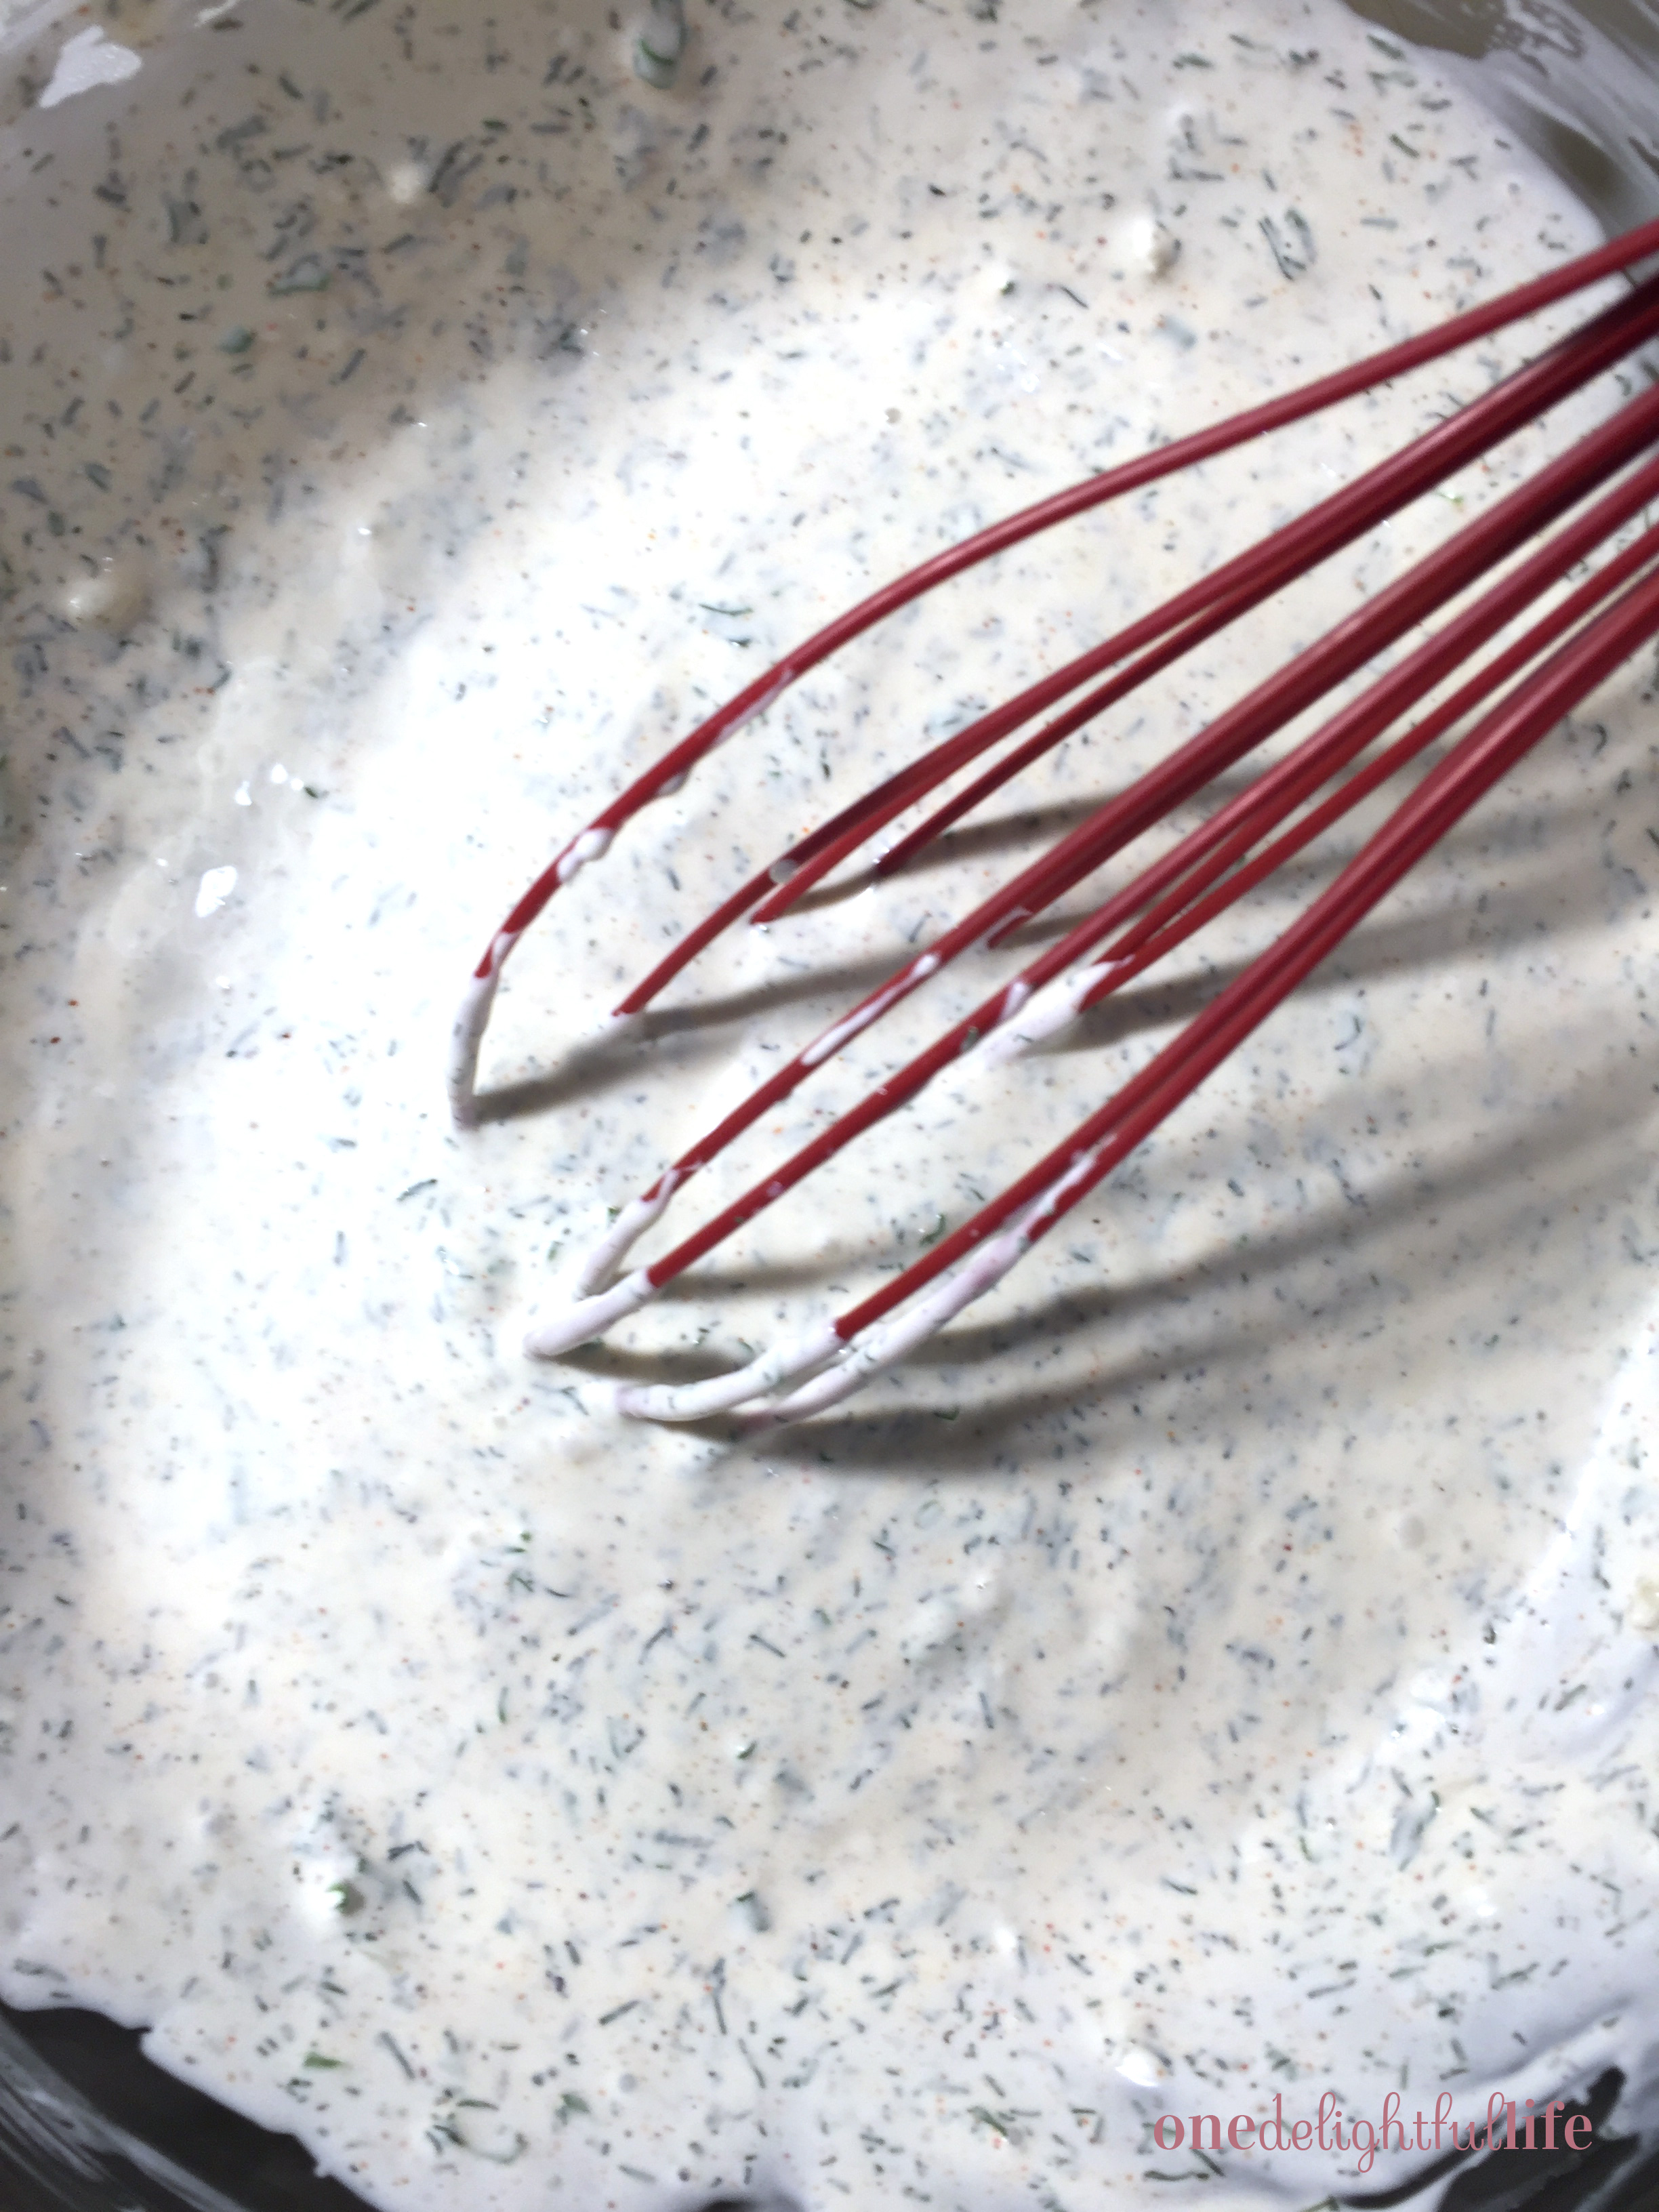
Note: When you make the garlic paste, be sure to crush the garlic until it is very fine. Nobody needs harsh garlic breath. If you prefer a thinner dressing, use more buttermilk.

Again, you can follow this link to Ree Drummond’s Homemade Buttermilk Dressing recipe.  All of the photos in this post are my own. No affiliate links contained in this post either.

Now, grab that whisk. We’ve got ranch to make!


Filed Under: Taste Tagged With: Atkins, buttermilk, chives, condiment, dill, dressing, garlic, garlic paste, herbs, Hidden Valley Ranch, homemade, hot sauce, kosher salt, milk, parsley, paste, pioneer woman, ranch, real, ree drummond, salad, spices, topping

Baileys Cookies and Cream Parfait: Whip Your Way into Dessert Delight

April 26, 2017 by Vanessa Leave a Comment

Since party planning for our St. Patrick’s Day party, I have been staring at one drool-worthy photo on my Pinterest dessert board. If I had know how delicious Homemade Hooplah’s Baileys Cookies and Cream Parfait was, I would have made it sooner. This dessert is absolutely delightful!

The recipe includes pillowy layers of homemade Baileys whipped cream nestled between Oreo cookie crumbs and the light chocolate layers of…wait for it…even more whipped cream. If you’re like me, you’ll find yourself digging the spoon deeper into the glass to drag a bit of each layer up with each serving.

Having never made homemade whipped cream, I was frustrated when my bowl of Baileys, heavy cream, and powder sugar didn’t form “stiff peaks” after using a hand mixer for a few minutes. That’s because delicious whipped cream takes time! After seven minutes, I finally had real whipped cream. After 10 minutes I had eaten nearly all of it. Don’t judge me.

Tip: Over mixing your cream can turn your mixture into butter. Set a timer before you begin the process of mixing.

Homemade Hooplah’s recipe creator Chrisy recommends using a piping bag to add each layer to the glass to build your parfait. I also recommend doing so if you want to avoid messy layers. If you’re going for that Pinterest perfect photo, add your whipped cream to a corner-snipped Ziplock bag or buy a piping bag before preparing this recipe. While she give the option of crushing Oreo cookies inside a Ziplock bag, I crumbled the chocolate cookies in my Cuisinart. I love to watch theose blades whirl.

All the credit for this dessert goes to Homemade Hooplah, a Pinterest recipe success! What recipe is waiting for you to make it? Check out my Pinterest recipe boards to get some inspiration here.

Enjoy!

Filed Under: Desserts, Taste Tagged With: Baileys, chocolate chips, cookies, glass, heavy cream, homemade, hooplah, ice cream, Irish cream, layers, milk, mixing, Oreo, parfait, semi-sweet chocolate, St. Patrick's Day, sweet, whipped cream

Primary Sidebar

SEARCH

Ammar
Hello! I'm Vanessa. Welcome to One Delightful Life, a blog created to add more delight to your life with delicious recipes, travel destinations, and lifestyle improvement ideas. Thanks for exploring my blog!

Archives

Contact Us

  • Email
    info@onedelightfullife.com

Popular Posts

Back to School Brain Breaks12K Total Shares
Going Underground in Historic Ellinwood, KansasGoing Underground in Historic Ellinwood, Kansas7K Total Shares
Weston, Missouri: Making the Most of a Weekend VisitWeston, Missouri: Making the Most of a Weekend Visit2K Total Shares
Cucumber Lime Vodka SplashCucumber Lime Vodka Splash1K Total Shares
Sun Palace: A Couples-Only Resort in Cancun, MexicoSun Palace: A Couples-Only Resort in Cancun, Mexico508 Total Shares
  • About
  • Taste
  • Travel
  • DIY
  • Contact
  • Lifestyle
  • 100 Things to Do in Wichita Before You Die

© 2023 · onedelightfullife ·