• Skip to primary navigation
  • Skip to main content
  • Skip to primary sidebar

A Lifestyle Blog

  • About
    • Work With Me
      • Delightful Life Media
    • Privacy Policy & Disclosures
  • Taste
    • Breakfast
    • Lunch
      • Salads
      • Sandwiches
    • Dinner
      • Grilled
      • Sides
      • Pasta
      • Rice
    • Appetizers
    • Desserts
    • Drinks
      • Cocktails
      • Non-Alcoholic
    • Snacks
  • Travel
    • United States
      • Kansas
      • Missouri
      • Nevada
      • Nebraska
      • New York
      • Oklahoma
      • Texas
      • Wisconsin
    • Mexico
  • DIY
    • Projects
  • Contact
  • Lifestyle
  • 100 Things to Do in Wichita Before You Die

freezer

Mixed Berry Popsicles with Coconut Water

August 5, 2018 by Vanessa 2 Comments

The quintessential summer dessert is the classic popsicle. Wouldn’t you agree? Sure melted s’mores are delicious, but I consider s’mores more of a fall dessert made around a campfire. I have fond memories of the ice cream truck cruising down the city street. It conjures up nostalgic thoughts of having to choose from tri-colored bomb pops, ice cream drumsticks or fruity popsicles. A tough decision! Which one did you choose? I used my 75 cents to buy the rainbow popsicle almost every time.

Now an adult, I still mark summer by indulging in a colorful popsicle, but I’d rather not ingest corn fructose syrup or ingredients I can’t pronounce. So, this summer I made Mixed Berry Popsicles with Coconut Water, a thirst-quenching treat made from natural flavors!

I used frozen, mixed berries and coconut water, which is low in calories and high in nutrients. The benefits of coconut water will convince you that it’s worth trying!

I used frozen organic fruit, but you could easily use canned or fresh fruit as well.

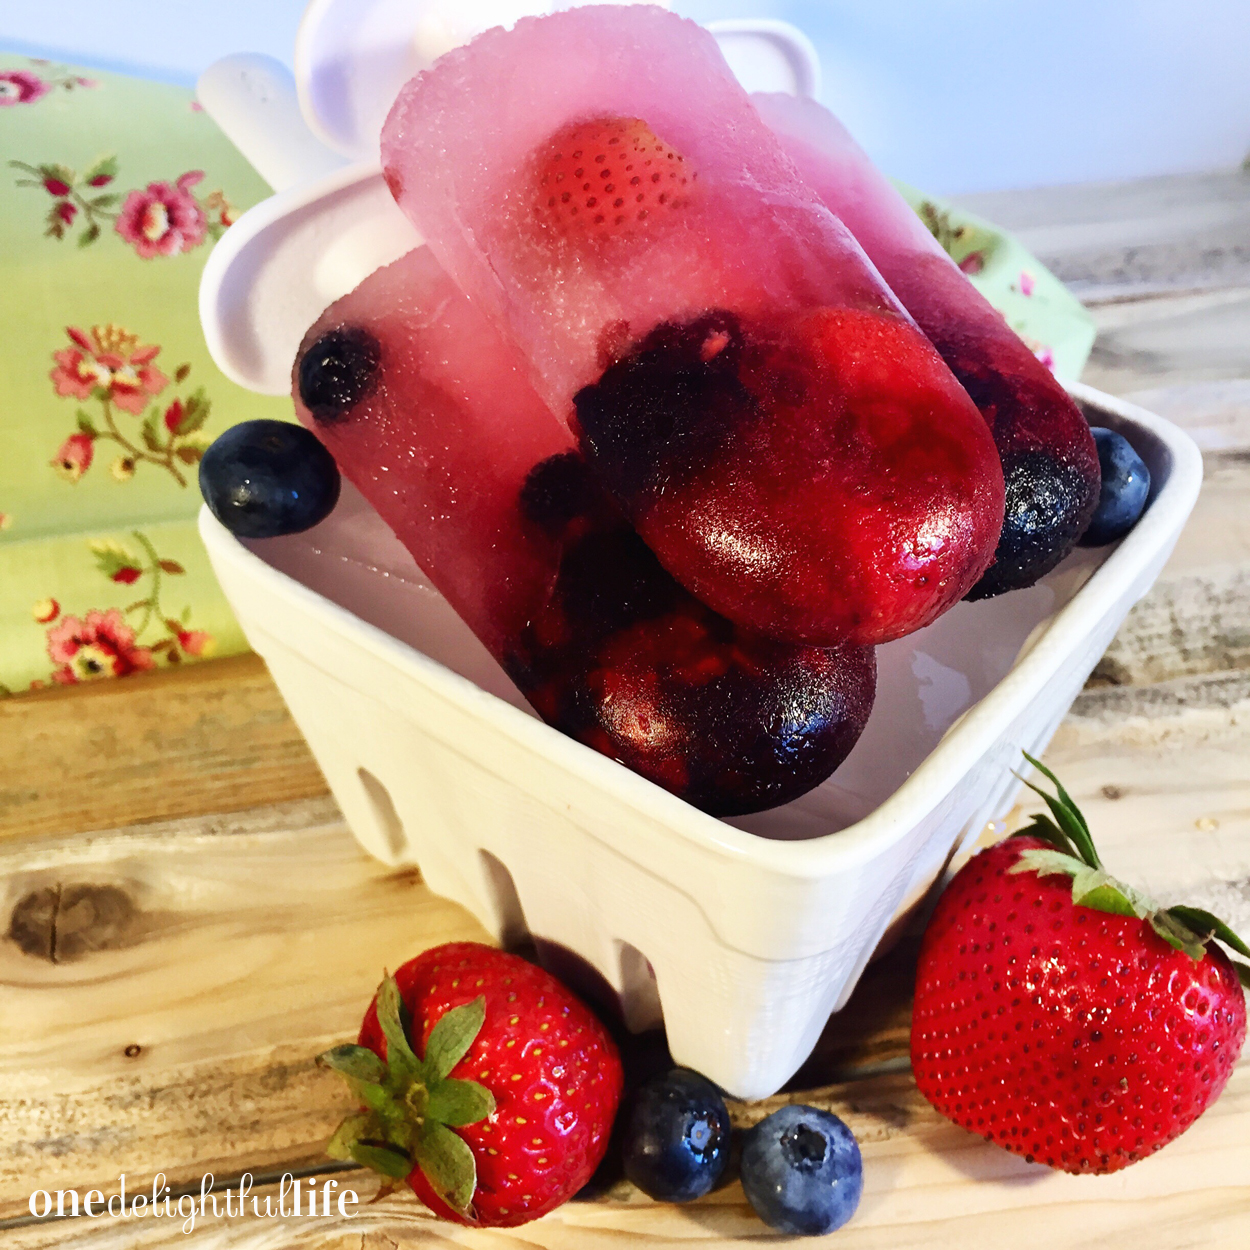
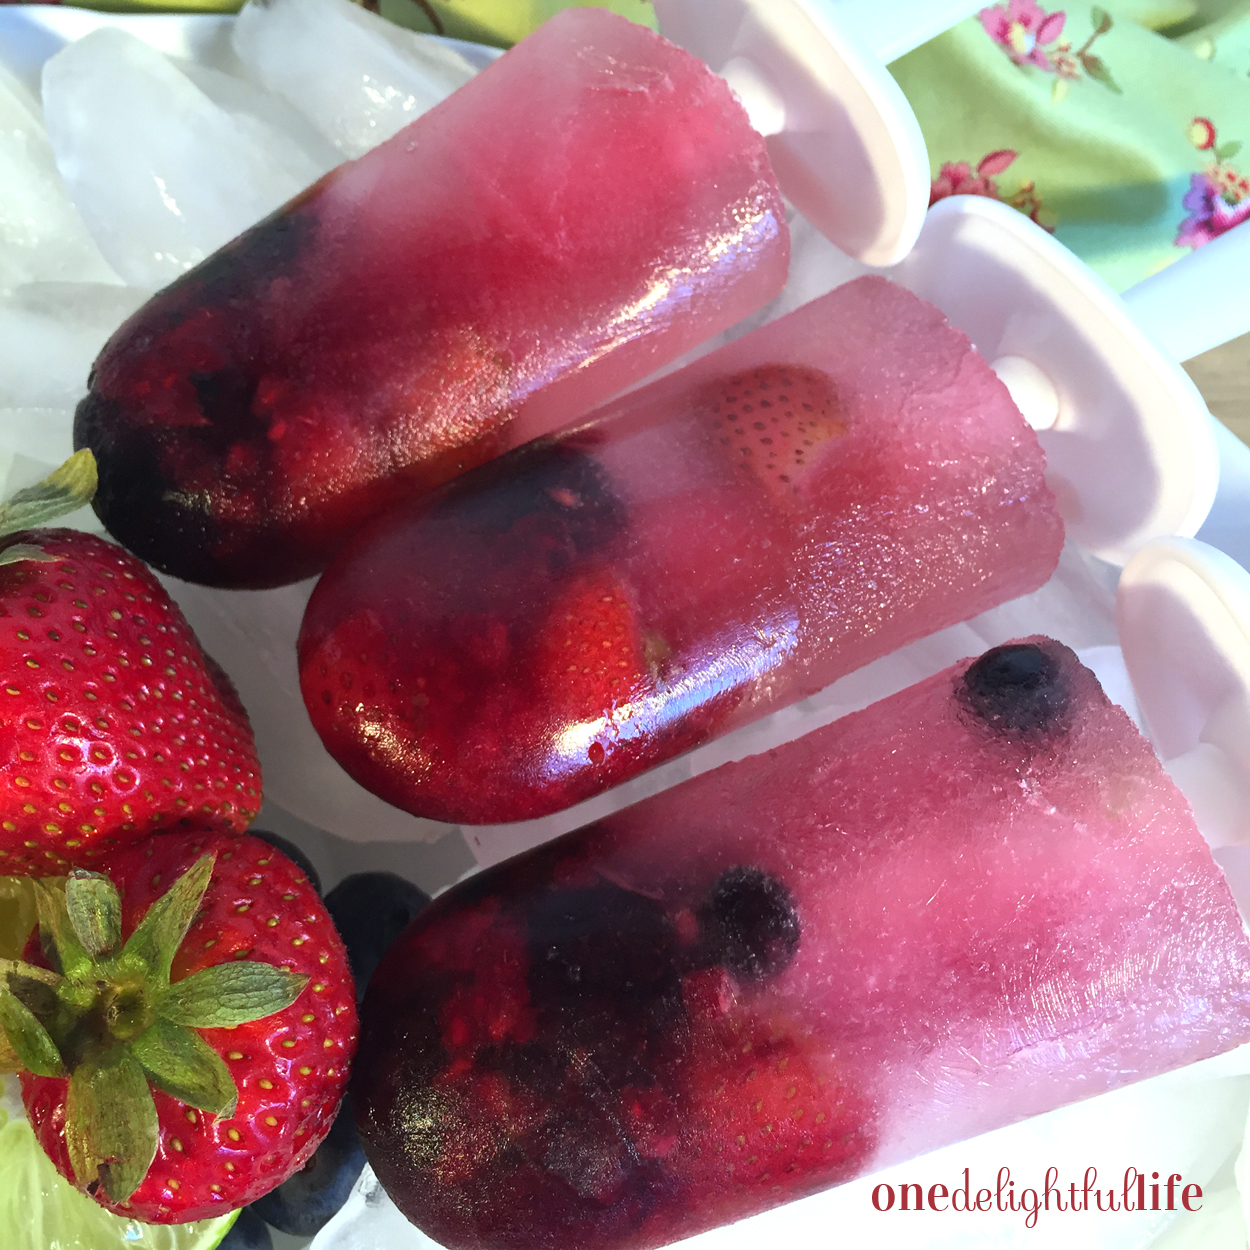
I prepared them using Koji popsicle molds, which I purchased at Target last year. Filling the molds is as easy as adding a tablespoon (or two!) of mixed frozen berries, filling the mold with coconut water almost to the top of it, a tiny bit of Stevia, and a pinch of lime zest for added tanginess. You could add lime juice instead of zest as well. Prepping the yummy popsicles only takes minutes and they are ready to enjoy within a few hours of placing them in the freezer.

When you’re ready to eat them, remove the popsicle molds from the freezer and let them sit out on the counter for about ten minutes or so. Allowing them to thaw out will help you easily remove the popsicles from the mold. Isn’t it cool how the whole berries can be seen through the frozen coconut water? These popsicles are not only yummy tasting but they’re pretty, too!

What was your summer like? I spent mine living for the weekend and trying to squeeze the most delightful moments out of each day. I’m not ready for fall temperatures or lattes just yet. I’ve got popsicles to enjoy on the back porch while watching the gorgeous Kansas sunset!

Filed Under: Desserts, Taste Tagged With: coconut water, cold, cool, dessert, freezer, fresh fruit, frozen, frozen fruit, fruit, ice cream, Kansas, Koji, lime, lime zest, mixed berries, popsicles, seasonal fruit, summer, summertime, sunset

Creamy No-Churn Vanilla Ice Cream with Cherries and Chocolate

July 11, 2017 by Vanessa Leave a Comment

What if I told you that you could make ice cream with only three ingredients plus your favorite mix-ins and it didn’t require fancy equipment? You can!

I’m on a major sugar bender right now. It’s unusual for me to eat sweets three days in a row but nothing beats my homemade Creamy No-Churn Vanilla Ice Cream with Cherries and Chocolate. Not movie candy. Not baked goods. This dessert is it for me. It’s incredibly delicious and I want to give you the “scoop” on how to make it at home.

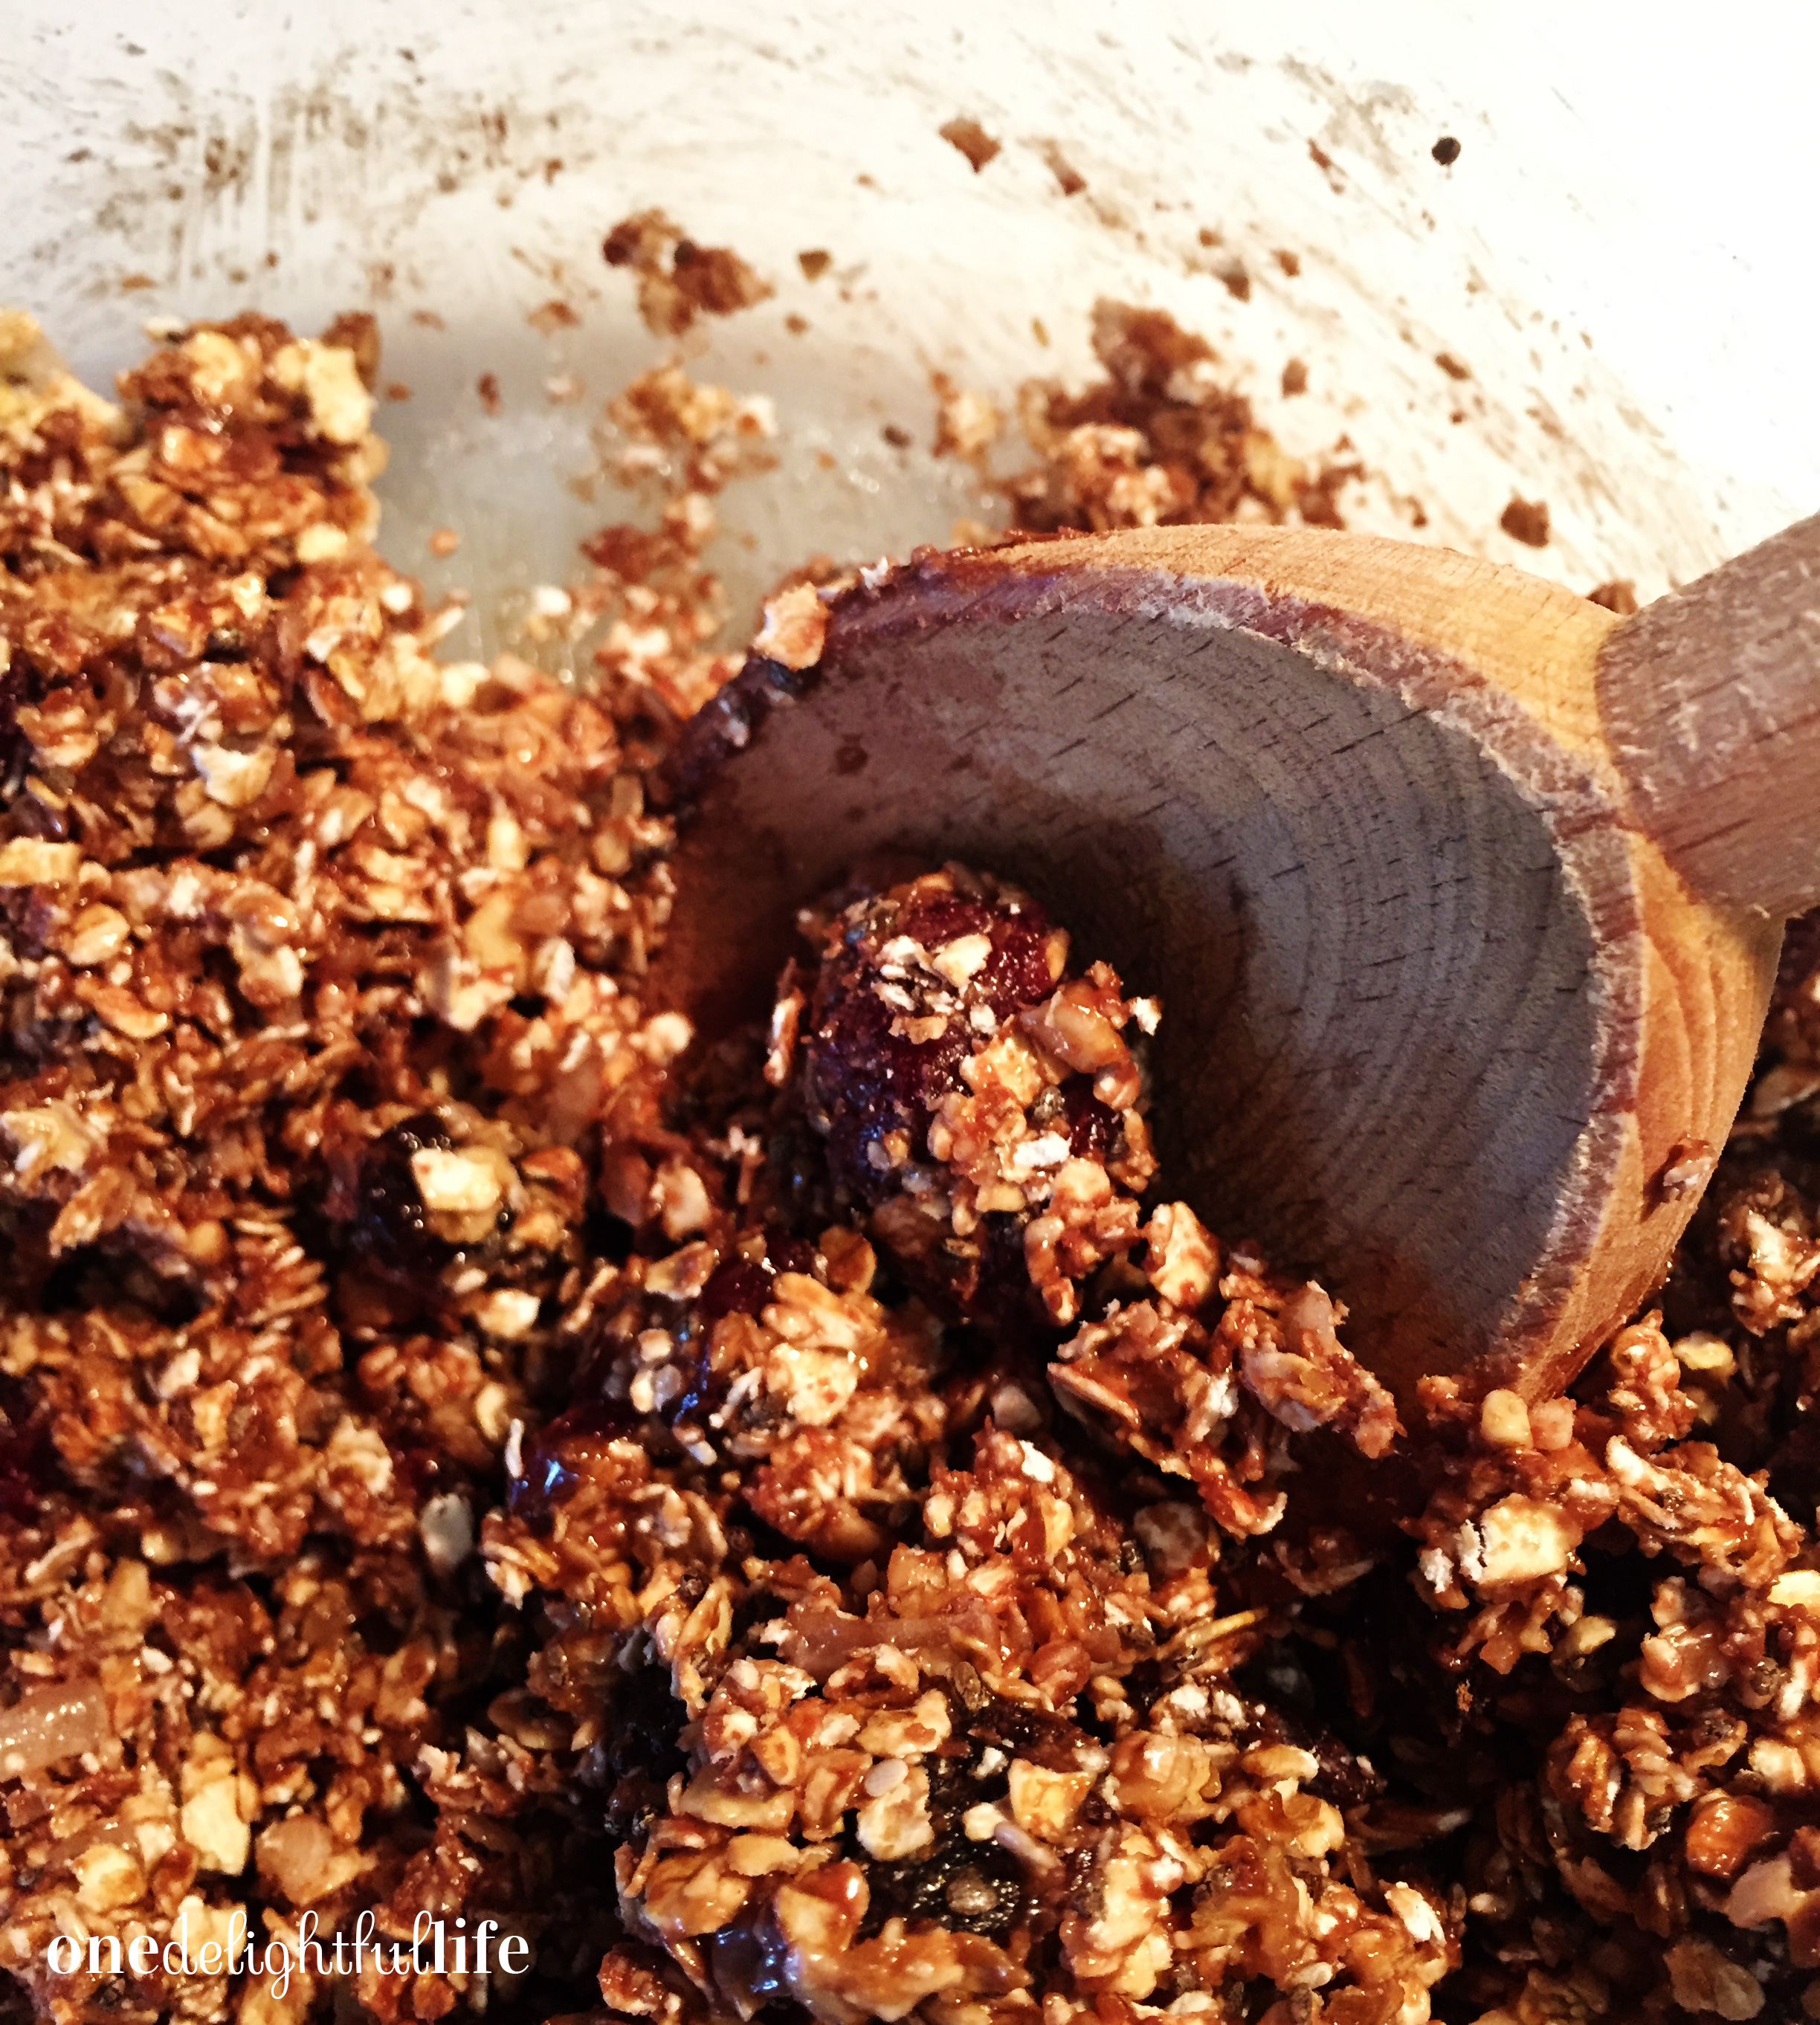
If you can use a hand mixer and a spatula, you can make this yummy recipe. Preparing the ice cream is easy. Waiting about eight hours for it to freeze is the tough part. If you would prefer different fruit or candy mix-ins, you certainly can swap them for the fresh cherries and chocolate. In fact, I almost wish I remembered to add chopped walnuts to this recipe, but that’s okay! I can just sprinkle them on top of my ice cream or get wild and create a sundae with whipped cream too.

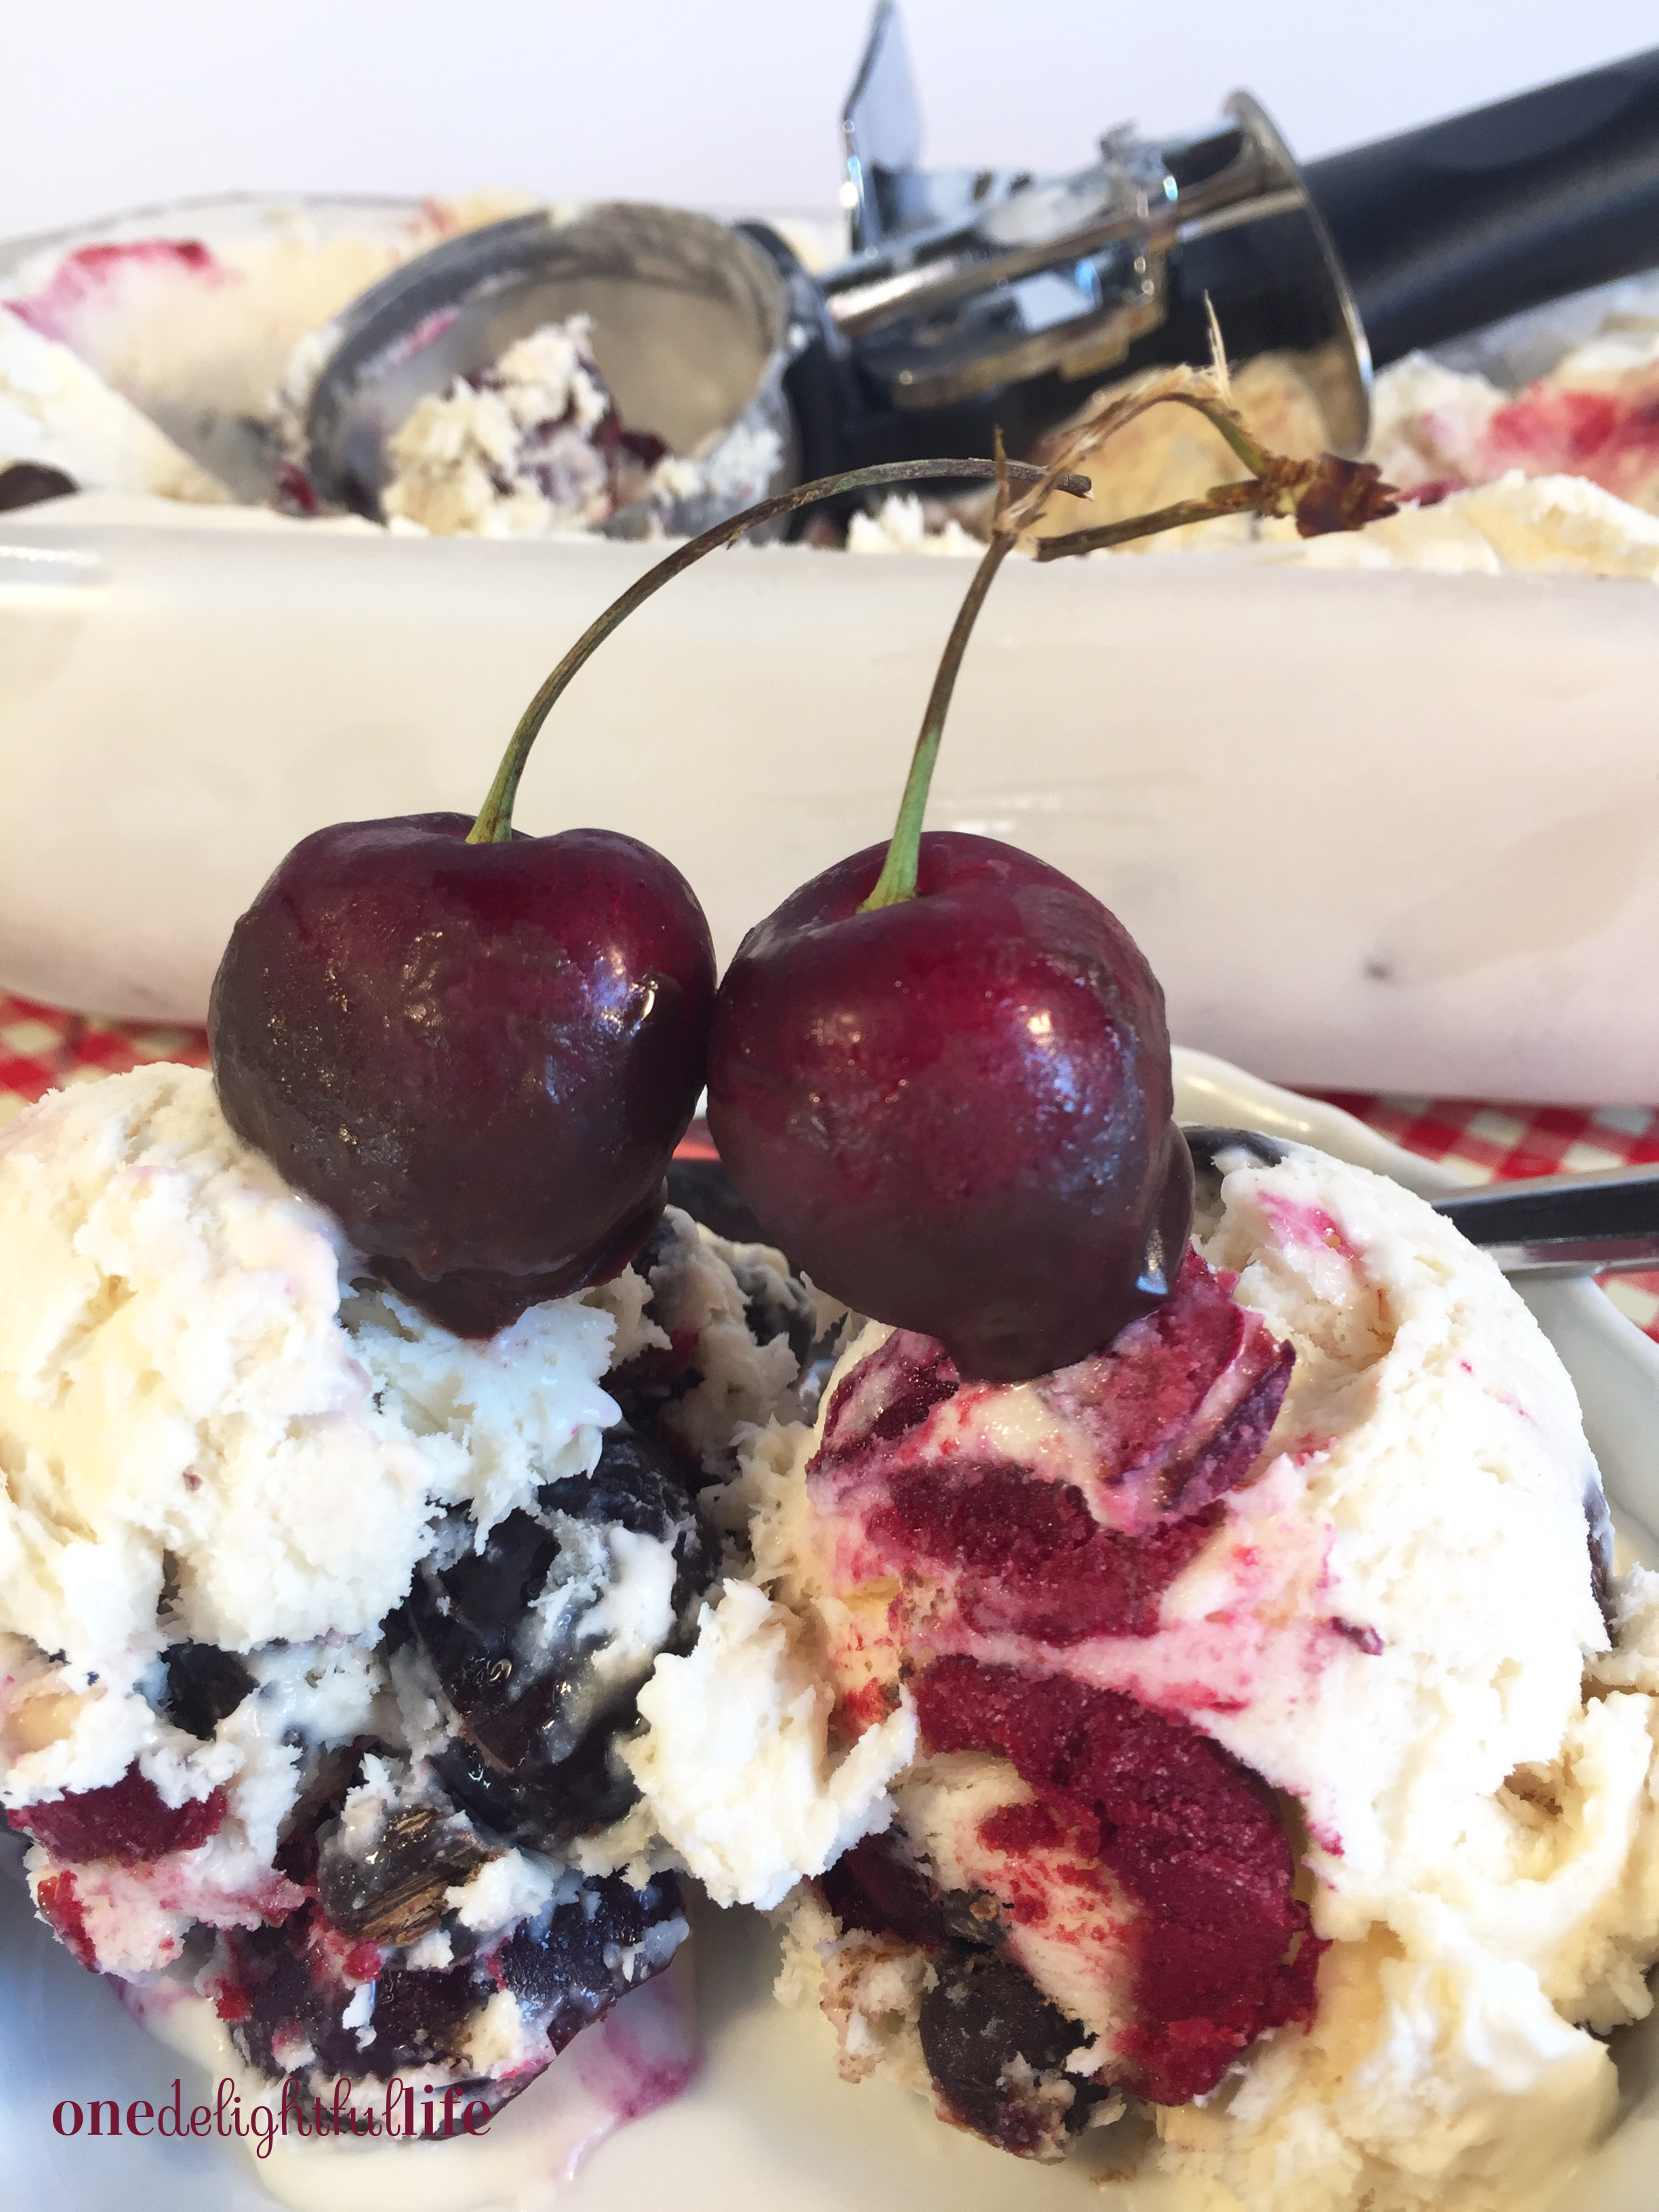
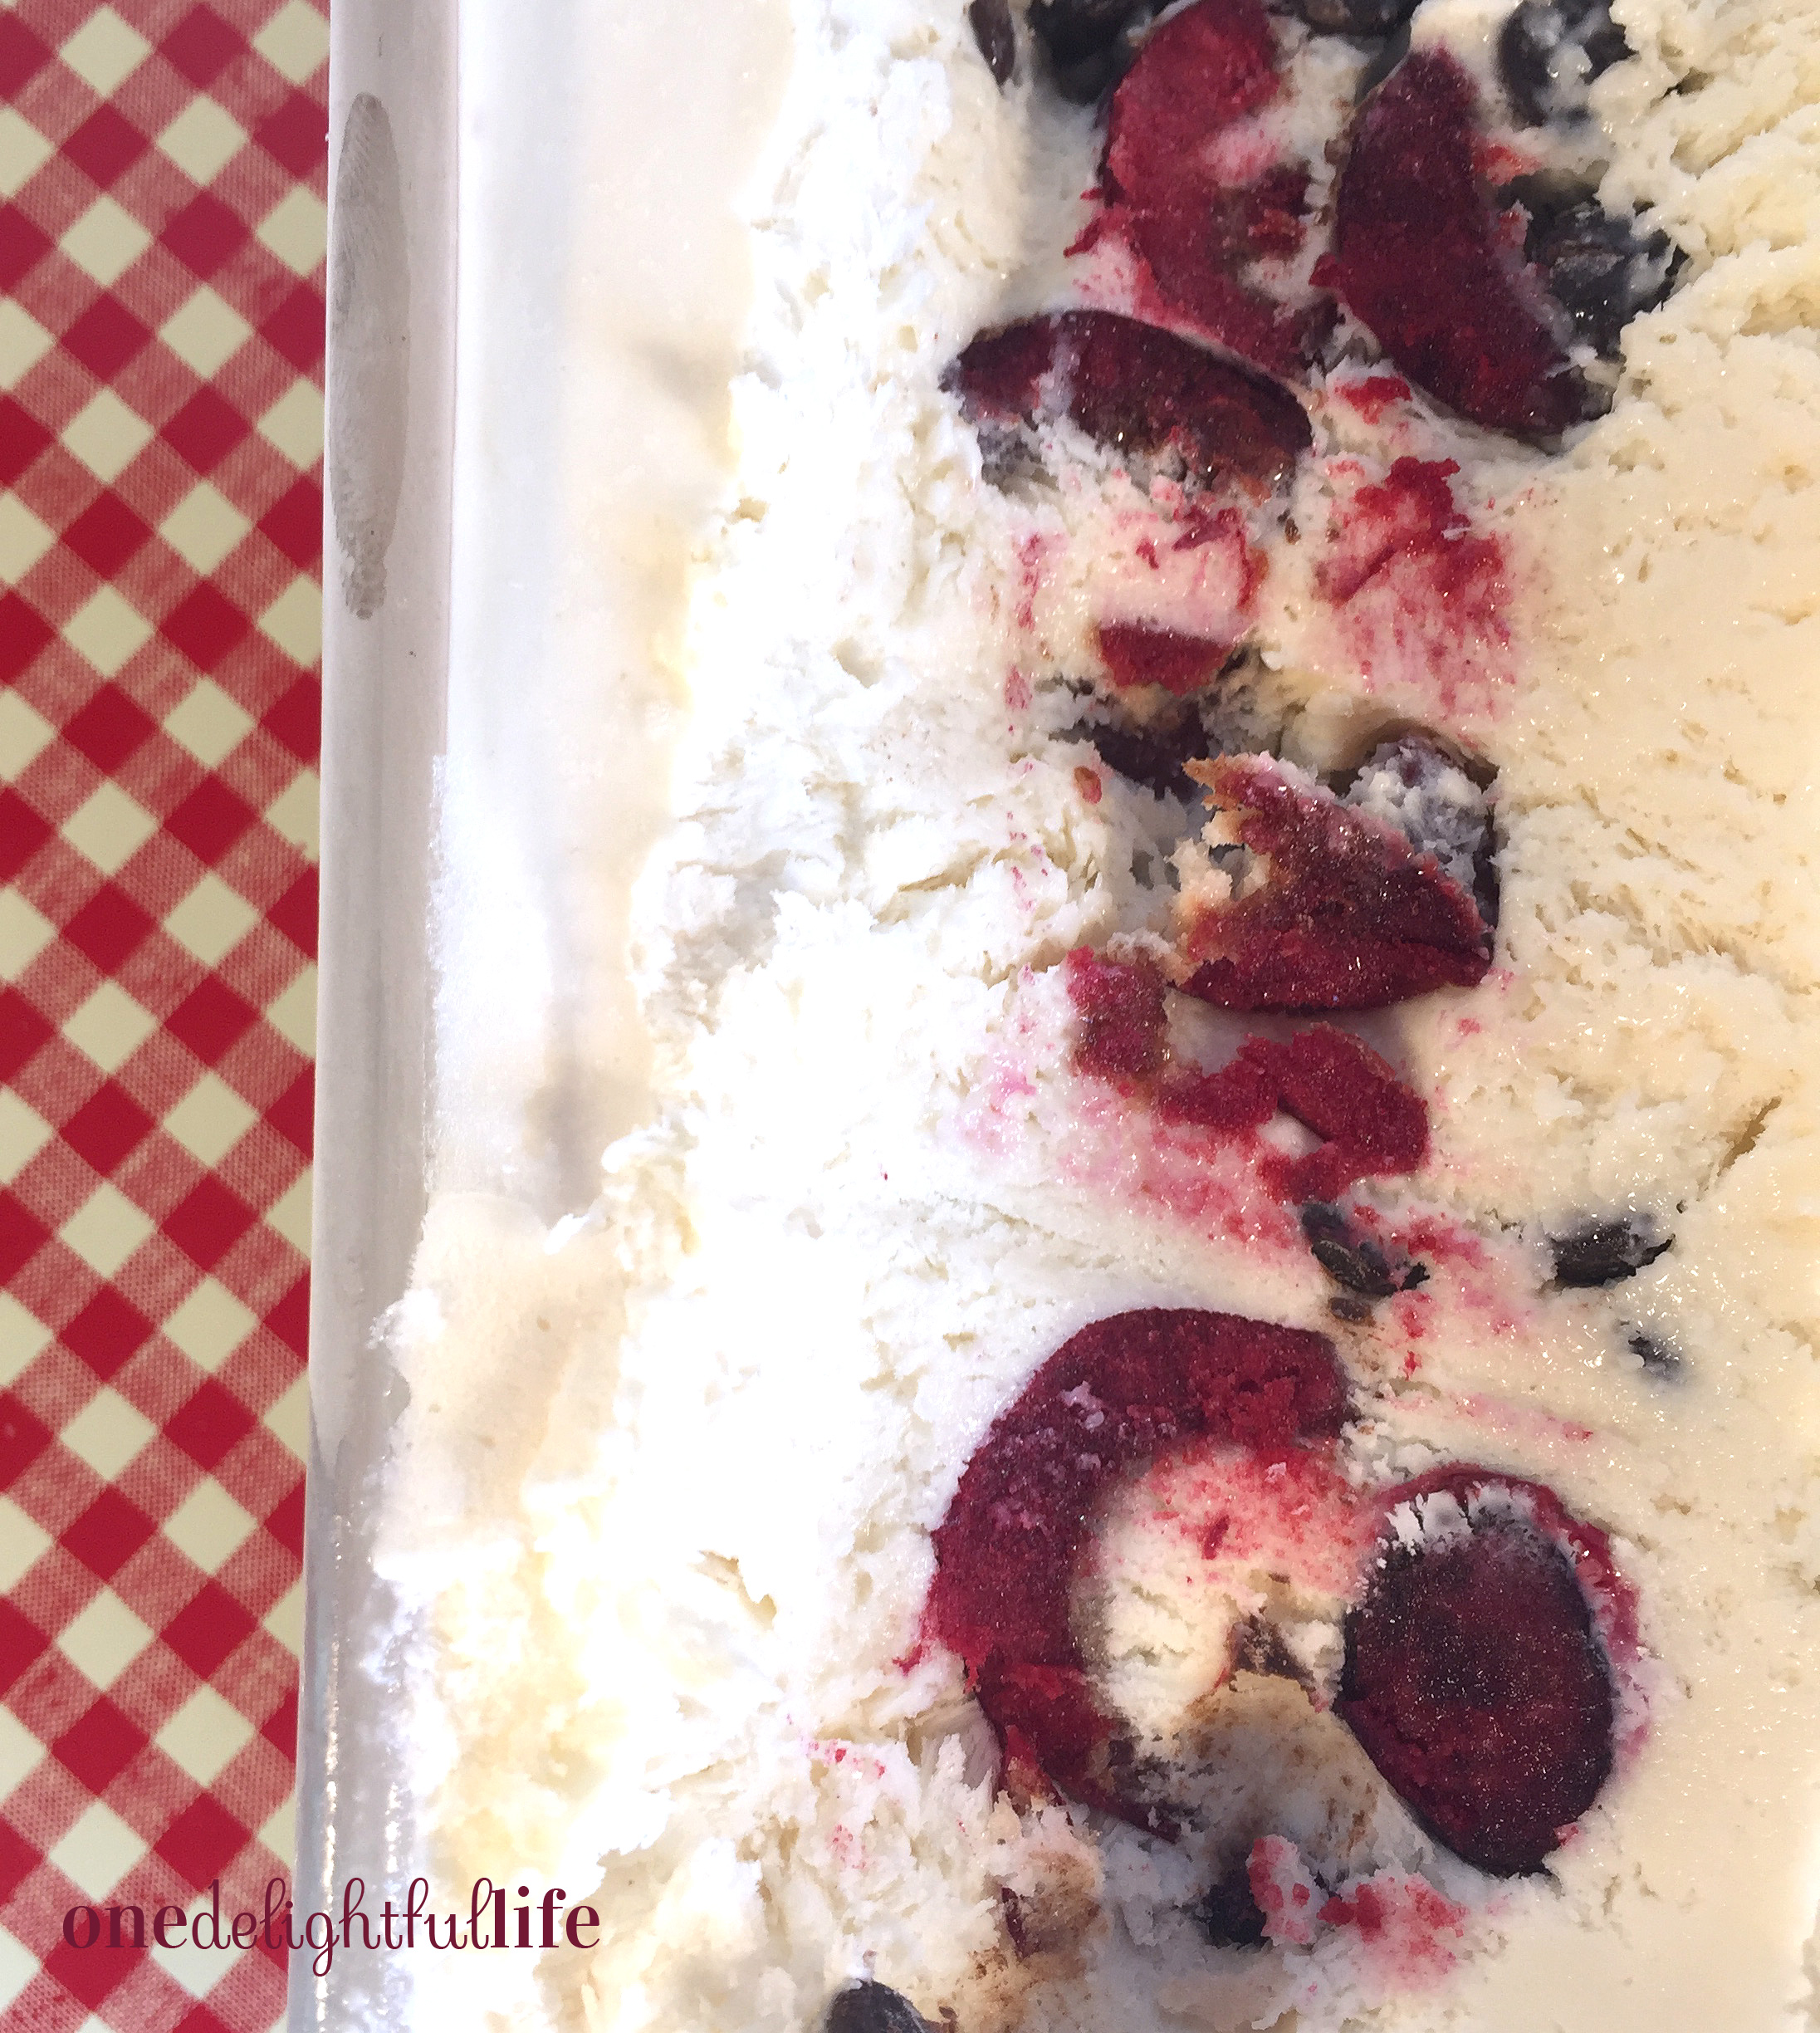
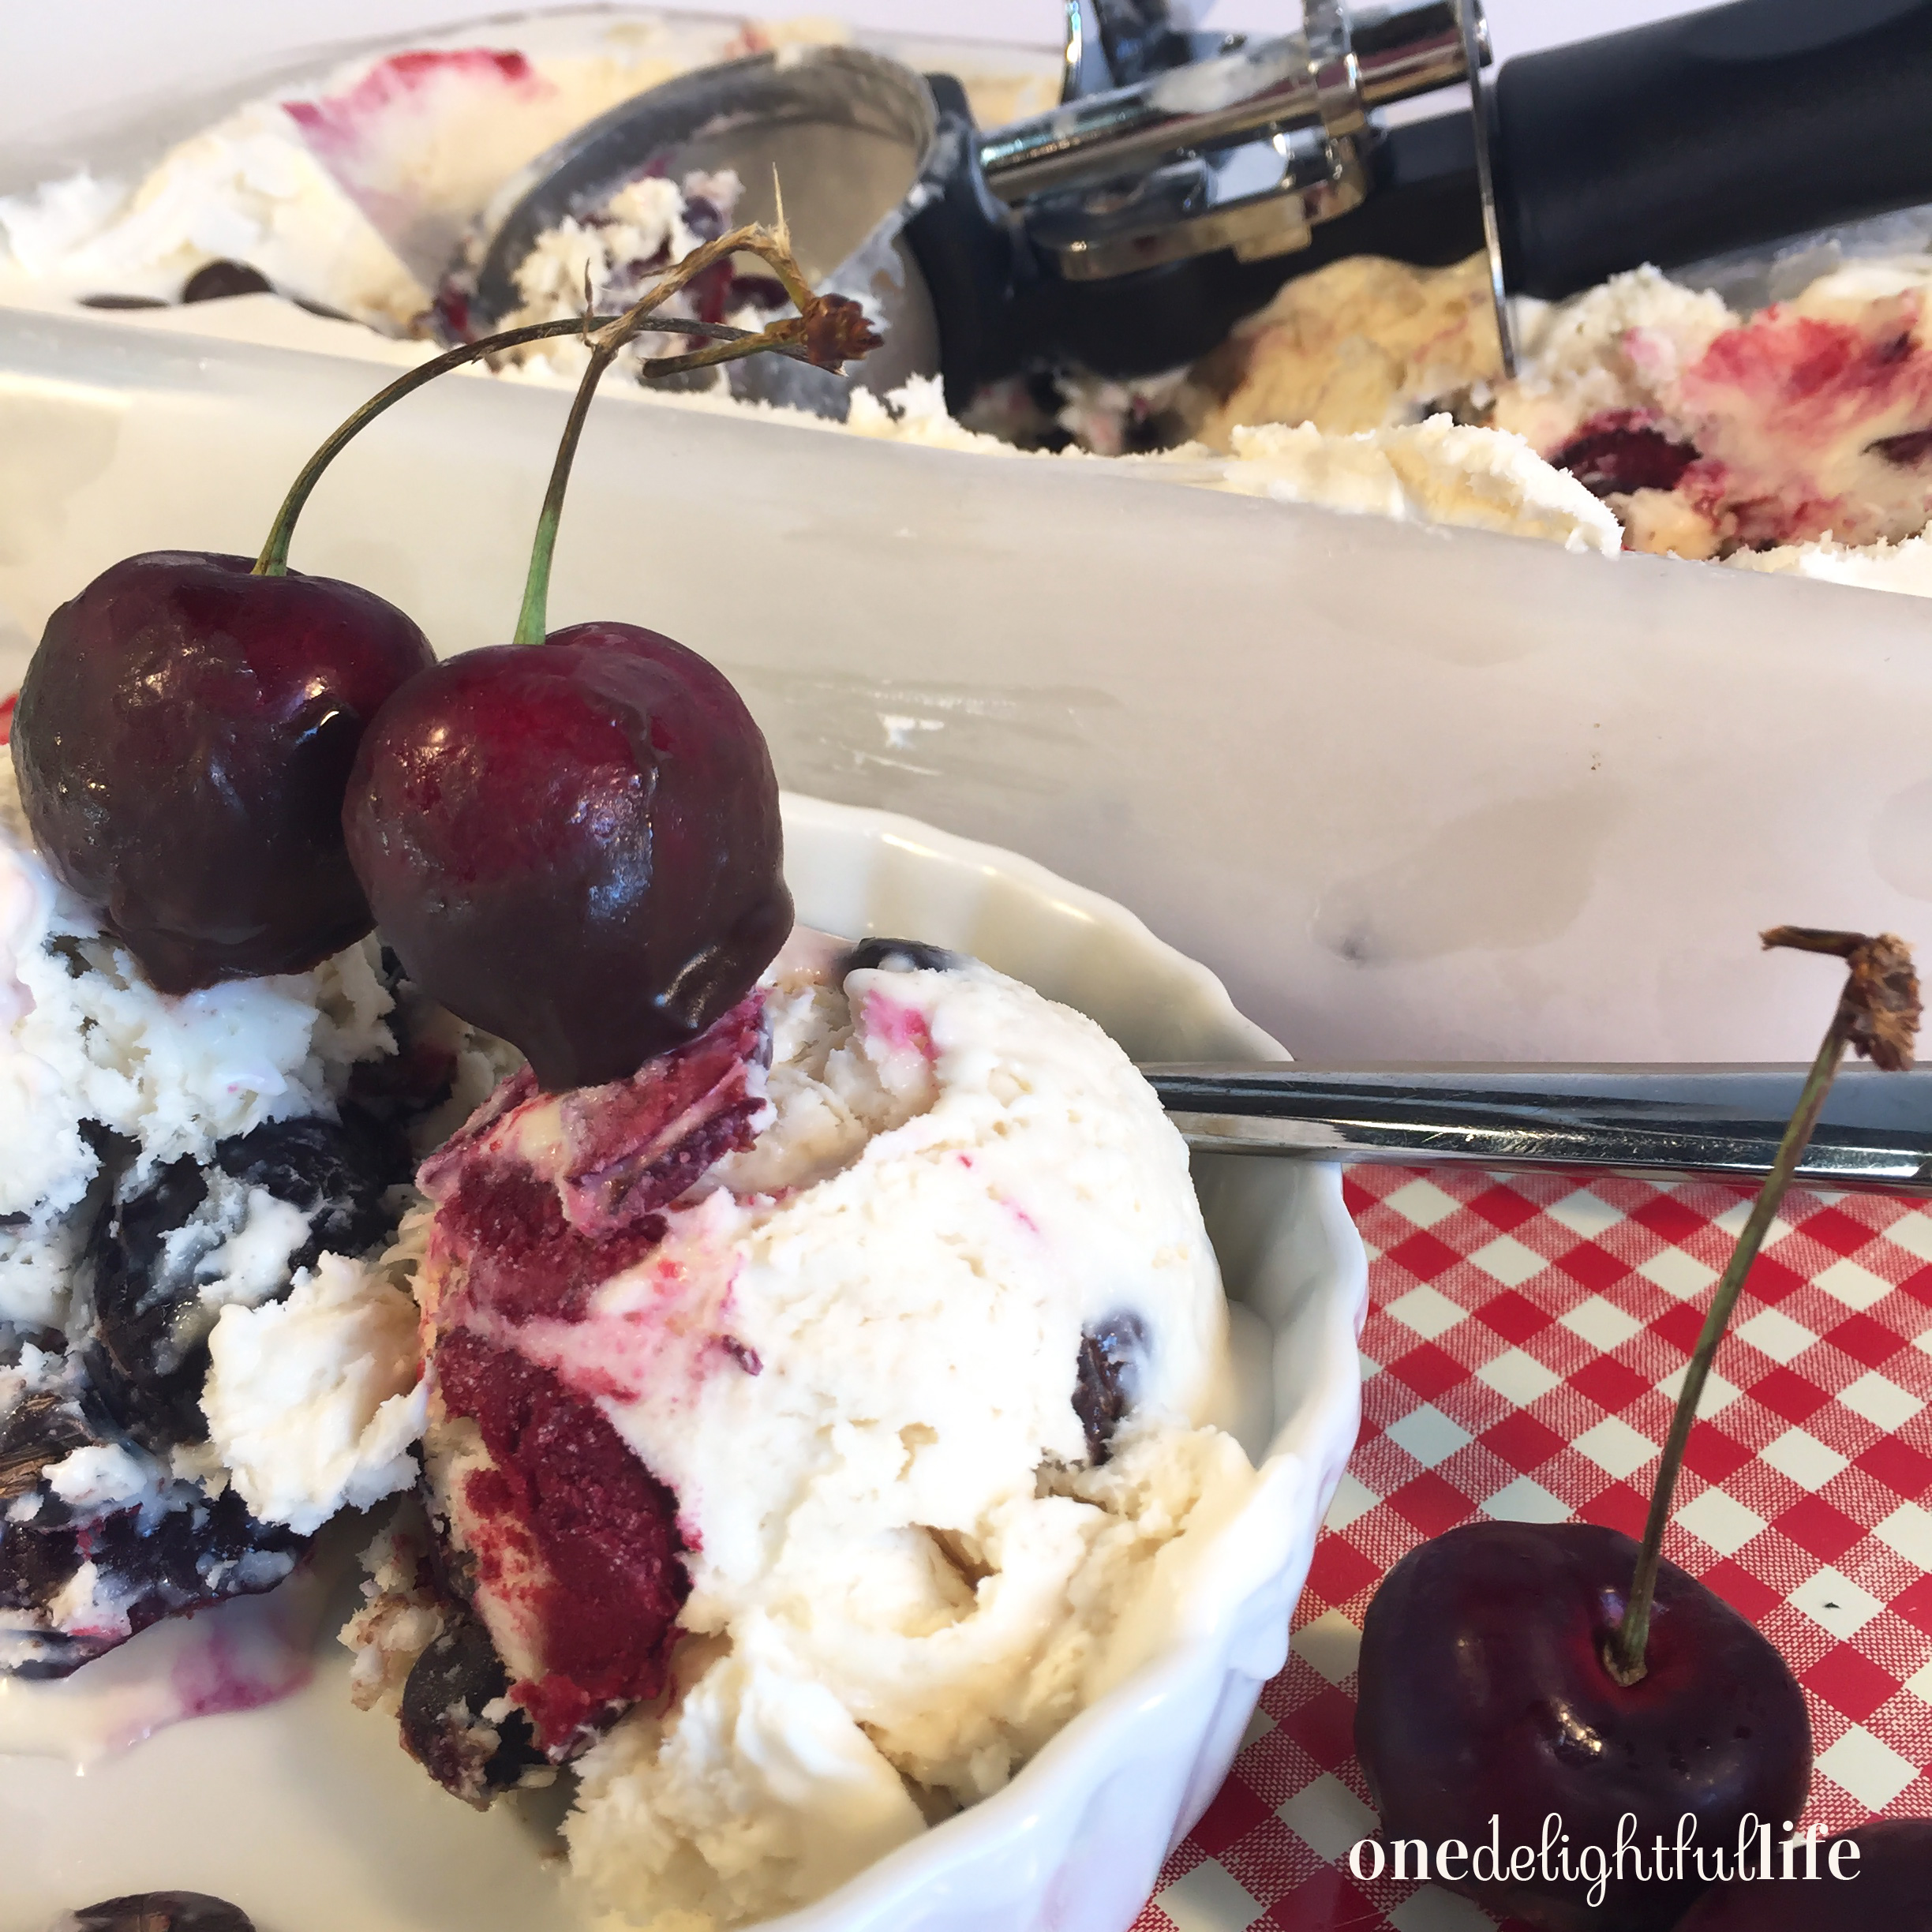
Can you believe how amazing that scoop of ice cream looks topped with chocolate dipped cherries? As vanilla ice cream as the base, the possibilities for flavor combinations is limitless. Why not peanut butter and chocolate? Or a take on Smores using mini marshmallows? Or perhaps chunked pieces of apple pie from the grocery’s bakery department?

I was inspired to use the cherry-chocolate flavor pairing after purchasing a pound of fresh dark cherries from the grocery store. If you buy fruit that is in season, it forces you to use your creativity to build a recipe around it. What goes well with cherries? Say it with me…chocolate! To keep the recipe inexpensive, I used semi-sweet chocolate chips. You’ll also need two cups of cold, heavy whipping cream, vanilla extract, and one can of sweetened condensed milk to make the ice cream base. Preferring big chunks of fruit in my ice cream, I halved each cherry rather than chopping them.

no-churn ice cream
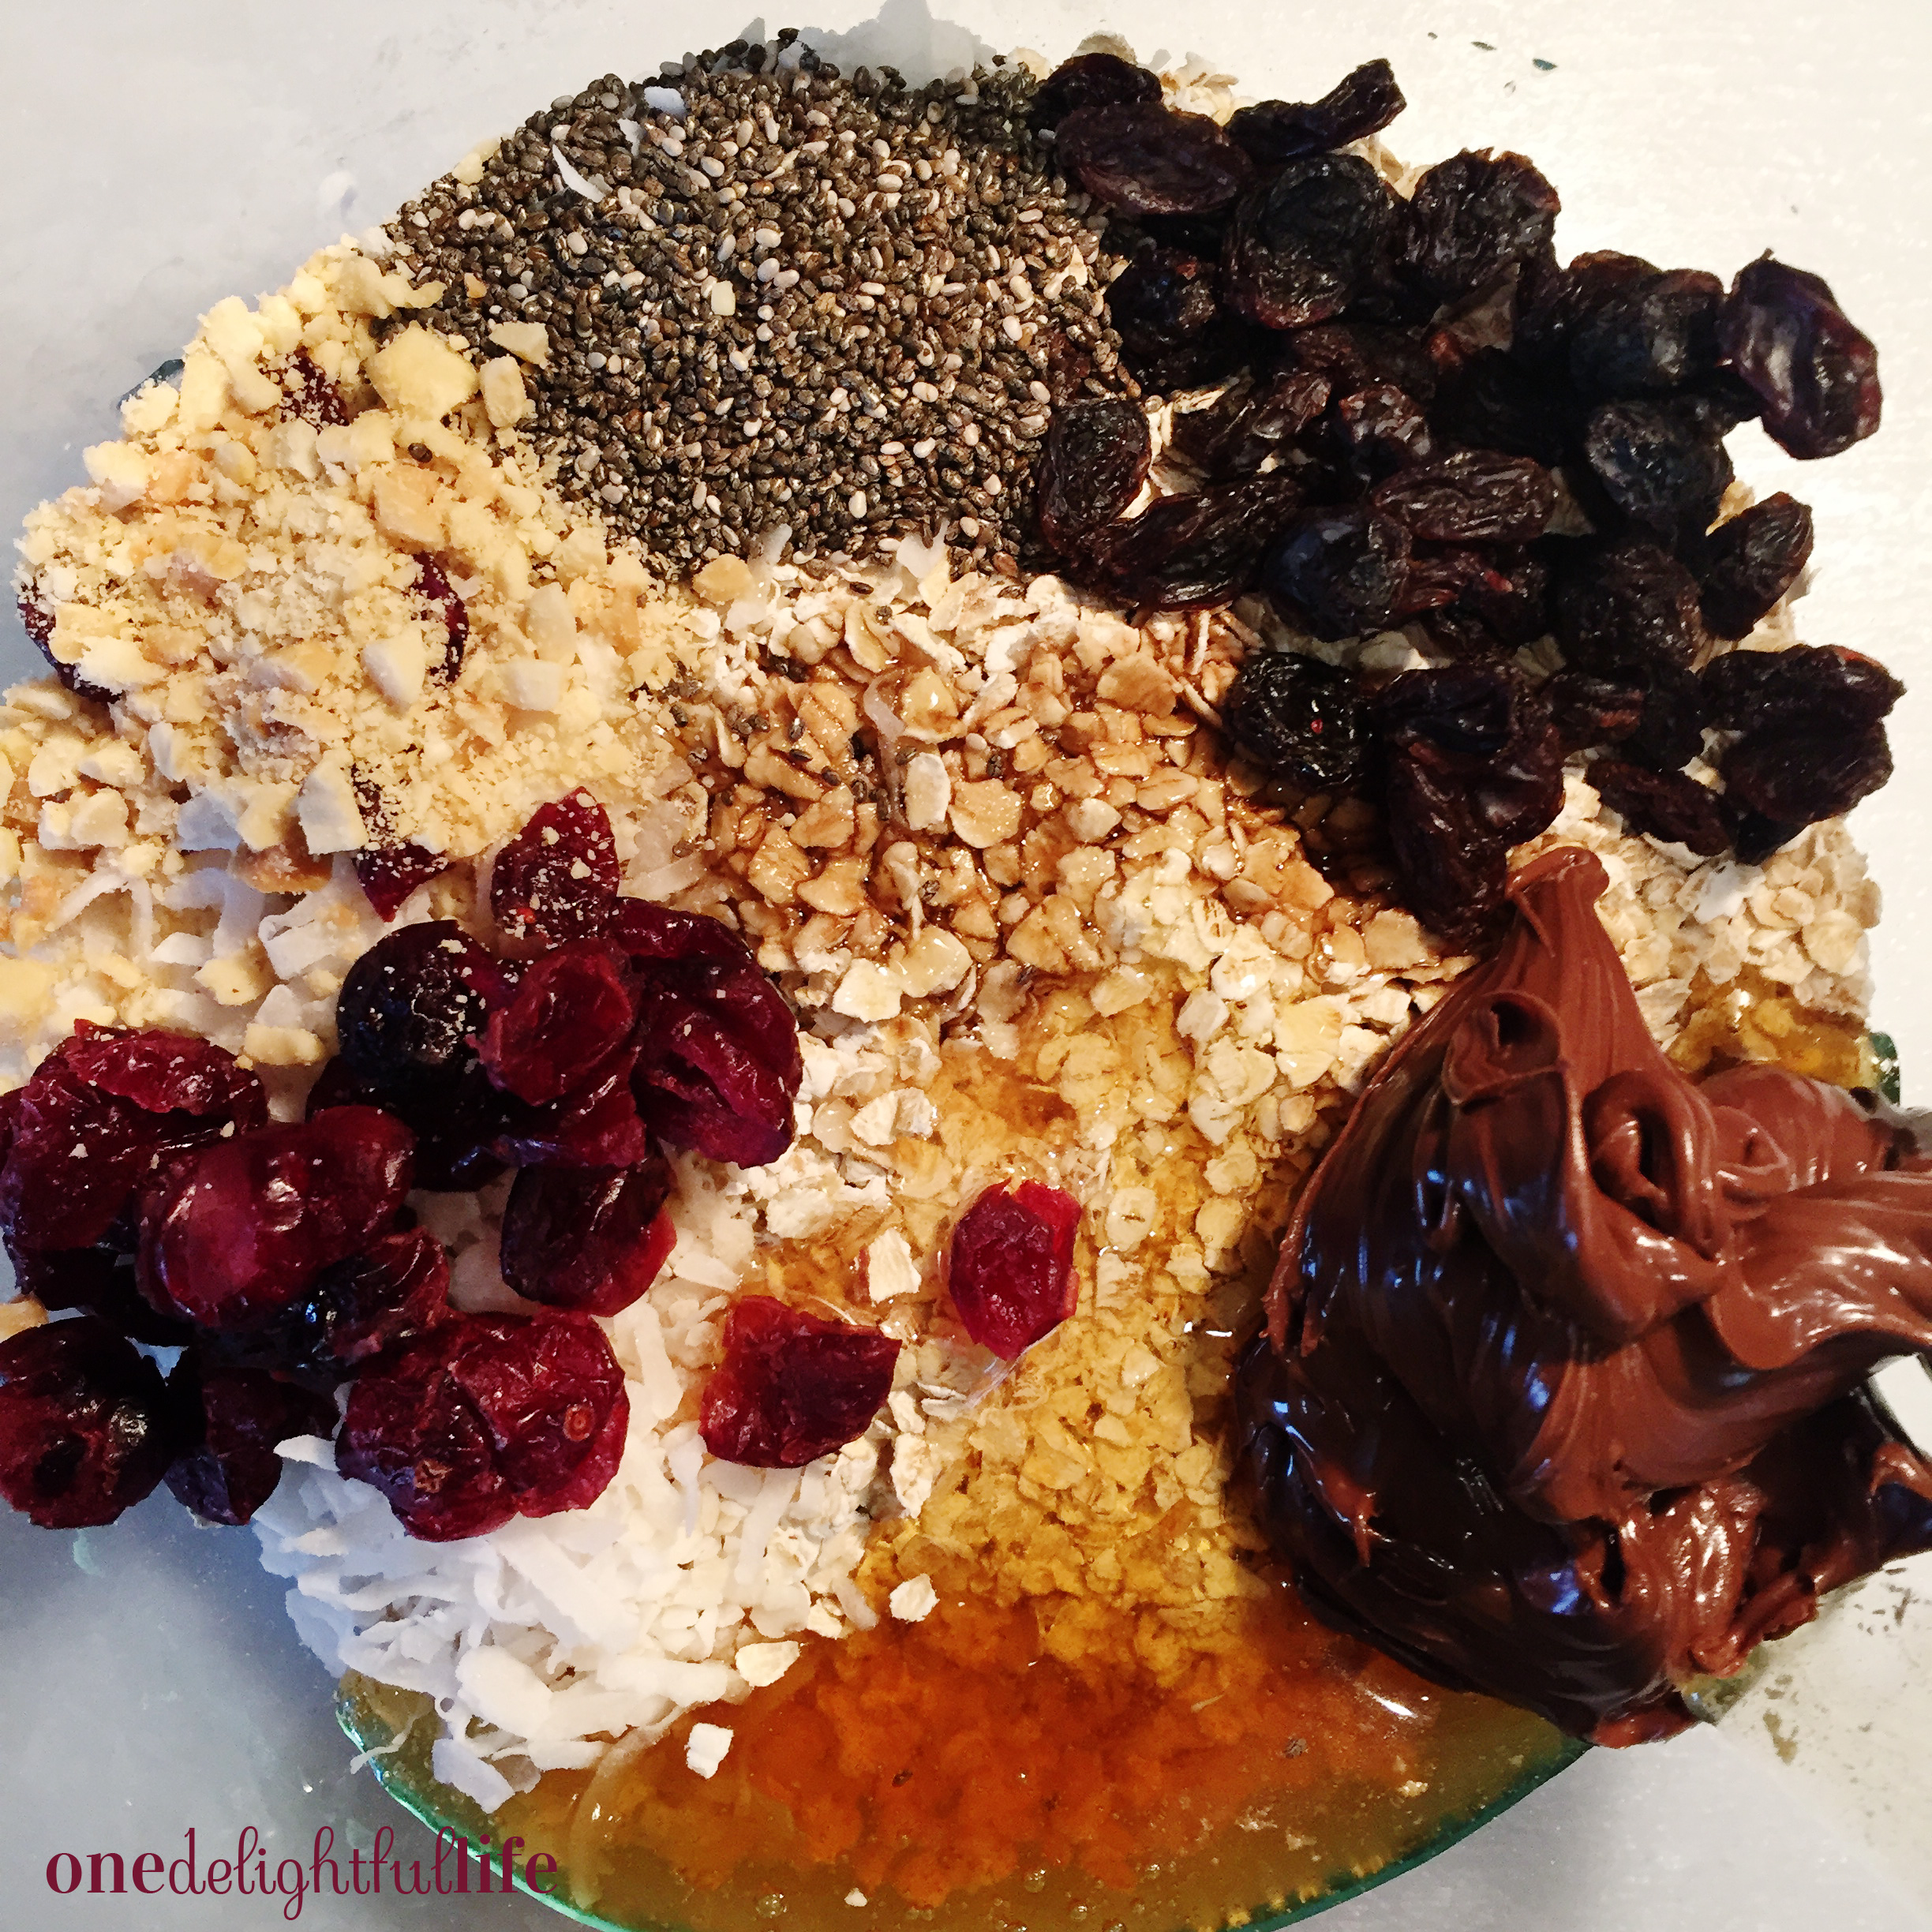
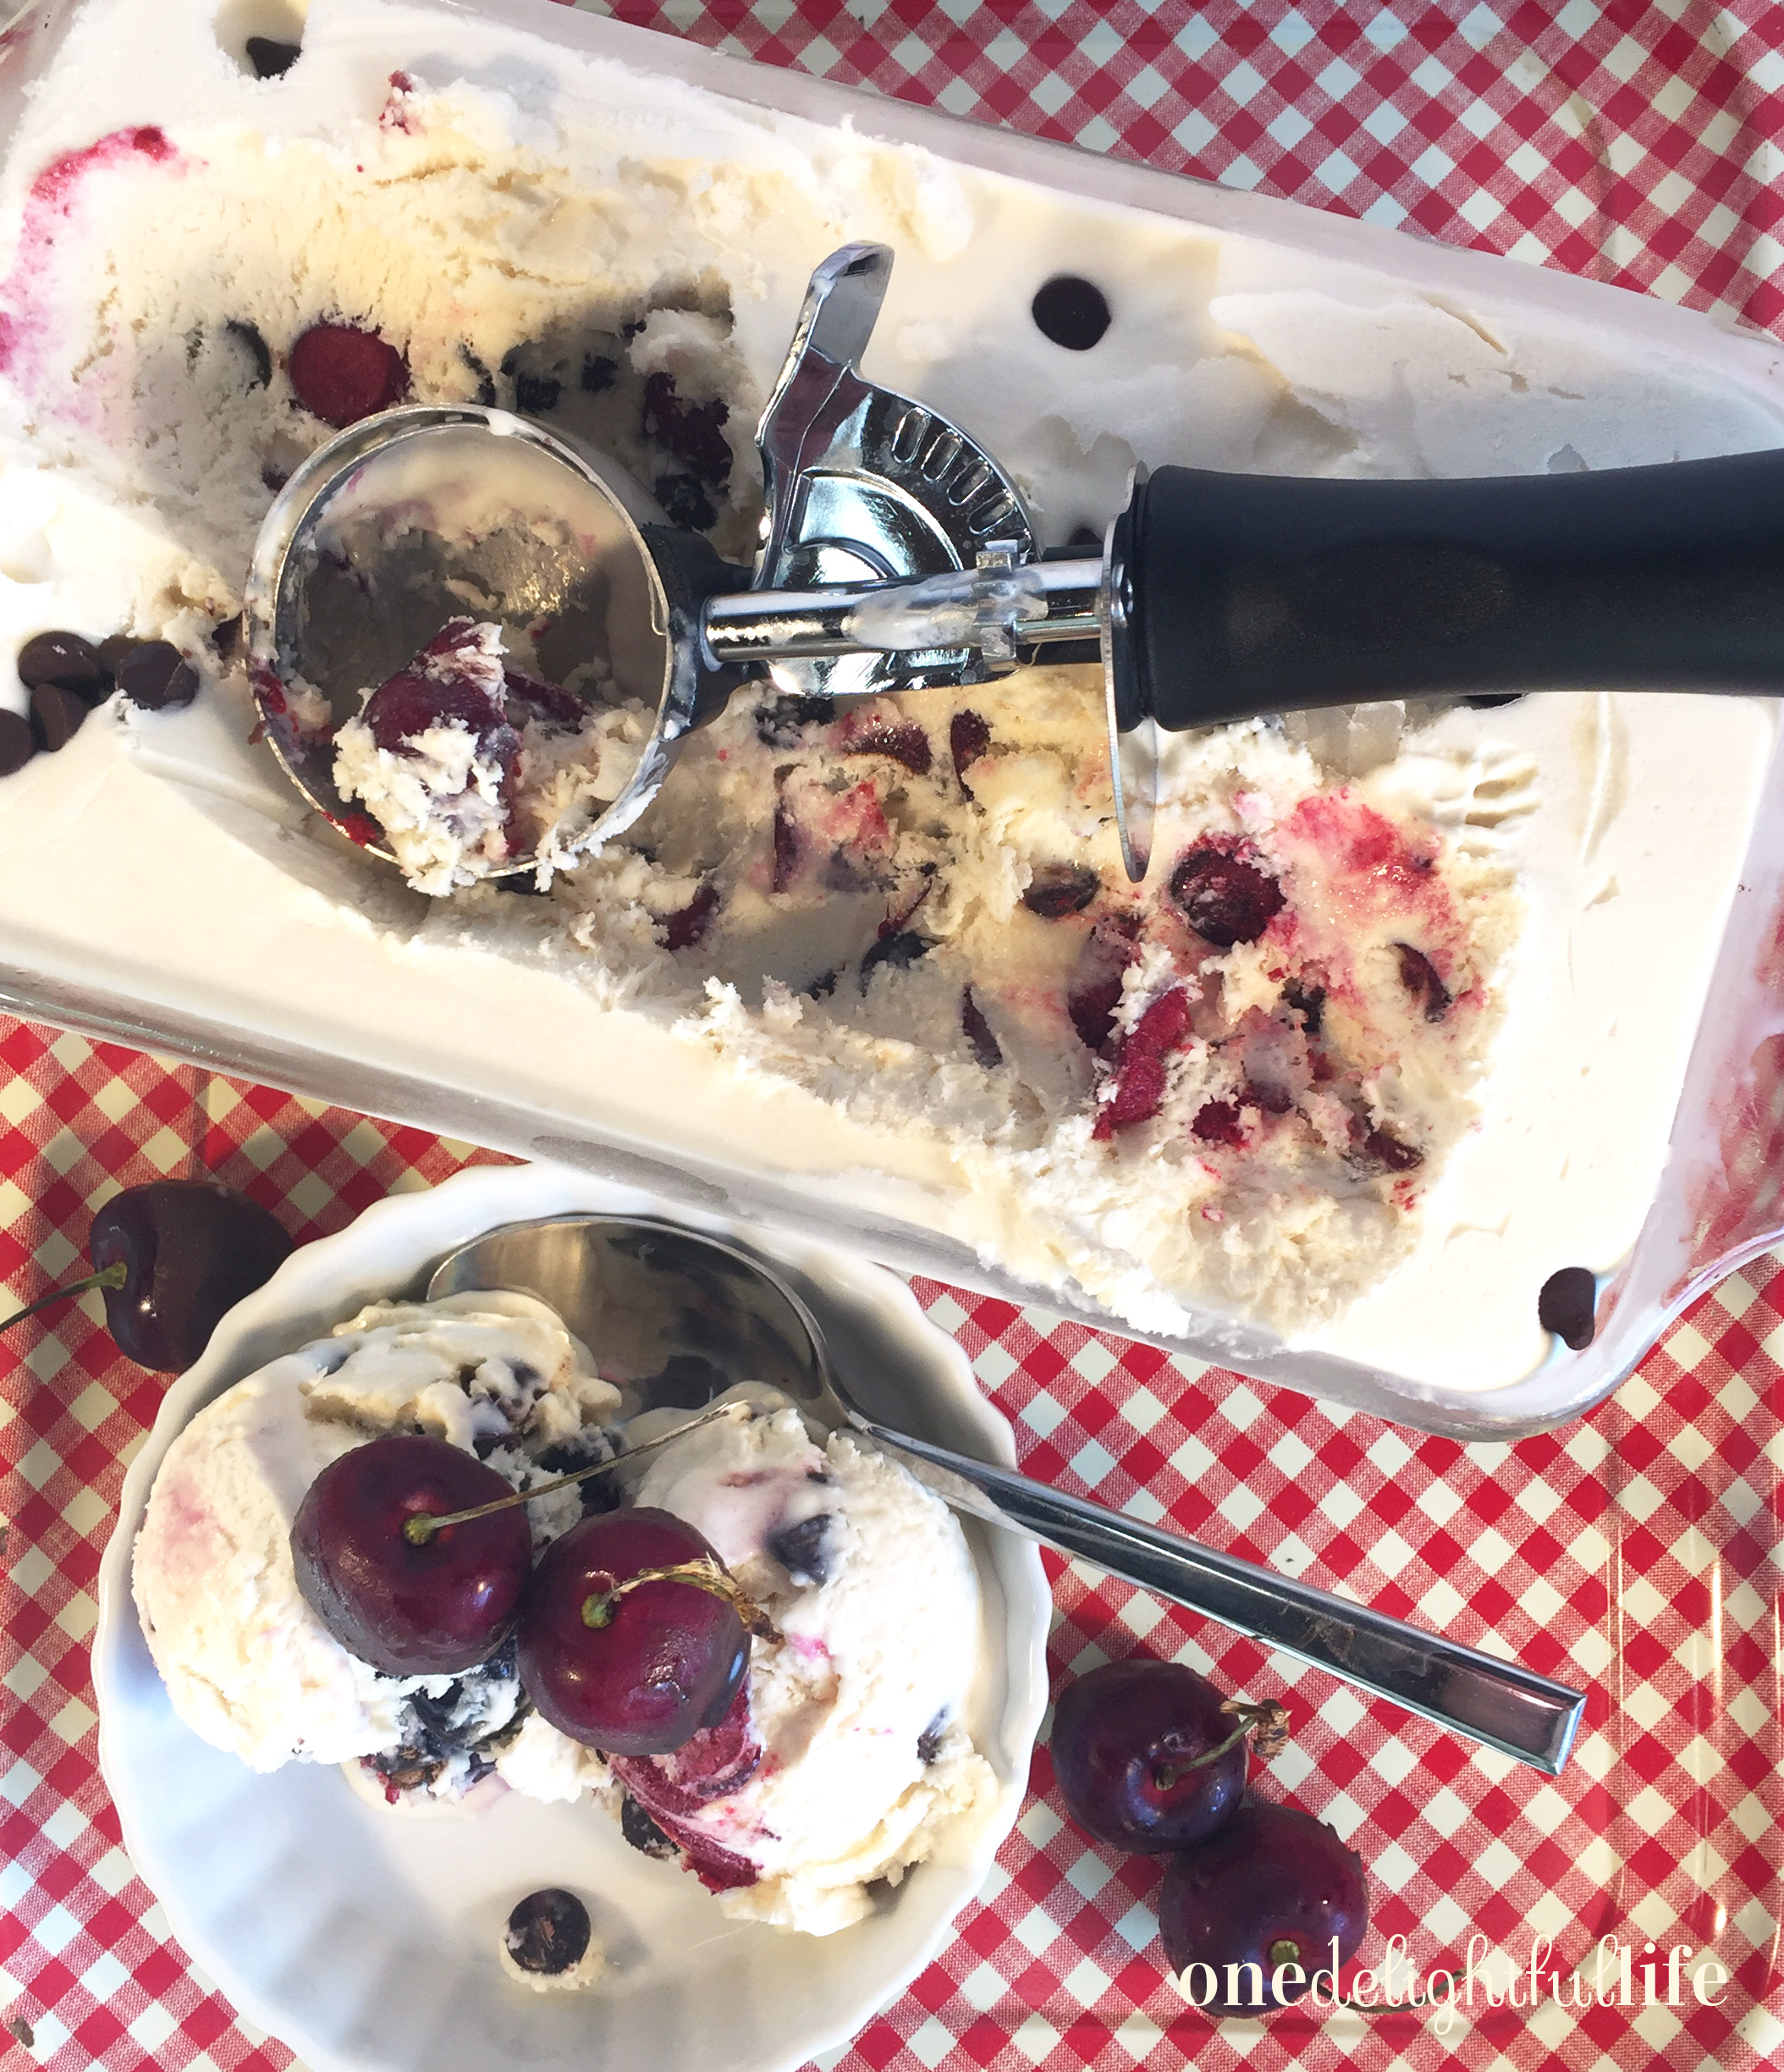
Be sure to lay out all of your kitchen tools and ingredients before starting this recipe, a method many chefs refer to as “Mise en Place.” This is French for putting everything in place. You’ll need to be organized so you can quickly move the Seran wrap covered ice cream pan to the freezer, which if you’re like me, means first clearing a flat space in the deep freeze.

To prepare the ice cream base, beat the heavy whipping cream in a large bowl until stiff peaks form on the hand mixer’s beaters. In a separate large bowl, mix a can of sweetened condensed milk and one tablespoon vanilla extract with spoon by hand. Gently fold in the whipped cream a large clump at a time until all of it is gently incorporated into the sweetened condensed milk and vanilla extract mixture. If you mix too the whipped cream into the ice cream base in a hurried fashion, you’ll end up with sweet soup. Patience pays off.

I added about 2 cups pitted and halved fresh cherries and 1 cup of semi-sweet chocolate chips and gently mixed them into the ice cream base mixture. When finished, pour the bowl of ice cream into a glass loaf pan. Cover tightly with Seran wrap and freeze at least 6 up to 8 hours before serving. It was harden just like any other scoopable ice cream. This is not ice milk or soft serve ice cream.

onedelightfullife.com

8-10 servings

Creamy No-Churn Vanilla Ice Cream with Cherries and Chocolate

Better than store-bought ice cream, this no-churn recipe doesn't require fancy kitchen equipment and tastes delightful.

30 minPrep Time

6 hrCook Time

6 hr, 30 Total Time

Save RecipeSave Recipe
Print Recipe
My Recipes My Lists My Calendar

Ingredients

  • Ice Cream Base:
  • 2 cups heavy whipping cream
  • 1 can sweetened condense milk
  • 1 T. vanilla extract
  • Mix-Ins:
  • 2 cups pitted, halved fresh cherries
  • 1 cup semi-sweet chocolate chips

Instructions

  1. Pour heavy whipping cream into a large bowl.
  2. Using a hand mixer on a middle speed setting, mix the heavy whipping cream until it begins to thicken. You'll know it's done when it forms stiff peaks on the beaters. When finished, set the bowl aside.
  3. In a separate large bowl, add vanilla extract to the sweetened condensed milk and mix thoroughly. Set the bowl aside.
  4. Using a rubber spatula, gently fold in the whipped cream a little at a time into the condensed milk and vanilla mixture. Continue adding the whipped cream and gently continue mixing until all three ingredients are well incorporated.
  5. Add in the pitted, halved cherries and chocolate chips (or your mix-ins of choice)
  6. Pour ice cream base mixture into a glass loaf pan.
  7. Cover tightly with plastic wrap.
  8. Freeze 6-8 hours.
7.8.1.2
77
https://onedelightfullife.com/no-churn-vanilla-ice-cream/
onedelightfullife.com

Nutrition

Calories

3199 cal

Fat

224 g

Carbs

190 g

Protein

23 g
Click Here For Full Nutrition, Exchanges, and My Plate Info
ESHA Logo

I hope you enjoy this easy, no frills ice cream recipe. It’s super simple and inexpensive to make as a dessert for several people.

I promise to bring more blog posts to keep your time in the kitchen fun and budget-friendly as summer long. Until then, get more inspirational recipe and travel posts on ODL Instagram and receive daily updates on Twitter. Have an idea for a recipe you’d like me to test? Leave it in the comments section below.

Filed Under: Desserts, Taste Tagged With: berries, cherries, chocolate, cold, condensed milk, dark cherries, dessert, freeze, freezer, fresh fruit, frozen, ice milk, mix-ins, no-churn, scoop, semi-sweet chocolate, vanilla ice cream

No Bake Energy Bites: A Mid-Day Snack to Keep You From Feeling Hangry

March 26, 2017 by Vanessa Leave a Comment

Hangry – The word ‘hangry’ is a concise way to describe a common feeling. Hangry is a clever word combination of hungry and angry, and an adjective that describes being irritable due to hunger, according to Webster’s Dictionary.

Anyone who works with me knows that I keep snacks in my drawer (fruit roll-ups, whole fruit, or granola bars) so that in the event I begin to feel hangry, I’ve got relief nearby. Sometimes I can feel myself getting hangry mid-morning and nobody wants me to get hangry. Nobody. So, I grab a healthy snack.

Inspired by our healthier “lifestyle” (we’re not calling it a diet), I was inspired to make No Bake Energy Bites: A Mid-Day Snack to Keep You From Feeling Hangry. They taste like no bake cookies and curb your hunger thanks to the addition of oatmeal and chia seeds, a popular ingredient in smoothies and granola bowls. Chia seeds are a trending super food high in nutrients that provides boost of energy. You can purchase them in bulk at any health food store. Because they expand a bit when wet, they make you feel full! Oh, and total bonus…chia seeds are suppose to promote healthy skin and reduce the signs of aging. Well, duh! I think I’ll add them to every early morning breakfast.

These No Bake Energy Bites taste like a cookie but they’re healthy for you. This recipe included cocoa, chocolate chips, peanut butter, almonds, vanilla and honey add-ins. See the recipe card below.

Using quick oats as the base, the mix-in ingredient options are about as endless as your imagination. For example, you can make ingredient substitutions or try these flavor combinations:

  • butterscotch chips for chocolate chips
  • chopped dried bananas, bacon bits, and peanut butter
  • dried apple chips with raisins and cinnamon
  • sunflower seeds instead of peanuts or almonds
  • Nutella and dried berries like cherries or blueberries
  • crushed honey oat cereal and peanut butter
  • cranberries, raisins, and toasted coconut with Nutella (see photos below)

Making No Bake Energy Bites is as easy as combining all of the recipe ingredients in a bowl, mixing them (your hands are a great kitchen tool but beware – the added honey will leave your hands sticky), and rolling them into one inch balls after the mixture refrigerates for 30 minutes. It’s a cinch!

This recipe version of No Bake Energy Bites includes cranberries, chopped peanuts, chia seeds, toasted coconut, raisins, Nutella, honey, vanilla, and oatmeal.
Work together all of the ingredients by pressing your spoon into the walls of the bowl and then finish mixing.

If you initially have a hard time rolling the mixture into balls, squeeze it in your hand until the mixture is tight and then use both hands to form a one-inch ball. Tip: Layer parchment paper (or wax paper) between the layers of energy balls in an airtight container before you store them in the refrigerator for at least two hours. I’m impatient and put my Tupperware container of energy bites in the freezer for one hour. A-c-t-u-a-l-l-y, I must admit that I ate one before the rest even made it into the refrigerator. They’re simply delicious!

Cranberry Raisin with Nutella No Bake Energy Bites

There you have it! No Bake Energy Bites are healthy for you and will save you from hunger pains at work so you don’t “bite” your co-worker’s head off. Yes, I went there (insert eye roll). Grab some oatmeal and your favorite mix-in ingredients and get started making tomorrow’s mid-day snack (or breakfast)!

onedelightfullife.com

9 energy bites

No Bake Peanut Butter Chocolate Energy Bites

Fight mid-day hunger with this healthy grab-and-go snack that tastes like an oatmeal cookie.

40 minPrep Time

1 hrCook Time

1 hr, 40 Total Time

Save RecipeSave Recipe
Print Recipe
My Recipes My Lists My Calendar

Ingredients

  • 1 c. quick oats
  • 1/2 c. natural peanut butter
  • 1/3 c. honey
  • 1/4 c. cocoa
  • 2 T. chopped almonds
  • 2 T. milk chocolate chips
  • 1 T. chia seeds
  • 1 tsp vanilla extract

Instructions

  1. In a large bowl, mix all ingredients with a spoon.
  2. Refrigerate mixture in the bowl for 30 minutes.
  3. Remove bowl from the refrigerator and shape it into one-inch balls.
  4. Place energy bites into a airtight container. Separate layers with wax paper or parchment paper.
  5. Refrigerate at least an hour before serving.
7.8.1.2
72
https://onedelightfullife.com/no-bake-energy-bites-a-mid-day-snack-to-keep-you-from-feeling-hangry/
onedelightfullife.com

Nutrition

Calories

98 cal

Fat

3 g

Carbs

16 g

Protein

3 g
Click Here For Full Nutrition, Exchanges, and My Plate Info
ESHA Logo

Enjoy friends.

Filed Under: Snacks, Taste Tagged With: almonds, apple chips, bacon bits, balls, berries, breakfast, butterscotch chips, cereal, chia seeds, chocolate chips, cocoa, cranberries, energy, freezer, hangry, healthy, honey, hunger, hungry, instant oats, mid-day, milk chocolate, no bake, Nutella, oatmeal, oats, office, peanut butter, peanuts, quick oats, raisins, snack, sunflower seeds, toasted coconut, vanilla extract

Primary Sidebar

SEARCH

Ammar
Hello! I'm Vanessa. Welcome to One Delightful Life, a blog created to add more delight to your life with delicious recipes, travel destinations, and lifestyle improvement ideas. Thanks for exploring my blog!

Archives

Contact Us

  • Email
    info@onedelightfullife.com

Popular Posts

Back to School Brain Breaks12K Total Shares
Going Underground in Historic Ellinwood, KansasGoing Underground in Historic Ellinwood, Kansas7K Total Shares
Weston, Missouri: Making the Most of a Weekend VisitWeston, Missouri: Making the Most of a Weekend Visit2K Total Shares
Cucumber Lime Vodka SplashCucumber Lime Vodka Splash1K Total Shares
How to Make the Most of a Weekend in Omaha, NebraskaHow to Make the Most of a Weekend in Omaha, Nebraska484 Total Shares
  • About
  • Taste
  • Travel
  • DIY
  • Contact
  • Lifestyle
  • 100 Things to Do in Wichita Before You Die

© 2023 · onedelightfullife ·