• Skip to primary navigation
  • Skip to main content
  • Skip to primary sidebar

A Lifestyle Blog

  • About
    • Work With Me
      • Delightful Life Media
    • Privacy Policy & Disclosures
  • Taste
    • Breakfast
    • Lunch
      • Salads
      • Sandwiches
    • Dinner
      • Grilled
      • Sides
      • Pasta
      • Rice
    • Appetizers
    • Desserts
    • Drinks
      • Cocktails
      • Non-Alcoholic
    • Snacks
  • Travel
    • United States
      • Kansas
      • Missouri
      • Nevada
      • Nebraska
      • New York
      • Oklahoma
      • Texas
      • Wisconsin
    • Mexico
  • DIY
    • Projects
  • Contact
  • Lifestyle
  • 100 Things to Do in Wichita Before You Die

snack

Soft Carrot Cake Energy Balls

February 5, 2019 by Vanessa Leave a Comment

Soft carrot cake with cream cheese icing. For over a decade of my childhood, I ordered carrot cake for my birthday cake when dining out OR when my mom asked what kind of celebratory dessert I wanted. Every. Single. Year. Today, I eat fewer heavy desserts like dense cakes or cookies, but I still love sweets and I know you do, too!

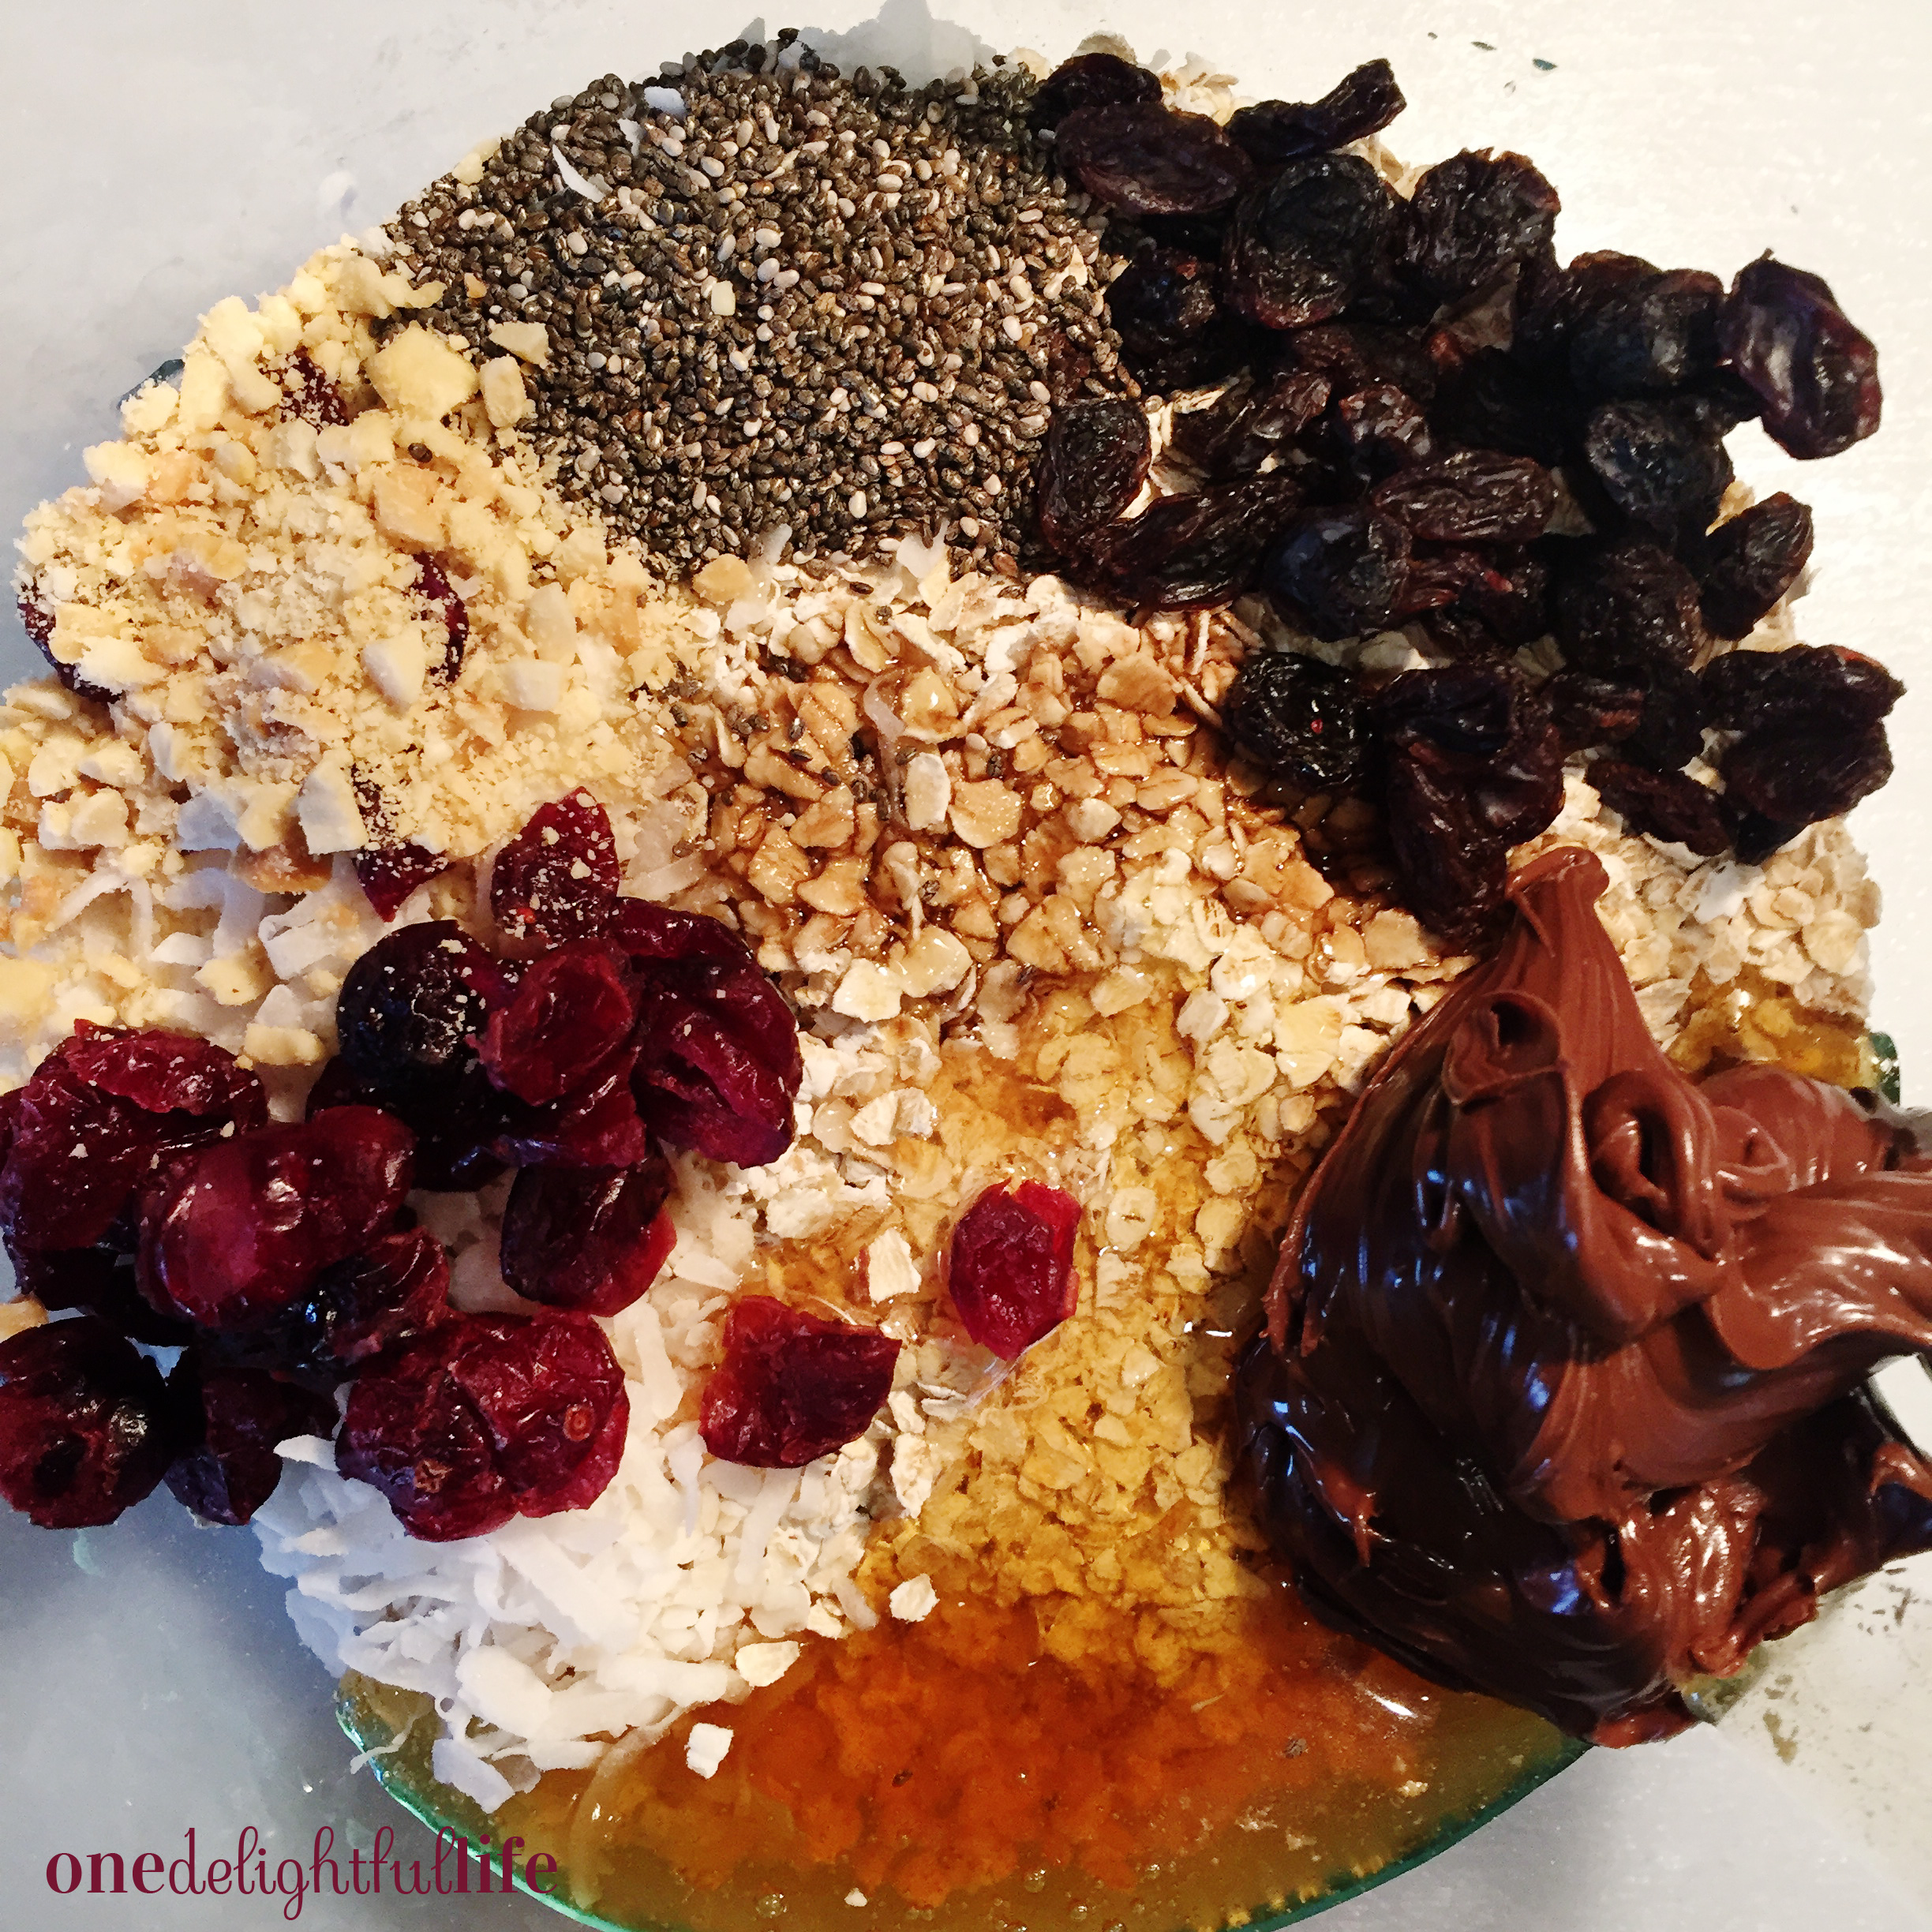
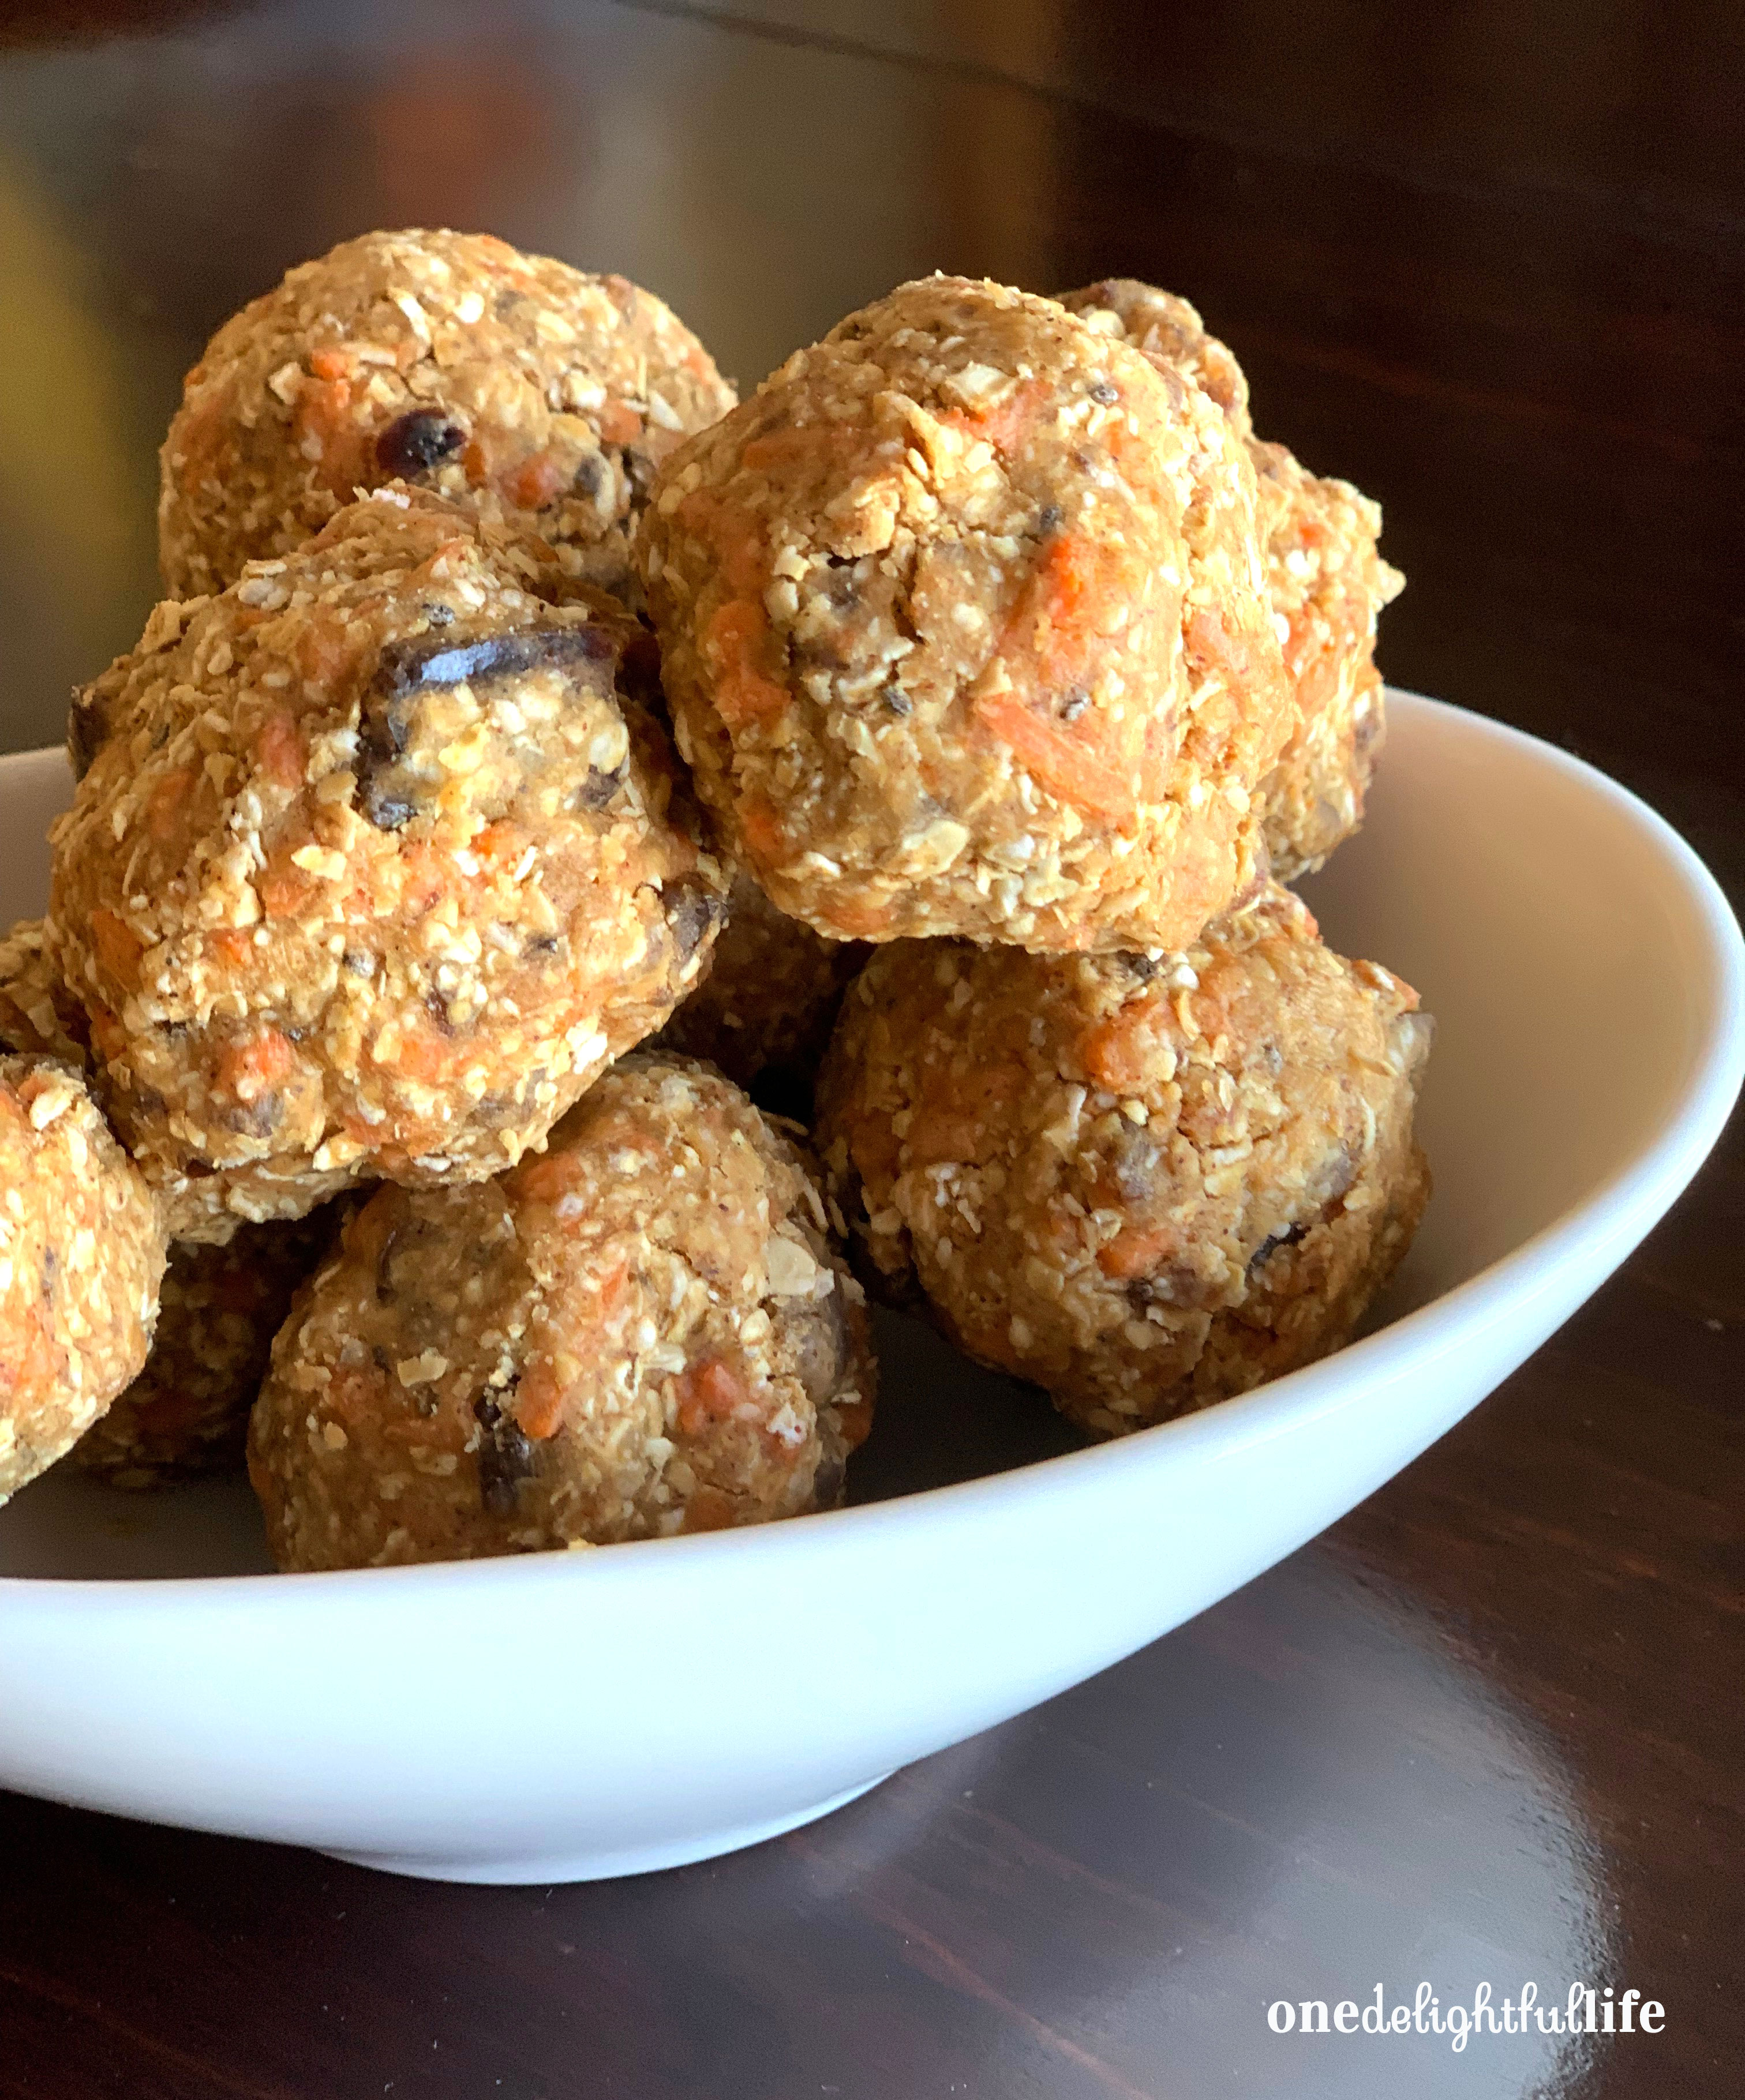
My Soft Carrot Cake Energy Balls are delicious and filling enough as a breakfast bite or snack that you won’t be hangry by meal time. The recipe’s mixture consists of nature’s best ingredients including dates, raisins, chia seeds, and say it with me…carrots! Admittedly, I use peanut butter as the binder so if you’re someone with a peanut allergy, this is not your recipe.

This is the right consistency for the mixture to form into balls.

Did you know carrots are a power food packed with nutrients and vitamins essential to our body’s good health? We all know that eating carrots improves one’s vision, but they also slow the aging process. Yes, please! (And there are 8 more reasons to eat them!) I know you’re going to love how simple it is to make this recipe and the clean-up couldn’t be easier.

You may also like my recipe for No Bake Energy Bites made with chocolate chips and dried fruit! That recipe also includes chia seeds since they help keep hunger at bay and are super healthy as well.

onedelightfullife.com

7-8 energy balls

Soft Carrot Cake Energy Balls

Love decadent carrot cake? These breakfast bites are the next best thing but healthy!

20 minPrep Time

20 minTotal Time

Save RecipeSave Recipe
Print Recipe
My Recipes My Lists My Calendar

Ingredients

  • 1 c. rolled oats
  • 3/4 c. shredded carrot
  • 1 c. smooth peanut butter
  • 1/2 c. diced dates
  • 1/4 c. raisins
  • 1/2 tsp. chia seeds
  • heavy pinch sea salt

Instructions

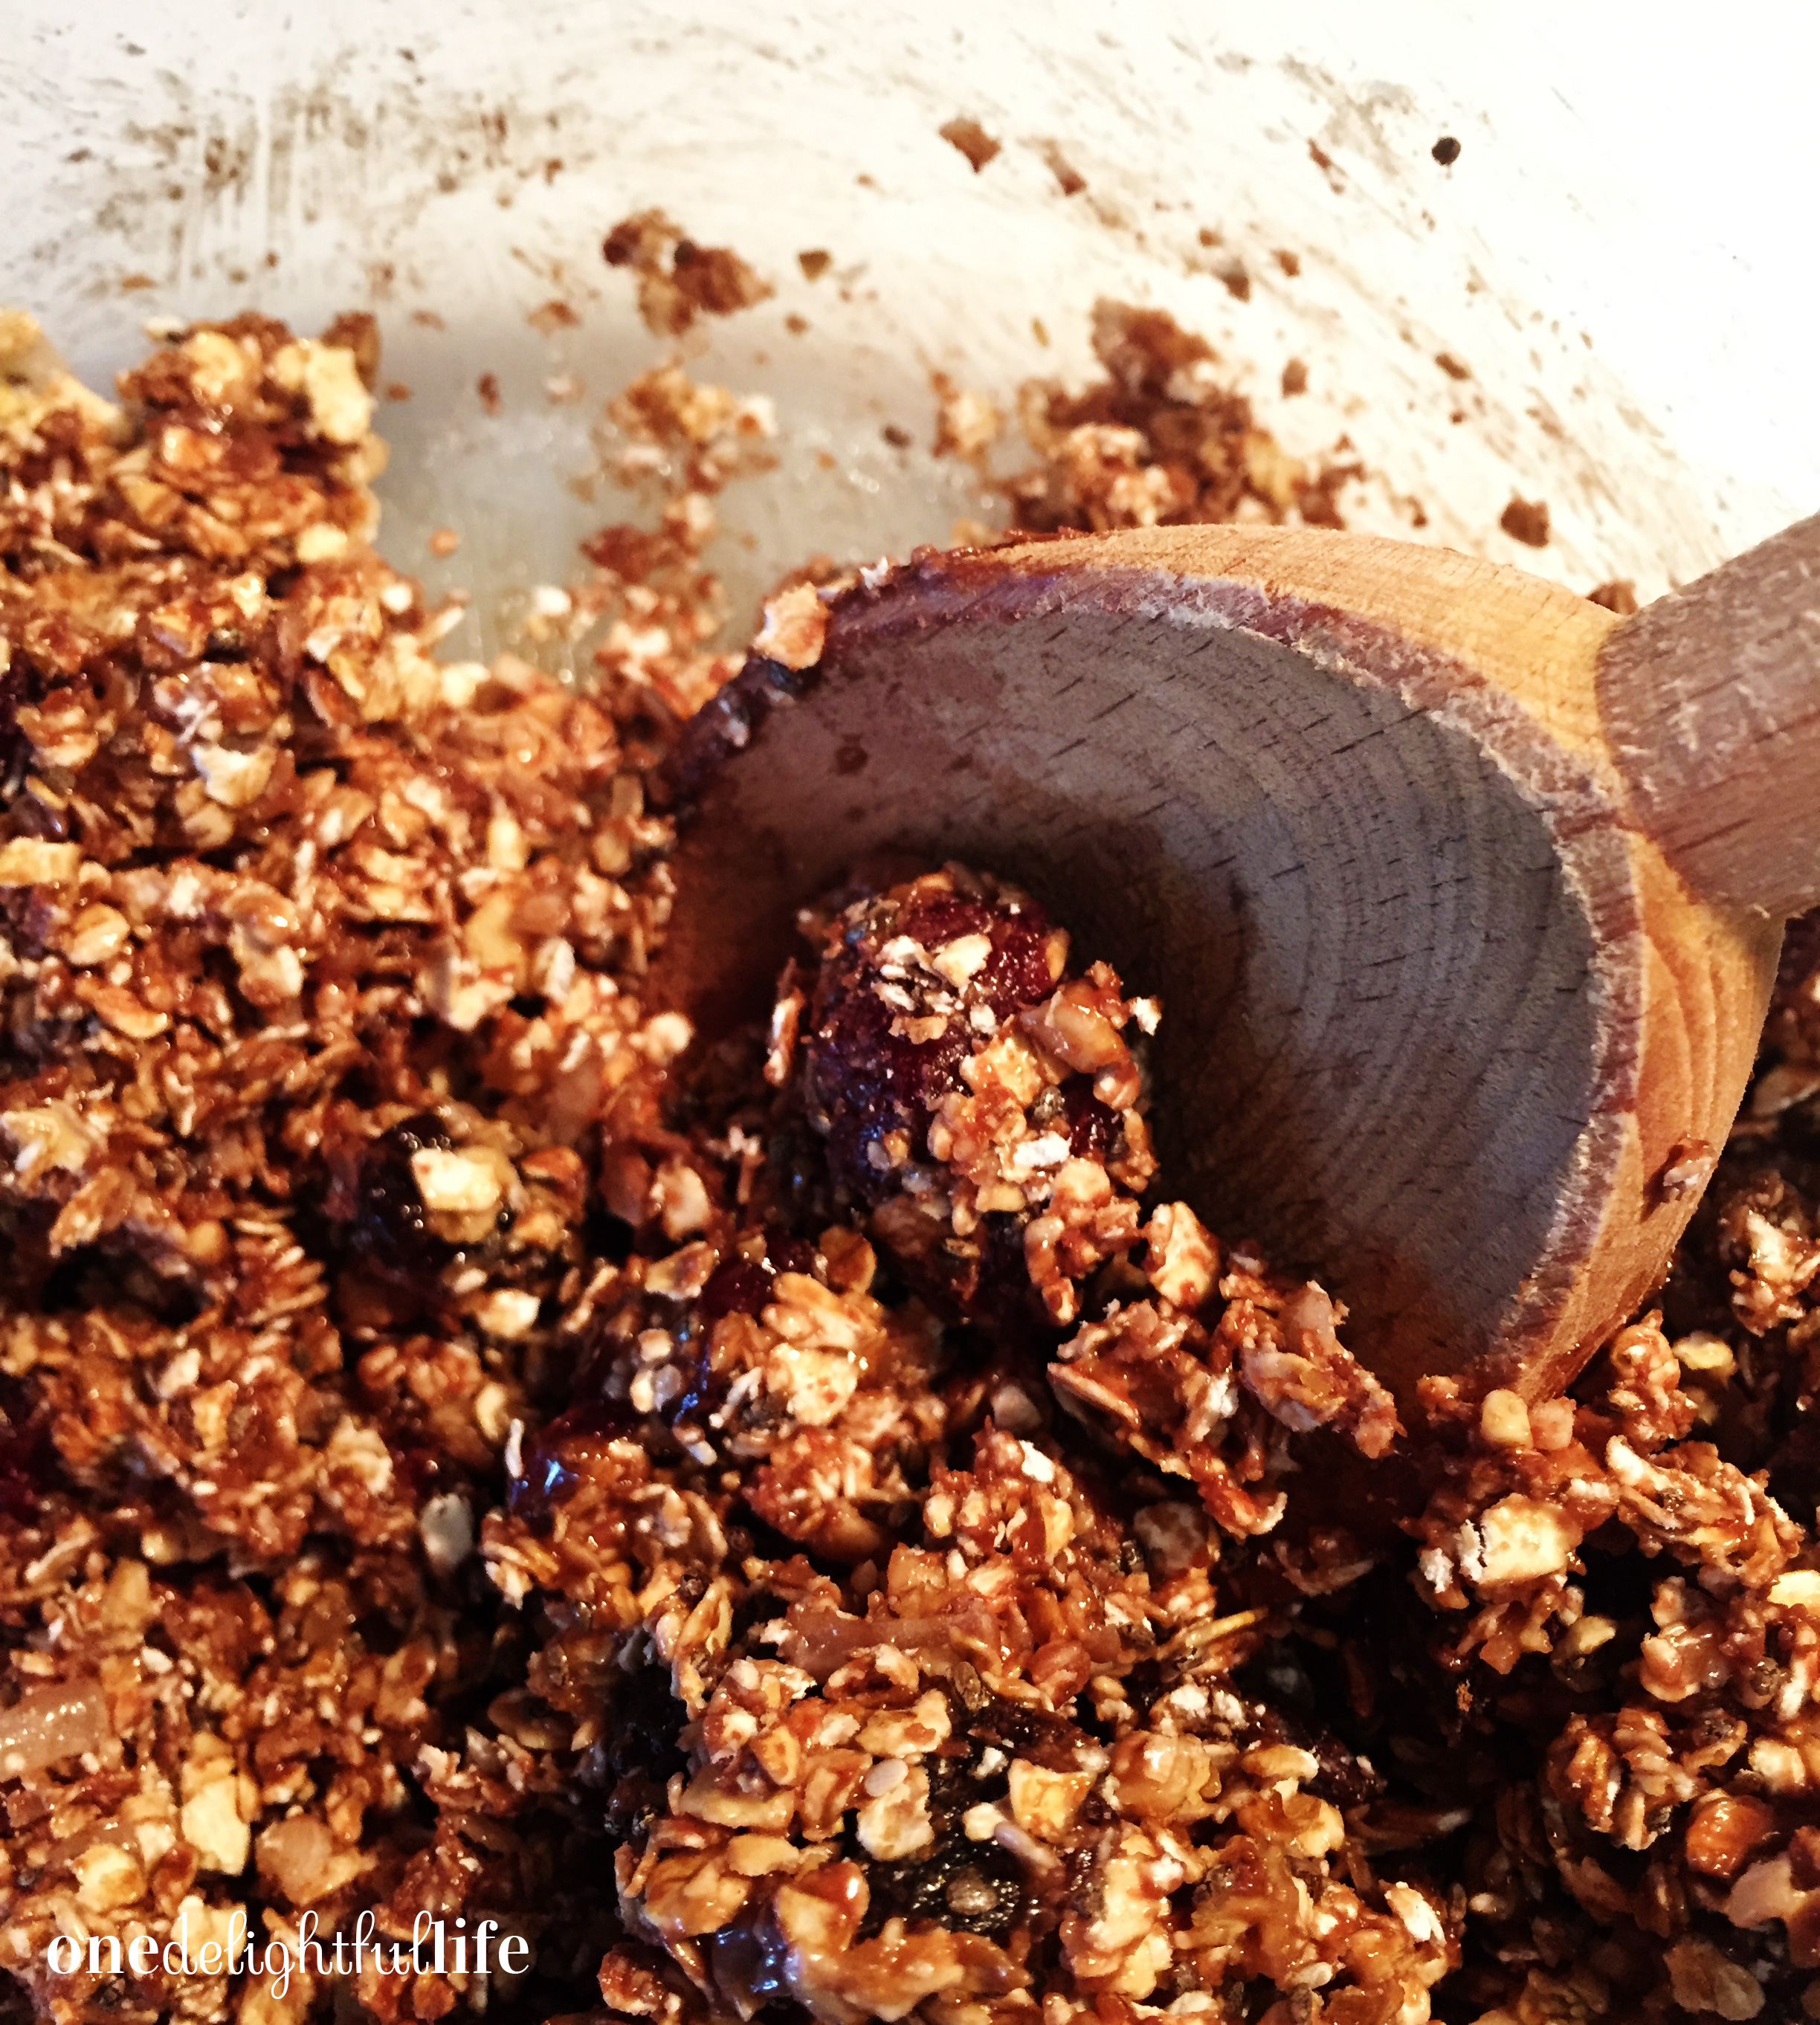
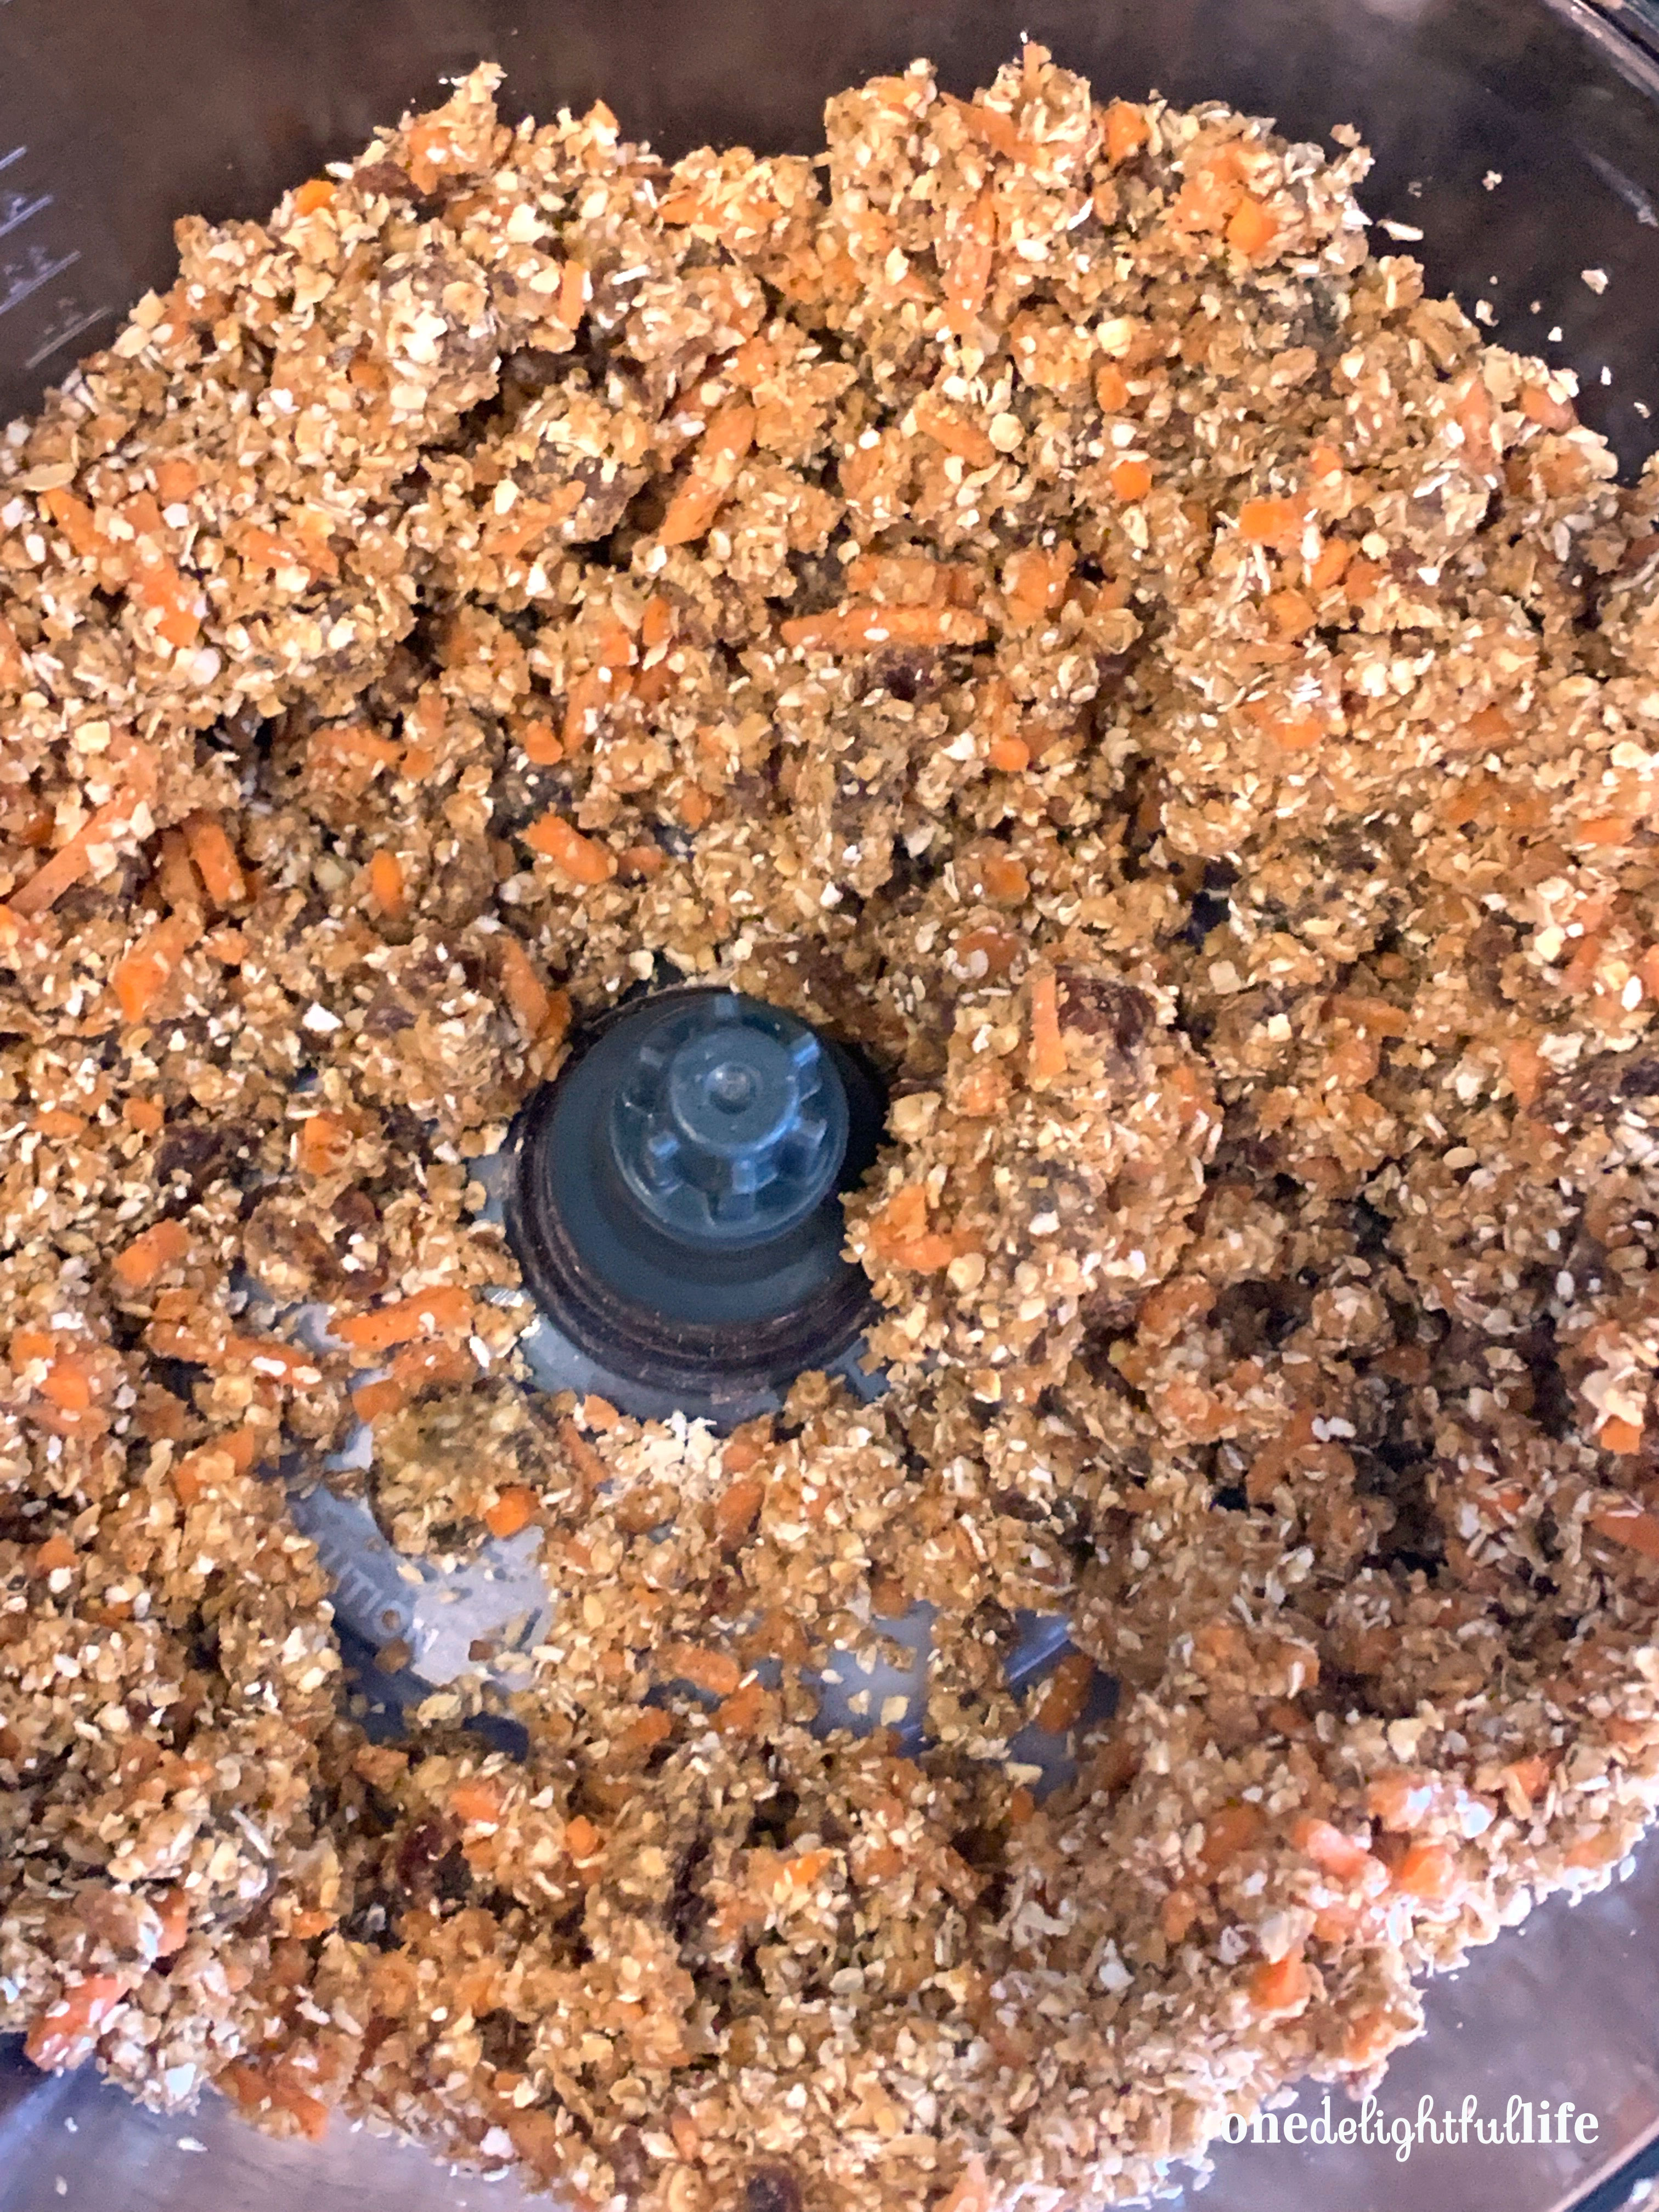
  1. Add all ingredients to a food processor and pulse until completely combined.
  2. Test the mixture to see if it binds to make a ball. If it isn't quite ready, just add more peanut butter.
  3. Remove the blade from the food processor.
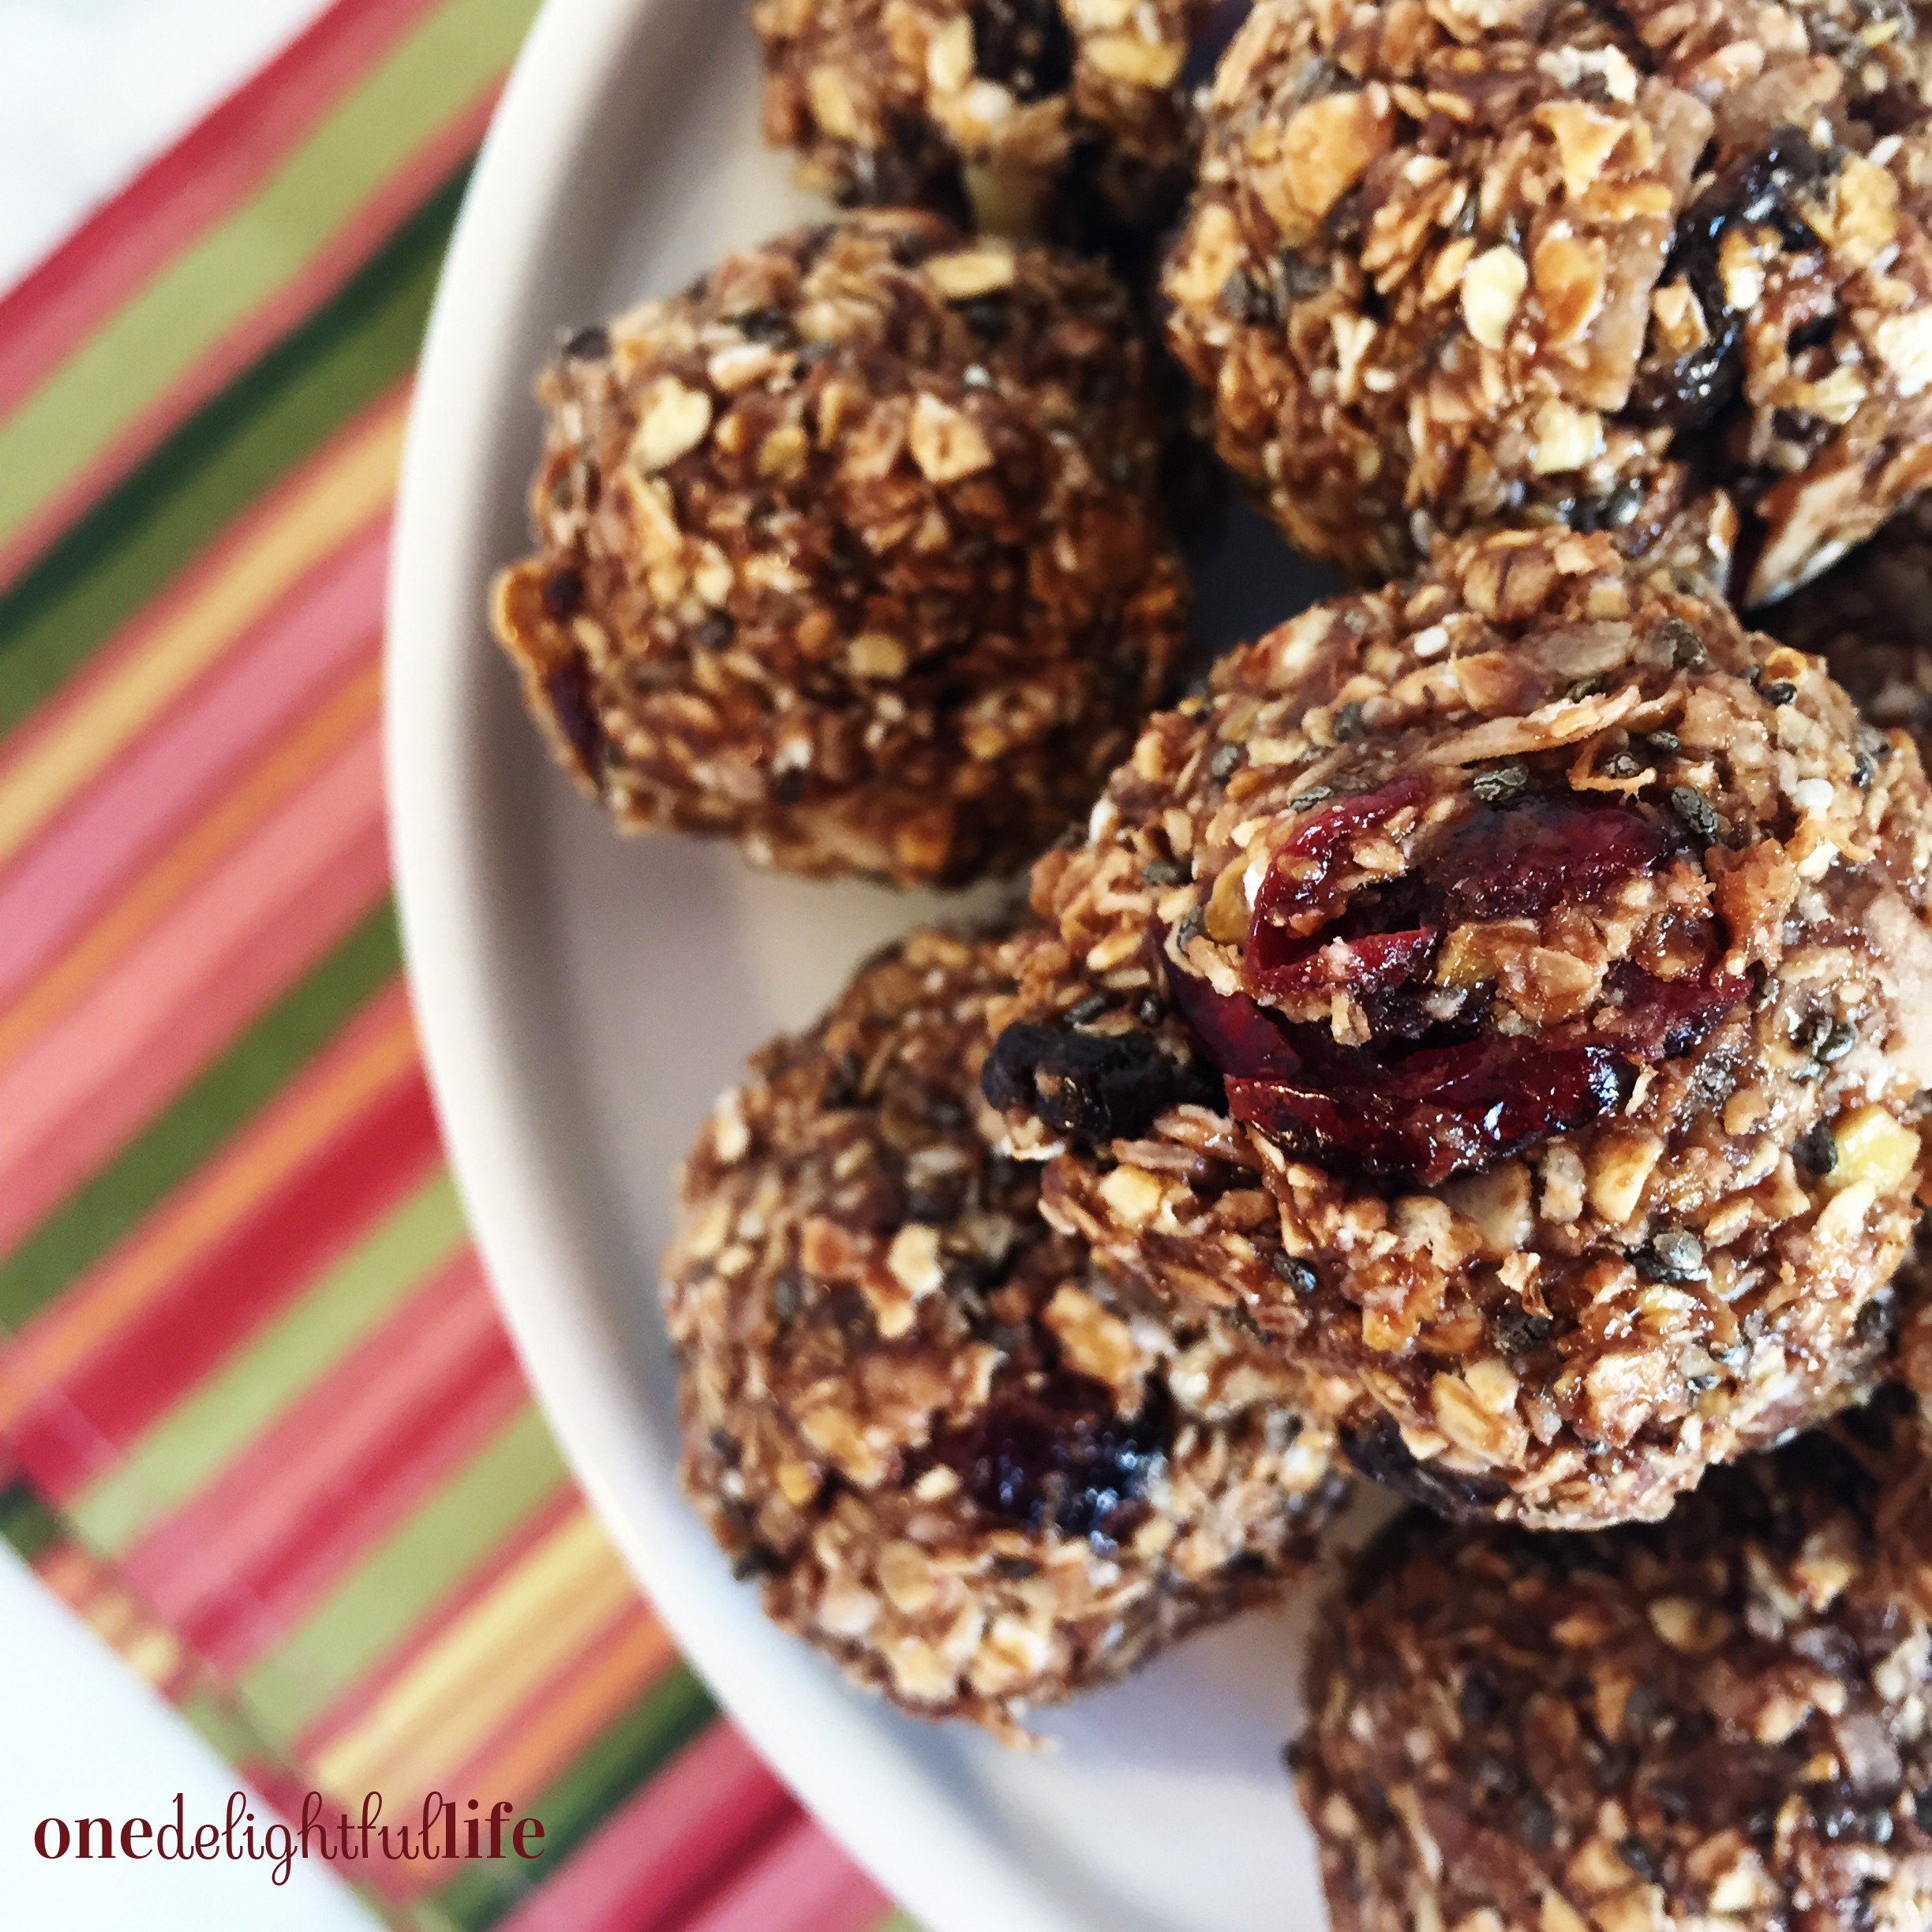
  4. Using your hands, roll the mixture into tight balls about the size of a quarter.
  5. Transfer the carrot cake balls to a Ziplock bag or storage container and refrigerate until you'r ready to eat them. They last a couple weeks, if refrigerated.

Notes

Some people enjoy this recipe with shredded coconut added.

Tags

Allergy
dairy free
egg free
seafood free
7.8.1.2
90
https://onedelightfullife.com/soft-carrot-cake-energy-balls/
onedelightfullife.com

Nutrition

Calories

2303 cal

Fat

135 g

Carbs

181 g

Protein

86 g
Click Here For Full Nutrition, Exchanges, and My Plate Info
ESHA Logo

Filed Under: Taste Tagged With: breakfast, cake, carrot, chia, dates, energy, energy bites, healthy, oatmeal, peanut butter, raisins, snack, vegetarian

Baked Cinnamon Sugar Pecans

December 18, 2017 by Vanessa 1 Comment

Have any Bah Humbugs in your house this holiday? Baked Cinnamon Sugar Pecans are the cure!

Not only does the house fill with the smell of warm cinnamon (better than any candle – thank you), but I dare any bah humbugs to try and remain a Scrooge after sampling warm pecans from the oven! The spirit of Christmas is the secret ingredient in this recipe.

Tis the season to abandon your diet and go for the YUM!

The beauty of making this candy substitute is that the recipe is incredibly simple to make and one even the kiddos can help you with. So, throw on an apron and invite the kids into the kitchen!

Pecans or walnuts are good choices for this recipe so the sugary mixture bakes inside all of the nuts’ nooks and crannies. My walnuts were frozen in the freezer, so I used only pecans.

To make Baked Cinnamon Sugar Pecans preheat your oven to 300 degrees. Next, simply whisk one egg white with water and pour it over a bowl containing three cups of raw, unsalted pecans. Add the remaining ingredients, stir, and ta-da! Transfer the wet, coated pecans to a parchment-lined baking sheet and bake at 300 degrees for 25-28 minutes. That’s it!

After removing the pecans from the oven, let them cool before moving them from the baking sheet. The toughest part of making the pecans is not eating them while they’re warm! The pecans will be naturally clumped together because of the melted sugar coating, but that’s okay.

This is what the pecans look like as soon after they are removed from the oven and before they cool.

Once the pecans have cooled, break them up with your hands and transfer them to glass jars or Ziplock bags for simple storage. You could easily gift this dainty holiday snack by tying a ribbon around a pecan-filled mason jar and adding a gift tag! If you’re going to make a DIY foodie gift, make this one! It’s a guaranteed win and you’ll love how easy it is to prepare.

Send holiday dinner party guests home with a gift – jarred cinnamon sugar pecans. They’ll love you for it!

Candied pecans also make a delicious addition to any salad or as a yogurt mix-in. I served Baked Cinnamon Sugar Pecans to guests in place of a heavy dessert. Rather than eating a rich dessert after our steak dinner, we enjoyed hot coffee and handfuls of sweet pecans!

One Delightful Life

3 cups

Baked Cinnamon Sugar Pecans

As a snack, dessert replacement or on a salad, Baked Cinnamon Sugar Pecans are delectable!

10 minPrep Time

40 minCook Time

50 minTotal Time

Save RecipeSave Recipe
Print Recipe
My Recipes My Lists My Calendar

Ingredients

  • 3 cups raw, unsalted pecans
  • 1 egg white
  • 1 T. water
  • 1/2 c. sugar
  • 1/2 c. brown sugar (packed)
  • 1 T. cinnamon
  • large pinch Kosher salt

Instructions

  1. Preheat over to 300 degrees.
  2. Line a baking sheet with parchment paper.
  3. Whisk egg white with the water in a small bowl until foamy.
  4. Pour egg white mixture on pecans in a large bowl and stir until pecans are well coated.
  5. Combine remaining ingredients in separate large bowl. Then, add sugar mixture to pecans.
  6. Stir pecans until the sugar mixture evenly coats the nuts.
  7. Transfer pecans to the baking sheet and spread them until almost flat.
  8. Bake at 300 degrees for 25-28 minutes. (Check them at 25 minutes.)
  9. Remove from oven and allow pecans to cool completely before transferring to storage containers.

Notes

I did not stir the pecans half-way through baking, but you can.

7.8.1.2
87
https://onedelightfullife.com/baked-cinnamon-sugar-pecans/
onedelightfullife.com

Nutrition

Calories

3383 cal

Fat

252 g

Carbs

257 g

Protein

40 g
Click Here For Full Nutrition, Exchanges, and My Plate Info
ESHA Logo


Filed Under: Taste Tagged With: baking, brown sugar, candy, Christmas, cinnamon, coffee, dessert, gift, holiday, nuts, pecans, salad topping, snack, sugar

No Bake Energy Bites: A Mid-Day Snack to Keep You From Feeling Hangry

March 26, 2017 by Vanessa Leave a Comment

Hangry – The word ‘hangry’ is a concise way to describe a common feeling. Hangry is a clever word combination of hungry and angry, and an adjective that describes being irritable due to hunger, according to Webster’s Dictionary.

Anyone who works with me knows that I keep snacks in my drawer (fruit roll-ups, whole fruit, or granola bars) so that in the event I begin to feel hangry, I’ve got relief nearby. Sometimes I can feel myself getting hangry mid-morning and nobody wants me to get hangry. Nobody. So, I grab a healthy snack.

Inspired by our healthier “lifestyle” (we’re not calling it a diet), I was inspired to make No Bake Energy Bites: A Mid-Day Snack to Keep You From Feeling Hangry. They taste like no bake cookies and curb your hunger thanks to the addition of oatmeal and chia seeds, a popular ingredient in smoothies and granola bowls. Chia seeds are a trending super food high in nutrients that provides boost of energy. You can purchase them in bulk at any health food store. Because they expand a bit when wet, they make you feel full! Oh, and total bonus…chia seeds are suppose to promote healthy skin and reduce the signs of aging. Well, duh! I think I’ll add them to every early morning breakfast.

These No Bake Energy Bites taste like a cookie but they’re healthy for you. This recipe included cocoa, chocolate chips, peanut butter, almonds, vanilla and honey add-ins. See the recipe card below.

Using quick oats as the base, the mix-in ingredient options are about as endless as your imagination. For example, you can make ingredient substitutions or try these flavor combinations:

  • butterscotch chips for chocolate chips
  • chopped dried bananas, bacon bits, and peanut butter
  • dried apple chips with raisins and cinnamon
  • sunflower seeds instead of peanuts or almonds
  • Nutella and dried berries like cherries or blueberries
  • crushed honey oat cereal and peanut butter
  • cranberries, raisins, and toasted coconut with Nutella (see photos below)

Making No Bake Energy Bites is as easy as combining all of the recipe ingredients in a bowl, mixing them (your hands are a great kitchen tool but beware – the added honey will leave your hands sticky), and rolling them into one inch balls after the mixture refrigerates for 30 minutes. It’s a cinch!

This recipe version of No Bake Energy Bites includes cranberries, chopped peanuts, chia seeds, toasted coconut, raisins, Nutella, honey, vanilla, and oatmeal.
Work together all of the ingredients by pressing your spoon into the walls of the bowl and then finish mixing.

If you initially have a hard time rolling the mixture into balls, squeeze it in your hand until the mixture is tight and then use both hands to form a one-inch ball. Tip: Layer parchment paper (or wax paper) between the layers of energy balls in an airtight container before you store them in the refrigerator for at least two hours. I’m impatient and put my Tupperware container of energy bites in the freezer for one hour. A-c-t-u-a-l-l-y, I must admit that I ate one before the rest even made it into the refrigerator. They’re simply delicious!

Cranberry Raisin with Nutella No Bake Energy Bites

There you have it! No Bake Energy Bites are healthy for you and will save you from hunger pains at work so you don’t “bite” your co-worker’s head off. Yes, I went there (insert eye roll). Grab some oatmeal and your favorite mix-in ingredients and get started making tomorrow’s mid-day snack (or breakfast)!

onedelightfullife.com

9 energy bites

No Bake Peanut Butter Chocolate Energy Bites

Fight mid-day hunger with this healthy grab-and-go snack that tastes like an oatmeal cookie.

40 minPrep Time

1 hrCook Time

1 hr, 40 Total Time

Save RecipeSave Recipe
Print Recipe
My Recipes My Lists My Calendar

Ingredients

  • 1 c. quick oats
  • 1/2 c. natural peanut butter
  • 1/3 c. honey
  • 1/4 c. cocoa
  • 2 T. chopped almonds
  • 2 T. milk chocolate chips
  • 1 T. chia seeds
  • 1 tsp vanilla extract

Instructions

  1. In a large bowl, mix all ingredients with a spoon.
  2. Refrigerate mixture in the bowl for 30 minutes.
  3. Remove bowl from the refrigerator and shape it into one-inch balls.
  4. Place energy bites into a airtight container. Separate layers with wax paper or parchment paper.
  5. Refrigerate at least an hour before serving.
7.8.1.2
72
https://onedelightfullife.com/no-bake-energy-bites-a-mid-day-snack-to-keep-you-from-feeling-hangry/
onedelightfullife.com

Nutrition

Calories

98 cal

Fat

3 g

Carbs

16 g

Protein

3 g
Click Here For Full Nutrition, Exchanges, and My Plate Info
ESHA Logo

Enjoy friends.

Filed Under: Snacks, Taste Tagged With: almonds, apple chips, bacon bits, balls, berries, breakfast, butterscotch chips, cereal, chia seeds, chocolate chips, cocoa, cranberries, energy, freezer, hangry, healthy, honey, hunger, hungry, instant oats, mid-day, milk chocolate, no bake, Nutella, oatmeal, oats, office, peanut butter, peanuts, quick oats, raisins, snack, sunflower seeds, toasted coconut, vanilla extract

Easy to Make Baked Apple Slices

November 13, 2016 by Vanessa Leave a Comment

Did you know that apples are a member of the rose family of plants, along with pears, peaches, plums, and cherries?

According to nyapplecountry.com, Americans eat more apples per capita than any other fruit. Why? Perhaps we know that they’re good for us. A medium-sized apple contains about 80 calories. They keep us feeling full, unlike other processed snack foods. Better yet, apples are fat-free, sodium-free, and cholesterol-free!

Clearly, I’m fascinated by the delightful qualities of apples. So much so that I tried my hand at baking apple slices this weekend. Initially, I wanted to make these bite-sized snacks to add to a copycat Panera Fuji Apple Salad (which I may still whip up), but yesterday’s chilly temperatures inspired me to add them to a bowl of warm oatmeal for breakfast. It was delicious!

My Easy to Make Baked Apple Slices make a great grab-and-go snack or a flavorful addition to salads, sandwiches, or even a bowl of ice cream. This recipe produces soft apple slices with crispy edges. I prefer to leave on the apple skin. Unlike other baked apple slices recipes online, I bake mine at a higher temperature for less time. Let me walk you through the simple steps to making apple slices.

After shooting this photo, I ended up adding natural peanut butter to my oatmeal bowl. It was a little thick, but oh so warm and delicious.

Preheat the oven to 350 degrees. After washing each apple, remove its inside core using a melon baller. If you don’t have one, you can simply slice the apple in half and remove the core with a knife. Carefully use a mandolin slicer on the thin setting to slice each apple. Lay the apple slices on a parchment paper-lined cookie sheet. Sprinkle the apple slices with pumpkin spice.

No need to sprinkle pumpkin spice on the apple slices on both sides.
No need to sprinkle pumpkin spice on the apple slices on both sides. One side is enough.

Bake for 10 minutes. Flip the apple slices using tongs. (They will be soft, but that’s okay. We’re not making dehydrated apples.) Bake for another 10 minutes. Note: Small end pieces of apple may begin to burn so watch them closely in the later minutes of baking. Remove as necessary. Oven temperatures vary and these instructions are meant to produce still-soft apple slices, not hard chips.

file_002

If you love apples as much as I do (ironic because I was once a teacher), then you’ll also enjoy my recipe for Salted Caramel Apple Martini  or Peanut-Butterscotch Apple Nachos. Have a super apple recipe for me to try, tag One Delightful Life on Twitter or add it to the comment section below. 

Signature ODL 170x70px

Filed Under: Breakfast, Snacks, Taste Tagged With: apple, apple slices, baked apples, cinnamon, easy, fall, fat-free, Fuji, healthy, oatmeal, Panera, pumpkin spice, snack

Overnight Pickled Green Beans with Garlic and Dill

August 23, 2016 by Vanessa Leave a Comment

Kids in school teased me for my height and called me String Bean. It seems only appropriate that I would post an article on how to make Overnight Pickled Green Beans with Garlic and Dill for my ODL fans like you.

Using my method for pickling, you don’t need to boil jars or buy special equipment. It’s a quick process using a simple brine and a few ingredients.

overnight-pickled-green-beans-with-garlic-and-dill2

Recently, we made pickled cucumbers after shopping at a local farmers’ market. I loved the way the refrigerated pickles turned out because they have the crunch of a Claussen Kosher deli style dill spear, Huffington Post’s number one “highly recommended” vote in their Dill Pickle Taste Test. Impressed with how easy it was to make tangy pickles last week, I tried my hand at green beans. It was just as simple! I think I’ve opened a can, or should I say jar, of ideas for other quick-pickled vegetables.

Another benefit for making your own pickled veggies? You save money! A jar of Claussen dills is nearly $5. I purchased these green beans for 99 cents a pound.

The green beans have a zesty flavor thanks to the sliced garlic and the sprigs of fresh dill give it that standard pickled taste. The acidic white vinegar preserves the beans and the use of kosher salt leaves the brine cloud-free. Next time, I want to try my hand at using flavored vinegar such as red wine vinegar or apple cider vinegar with new herb combinations. For example, you could substitute asparagus, radishes, or mushrooms for the green beans as well. Don’t be afraid to try various spice mixtures or fresh herb add-ins like chives, fennel, oregano or French tarragon.

What is your favorite way to eat pickled veggies? Straight out of the jar standing over the sink? In a cocktail? Tell me in the comment section below!

Signature ODL 170x70px

onedelightfullife.com

Overnight Pickled Green Beans with Garlic and Dill

These beans have a garlic dill flavor that adds crunch to any salad or serve as a healthy mid-afternoon snack.

15 minPrep Time

5 minCook Time

20 minTotal Time

Save RecipeSave Recipe
Print Recipe
My Recipes My Lists My Calendar

Ingredients

  • 1/2 c. water
  • 1/4 c. plus 2 T. white vinegar
  • 1 tsp sugar
  • pinch kosher salt
  • 1 mashed clove garlic
  • 1/8 c. fresh chopped dill
  • 1/2 tsp ground coriander (use coriander seeds, if you have them)
  • small pinch red pepper flakes
  • 10-12 oz. green beans

Instructions

  1. Bring water, vinegar, salt, and sugar to a boil in a small saucepan.
  2. (The sugar and salt will dissolve.)
  3. Remove the saucepan from the burner, stir, and allow the liquid to completely cool.
  4. Wash a large handful of green beans, trim the ends so they will fit in the jar, and set aside.
  5. Add garlic, dill, coriander, and red pepper flakes to the bottom of the mason jar.
  6. Add green beans to the jar.
  7. Pour cooled pickling liquid into the jar leaving 1/4" space near the top.
  8. Secure lid.
  9. Refrigerate for 24 hours.

Notes

Multiply this recipe if making more than one large (16 oz) wide mouthed mason jar of beans.

7.8.1.2
50
https://onedelightfullife.com/overnight-pickled-green-beans-with-garlic-and-dill/
onedelightfullife.com


Filed Under: DIY, Snacks, Taste Tagged With: dill, garlic, green beans, jar, mason jar, pickle, pickled, pickling, quick pickle, salad, snack, vegetable

Nutty Granola With Cranberries and Raisins

August 10, 2016 by Vanessa Leave a Comment

Lately, I’ve wanted to make more of my food from scratch.

I have more time to cook since resigning from my full-time job and I care more about the food I eat. Do you cook things from scratch?

This morning I baked a batch of Nutty Granola with Cranberries and Raisins and let me tell you something…it was hard to not resist eating fresh from the oven. I nearly scorched my mouth gobbling up a spoonful of the oatmeal goodness. It’s easy to prepare and makes about two large mason jars.

I think more people would make granola if they realized how simple it is to prepare. You can use different mix-ins in this recipe (mine is always heavy on added fruit) like coconut, quinoa, pumpkin seeds, and nuts. I kept this recipe simple and knocked back the sugar by eliminating brown sugar. Instead of incorporating cinnamon into it, I substituted pumpkin spice. It may be the end of summer, but my stomach is already thinking it’s fall!

Love this milk carrier? You can find more just like it at The Vintage Rhinestone. It could be used to display flowers or serve as a carrier for party drinks with pretty straws.

Step 1: Preheat oven to 300 degrees and line a large baking sheet with parchment paper.

Step 2. Mix all ingredients in a large bowl using a wooden spoon.

Put all recipe ingredients into a bowl and mix well. Note: I took this picture before adding the wet ingredients.

Step 3: Transfer granola mixture to the baking sheet and evenly spread it out. Bake at 300 degrees for 30 minutes. Move the granola around every 10 minutes.

homemade-granola-with-cranberries-and-raisins5

Step 4: Allow the granola to cool and serve with yogurt and fruit or as a cereal.

Smoothie bowls are uber trendy so try adding granola to your yogurt favorites.

How do you prefer to eat your granola? Share a recipe suggestion in the comments section below! Have a delightful day.

onedelightfullife.com

Serves 2 large mason jars

Nutty Granola With Cranberries and Raisins

This naturally sweet and salty granola goes well in a smoothie bowl or as cereal for breakfast.

10 minPrep Time

30 minCook Time

40 minTotal Time

Save RecipeSave Recipe
Print Recipe
My Recipes My Lists My Calendar

Ingredients

  • 3 c. old fashion 100% whole grain oats
  • 1/2 c. dried cranberries
  • 1/4 c. raisins
  • 1/4 c. sliced almonds
  • 1/8 c. roasted and salted sunflower seeds
  • 1/2 tsp. pumpkin spice
  • 1/4 tsp. ground ginger
  • heavy pinch salt
  • 2 T. water
  • 2 T. honey
  • 1 T. vanilla
  • 1 T. maple syrup

Instructions

  1. Preheat oven to 300 degrees.
  2. Mix all ingredients in a large bowl with a wooden spoon.
  3. Transfer mixture to a parchment lined baking sheet.
  4. Level out mixture using the spoon.
  5. Bake at 300 degrees for 30 minutes. Be sure to move the granola around a little bit every ten minutes or so until the time expires.
  6. Transfer to mason jars once cooled.

Notes

This is not a clumpy granola but a more loose variety.

7.8.1.2
47
https://onedelightfullife.com/nutty-granola-with-cranberries-and-raisins/
onedelightfullife.com

Nutrition

Calories

1168 cal

Fat

15 g

Carbs

247 g

Protein

18 g
Click Here For Full Nutrition, Exchanges, and My Plate Info
ESHA Logo

Signature ODL 170x70px

Filed Under: Breakfast, Snacks, Taste Tagged With: almonds, breakfast, cereal, cranberries, granola, milk, nuts, raisins, smoothie bowl, snack, sunflower seeds, yogurt

  • Go to page 1
  • Go to page 2
  • Go to Next Page »

Primary Sidebar

SEARCH

Ammar
Hello! I'm Vanessa. Welcome to One Delightful Life, a blog created to add more delight to your life with delicious recipes, travel destinations, and lifestyle improvement ideas. Thanks for exploring my blog!

Archives

Contact Us

  • Email
    info@onedelightfullife.com

Popular Posts

Back to School Brain Breaks12K Total Shares
Going Underground in Historic Ellinwood, KansasGoing Underground in Historic Ellinwood, Kansas7K Total Shares
Weston, Missouri: Making the Most of a Weekend VisitWeston, Missouri: Making the Most of a Weekend Visit2K Total Shares
Cucumber Lime Vodka SplashCucumber Lime Vodka Splash1K Total Shares
Sun Palace: A Couples-Only Resort in Cancun, MexicoSun Palace: A Couples-Only Resort in Cancun, Mexico508 Total Shares
  • About
  • Taste
  • Travel
  • DIY
  • Contact
  • Lifestyle
  • 100 Things to Do in Wichita Before You Die

© 2023 · onedelightfullife ·